EVAC reserves the right to make alterations to this specication without prior notice.
© Copyright Evac Oy. All rights reserved.
1
VACUUM TOILET
INSTALLATION
Date:
Doc.
28 Jan 2011 002002-3
6541458 PNEUMATIC PUSH BUTTON, EVAC 910, WALL MODELS
6541057 OPTIONAL PNEUMATIC PUSH BUTTON KIT, EVAC 910, FLOOR MODELS
E
Ø 6
A
D
3.
C
From the control
mechanism
60
60
A
B
C
D
E
B
From the control
mechanism
Plastic hose to the
push button
Control
mechanism
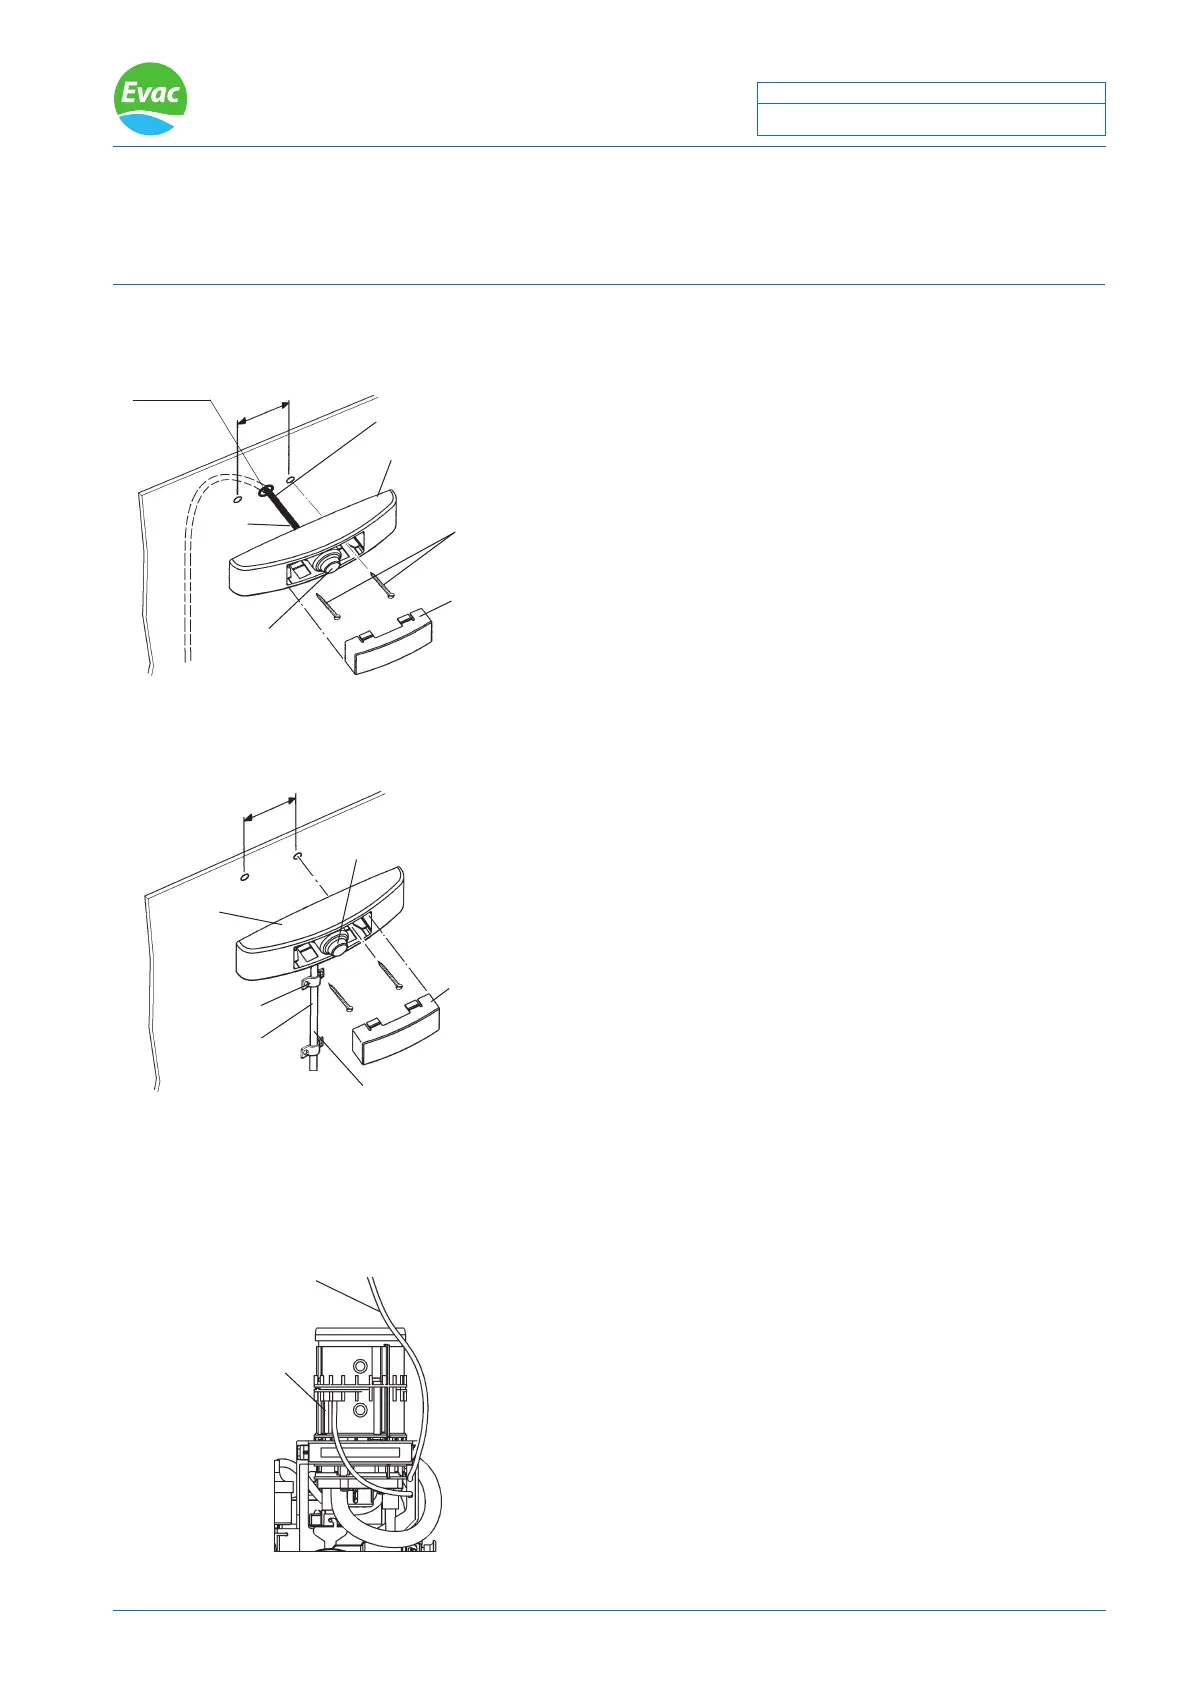
Installing the push button on the wall, oor models with
the optional push button kit.
(Hose and protecting pipe on the surface of the wall)
1. Drill Ø6 mm hole for the hose (A).
2. Connect the plastic hose (A) from the control mechanism to
the bellows (B). Warm the end of the hose if needed to help
installation.
3. Install the body (C) of push button on the wall using screws
(D) (not included).
4. Snap the cover (E) of the push button its place.
! NOTE: Secure, that the hose (A) is not attened after
installation. Air impulse must always ow free.
1. Thread the hose from the control mechanism through the
protection pipe (A).
2. Install the protection pipe (A) on the wall using screws and
clamps (B).
3. Cut off the lm of the bushing for the plastic hose in the
bottom side of the push buttons cover.
4. Connect plastic hose from the control mechanism to the
bellows (C). Snap the plastic hose on the clip behind the
bottom plate.
5. Install the push button body (D) to the wall using screws
(not included).
6. Snap the cover of the push button (E) its place.
Control mechanism
Make sure, that the plastic hose does not get loose from
the control mechanism.
 Loading...