87
Exterior Equipment
Notice:
The warranty for the arch will be void if it is
modied in any way or overloaded by towing
too many skiers, wakeboarders or another
boat. Additionally, if items like antennas,
spotlights and other accessories are mount-
ed improperly or in the wrong location, the
warranty could be void. If you intend to add
equipment or make modications to the arch,
you should contact your dealer or Everglades
Customer Service to make sure the equipment
you would like to add or the intended modi-
cation will not void the warranty.
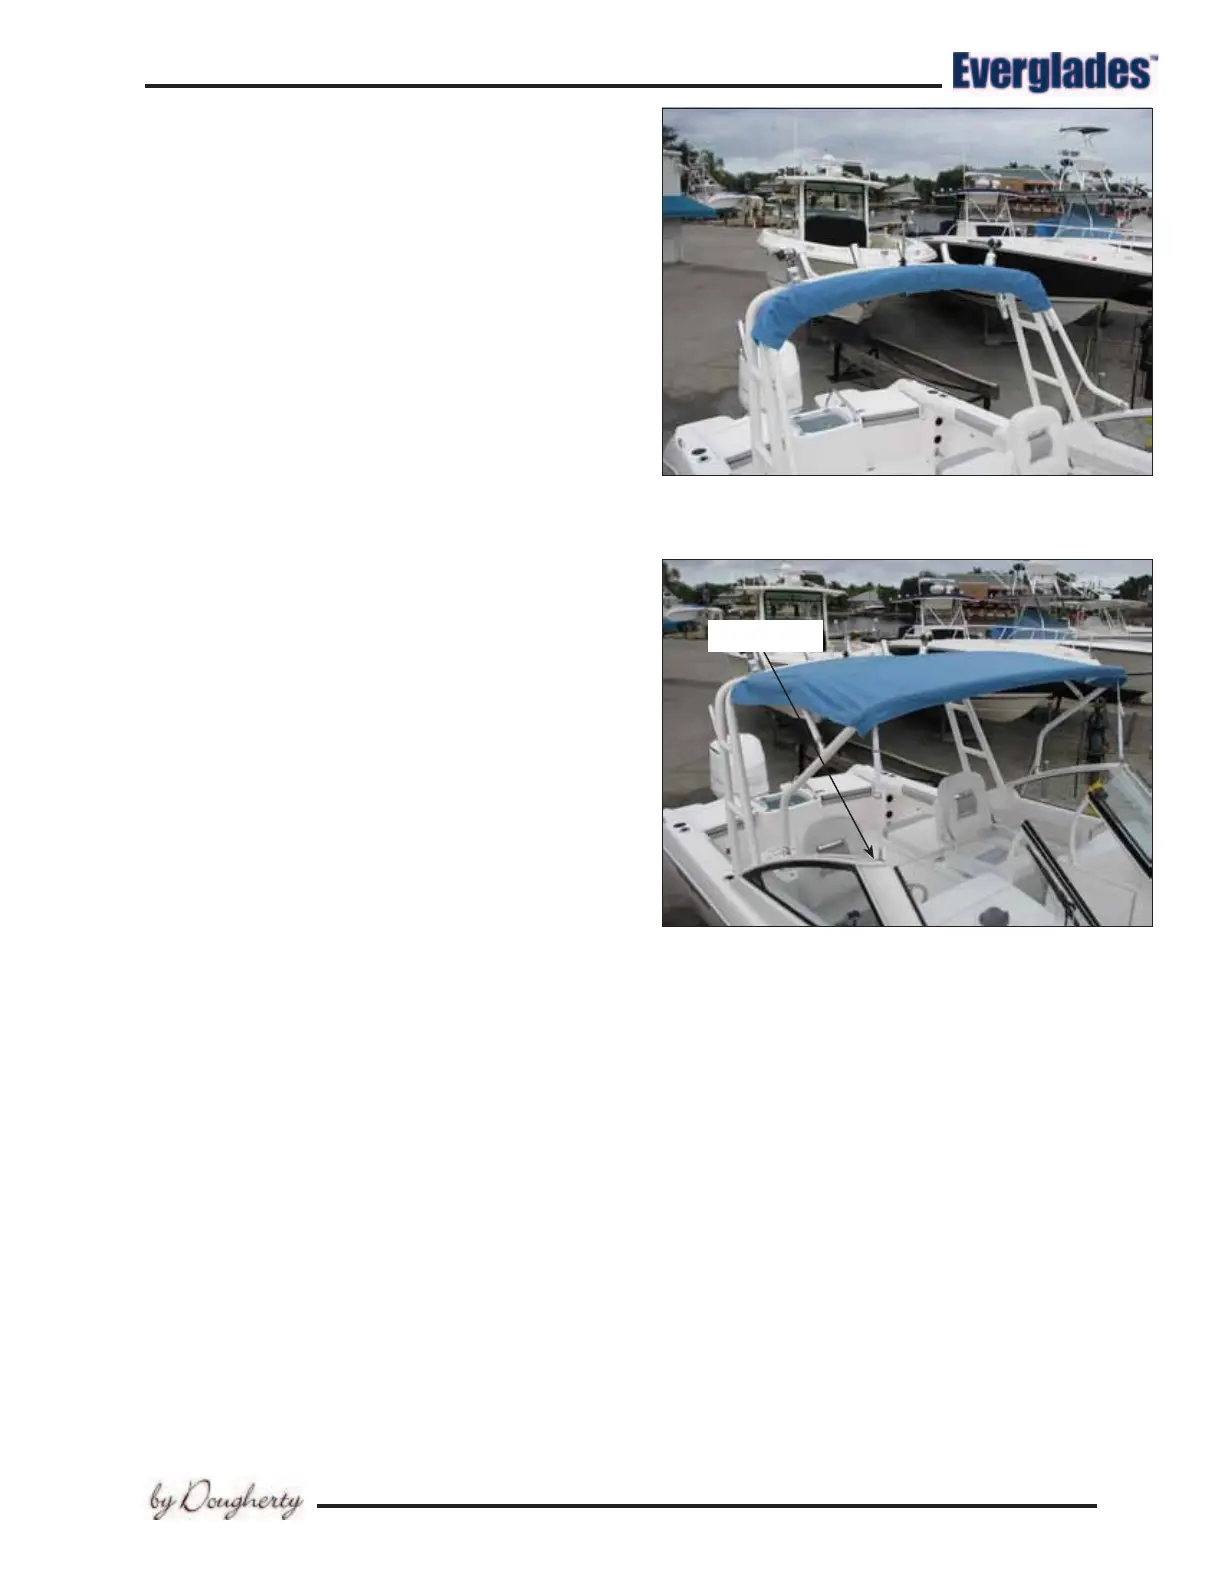
Arch Bimini Top
The arch is equipped with an integrated bimini
top. The convertible top is designed with a rela-
tively at prole and a snug t. The canvas is t
to the boat at the factory and must be installed
properly. The top is folded against the arch and
covered with a storage boot when it is in the folded
position. The boot is custom t with four zippers
that enable the boot to be installed to the folded
top while it is attached to the arch.
To put the bimini top up, remove the boot and
open the top it by pulling the main bow toward
the front of the boat until it stops. Use your body
weight on each side of the bow to pull down and
stretch the fabric until the strap will attach to
the pad eye on the port side of the windshield.
Repeat on the starboard side. The top canvas
should be stretched tight when both straps are
secured pad eyes.
Notice:
Avoid the temptation to loosen the straps if
the top seems a little too tight. Your boat can
operate at high speeds and the canvas must
be a tight t to perform properly in these
conditions. If the straps are loosened the
top will be too loose to hold up to the wind
pressure experienced at high speed and the
optional clear connector and side curtains
will not t properly and appear to be too
short. If you feel the top on your boat is too
tight, contact your dealer for assistance.
Once the bimini is open and secured with the
front straps, close the center windshield sec-
tion and secure it with the cam latch. Attach
the clear connector to the zipper at the front of
the top and snap it to the top of the windshield
beginning with the center snaps. If the bimini
Arch Bimini Top Open with
Forward Straps attached to Windshield Pad Eyes
Bimini Top Closed with Boot Installed
and Stowed Against Arch
PAD EYE
top is adjusted properly, the clear connector will
have to be stretched just enough to pull out the
wrinkles and reach the snaps on the windshield.
The front straps will continue to bear the main
load of the top.
Once the clear connector is completely installed,
the side curtains can be put on. Attach the side
curtains to the zippers on the sides of the bimini
and to the front connector. Snap the curtains to
the windshield and the arch beginning with the
forward snaps on the windshield. If the bimini is
adjusted properly, the side curtains will have to
be stretched slightly to pull out the wrinkles and
reach the snaps. The main load for the top should
remain on the front straps.