SELECTING A MOUNTING LOCATION
1. Give consideration to the weight of the unit when operating (filled with water). Operating weights
of the QC7I Systems are:
• Single System - 9 lbs. (4.0 kg.)
• Twin System - 19 lbs. (8.5 kg)
• Triple System - 27 lbs. (12 kg)
• Quad System - 36 lbs. (20 kg)
2. The location should allow for:
• Minimum clearance of 2-1/2” under the cartridge(s) so it can be lowered for removal and
replacement.
• Adequate space for “in” and “out” water line connections.
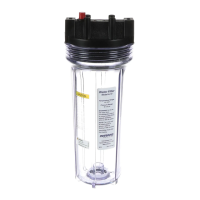
• Be near a drain for flushing and near a 110V outlet if the accessory (sold separately) Everguard
Low Pressure Alarm is used. See Figures 1-8.
3. If used in conjunction with the SR-X feeder, the SR-X should be mounted after the QC7I Series
Filter and as near the equipment as possible. If possible, keep at least 6” available to the left and
the right of the QC7I System in the event poor quality water conditions require the installation of
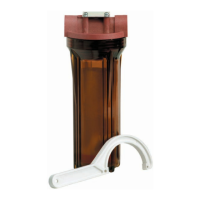
the optional Everpure E-Series Prefilter.
WARNING: Do not use the MH cartridge in conjunction with the SR-X.
OPERATING SPECIFICATIONS*
Combined Model Name
Replacement
Cartridge Flow Rate Capacity
QC7I Single - MC MC 1.67 gpm (6.3 lpm) 9,000 gal (34,000 L)
QC7I Single - MC
2
MC
2
1.67 gpm (6.3 lpm) 9,000 gal (34,000 L)
QC7I Single - MH MH 1.67 gpm (6.3 lpm) 9,000 gal (34,000 L)
QC7I Single - MH
2
MH
2
1.67 gpm (6.3 lpm) 9,000 gal (34,000 L)
QC7I Single - TO
TO 1.5 gpm (18.9 lpm) 30,000 gal (113,550 L)
QC7I Single - CV CV 1.67 gpm (6.3 lpm) 7,500 gal (28,390 L)
QC7I Single - XCV XCV 1.67 gpm (6.3 lpm) 10,000 gal (37,850 L)
QC7I Single - XC XC 1.67 gpm (6.3 lpm) 12,000 gal (45,420 L)
QC7I Single - XC
2
XC
2
1.67 gpm (6.3 lpm) 12,000 gal (45,420 L)
QC7I Single - 7CB5 7CB5 2.5 gpm (9.4 lpm) 10,000 gal (37,850 L)
QC7I Single - 7CB5-K 7CB5-K 2.5 gpm (9.4 lpm) 10,000 gal (37,850 L)
QC7I Single - 7CB5-S 7CB5-S 2.5 gpm (9.4 lpm) 10,000 gal (37,850 L)
Combined Model Name
Replacement
Cartridge Flow Rate Capacity
QC7I Twin - MC
MC 3.3 gpm (12.6 lpm) 18,000 gal (68,000 L)
QC7I Twin - MC
2
MC
2
3.3 gpm (12.6 lpm) 18,000 gal (68,000 L)
QC7I Twin - MH
MH 3.3 gpm (12.6 lpm) 18,000 gal (68,000 L)
QC7I Twin - MH
2
MH
2
3.3 gpm (12.6 lpm) 18,000 gal (68,000 L)
QC7I Twin - TO
TO 3.0 gpm (37.8 lpm) 60,000 gal (227,100 L)
QC7I Twin - CV CV 3.3 gpm (12.6 lpm) 15,000 gal (56,780 L)
QC7I Twin - XCV XCV 3.3 gpm (12.6 lpm) 20,000 gal (75,700 L)
QC7I Twin - XC
XC 3.3 gpm (12.6 lpm) 24,000 gal (90,840 L)
QC7I Twin - XC
2
XC
2
3.3 gpm (12.6 lpm) 24,000 gal (90,840 L)
QC7I Twin - 7CB5
7CB5 5.0 gpm (18.9 lpm) 20,000 gal (75,700 L)
QC7I Twin - 7CB5-K 7CB5-K 5.0 gpm (18.9 lpm) 20,000 gal (75,700 L)
QC7I Twin - 7CB5-S 7CB5-S 5.0 gpm (18.9 lpm) 20,000 gal (75,700 L)
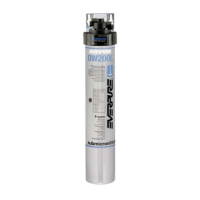
Figure 1 – Single System
EV3024-87D DE05
Installation and Operation Guide
QC7I Series Water Filters
Manufactured by Everpure
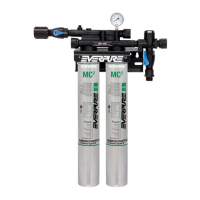
Figure 2 – Twin System
Figure 4 – Quad System
Figure 3 – Triple System