2
English
Power Supply User Manual
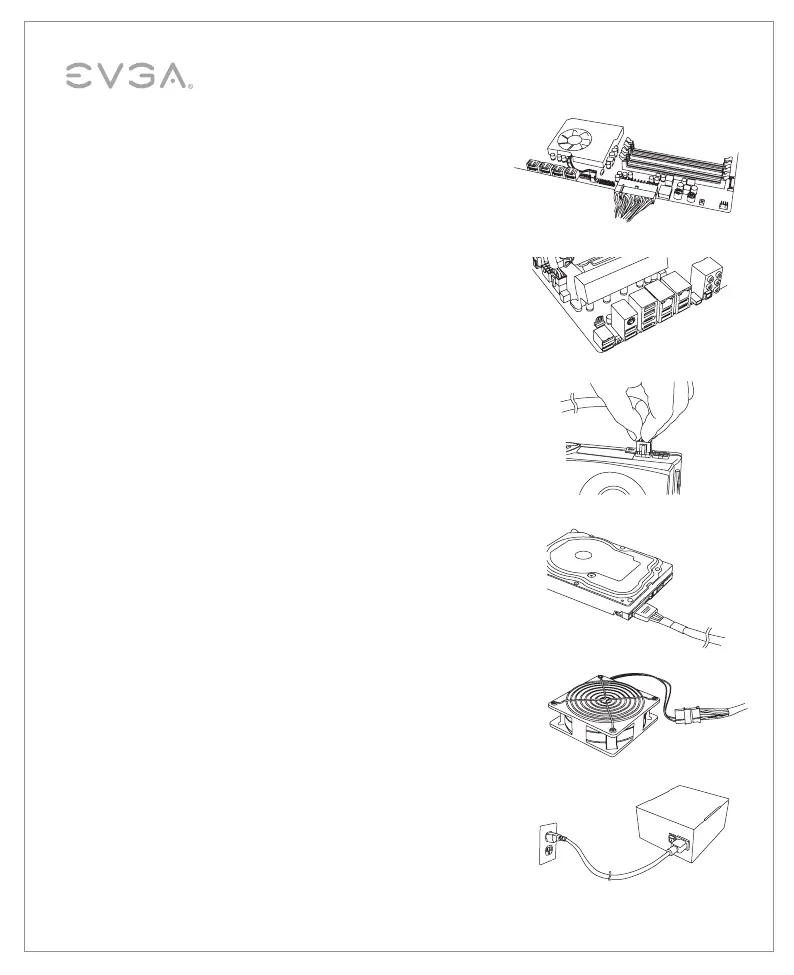
4. Connect the 24-Pin ATX cable to the PSU and the motherboard.
5. Connect the 4+4-Pin EPS12V cable to the motherboard.
(Optional) – If you plan on extreme overclocking
and your motherboard
supports additional 8-Pin or 4-Pin CPU power connectors,connect the
second 4+4-Pin EPS12V cable. This is only needed for heavy overclocking
or for Dual CPU motherboards.
6. Connect the 6/6+2-Pin PCI-E cables to your graphics card(s).
NOTE 1: Do not attempt to plug an 8-pin PCI-E cable into a 6-pin
connector without first detaching the two extra pins.
NOTE 2: We recommend to use a single PCI-E cable to connect per
port on graphic cards if your video card requires high power such as
equipped with more than 2 PCI-E connectors 6pin + 8pin and 8pin + 8pin.
7. Connect SATA power cables to all data drives or optical drives
(hard drives, solid state drives, optical drives).
8. Connect the peripheral “Molex” 4-Pin connectors for fans, pumps,
legacy components and other devices/adapters.
9. Connect the AC power cord to your power supply and to the wall.
Check all connections to assure a solid connection and turn the
power switch on the power supply to the ON position.