Hardware Installation
Connecting to the speaker, headphone or mic
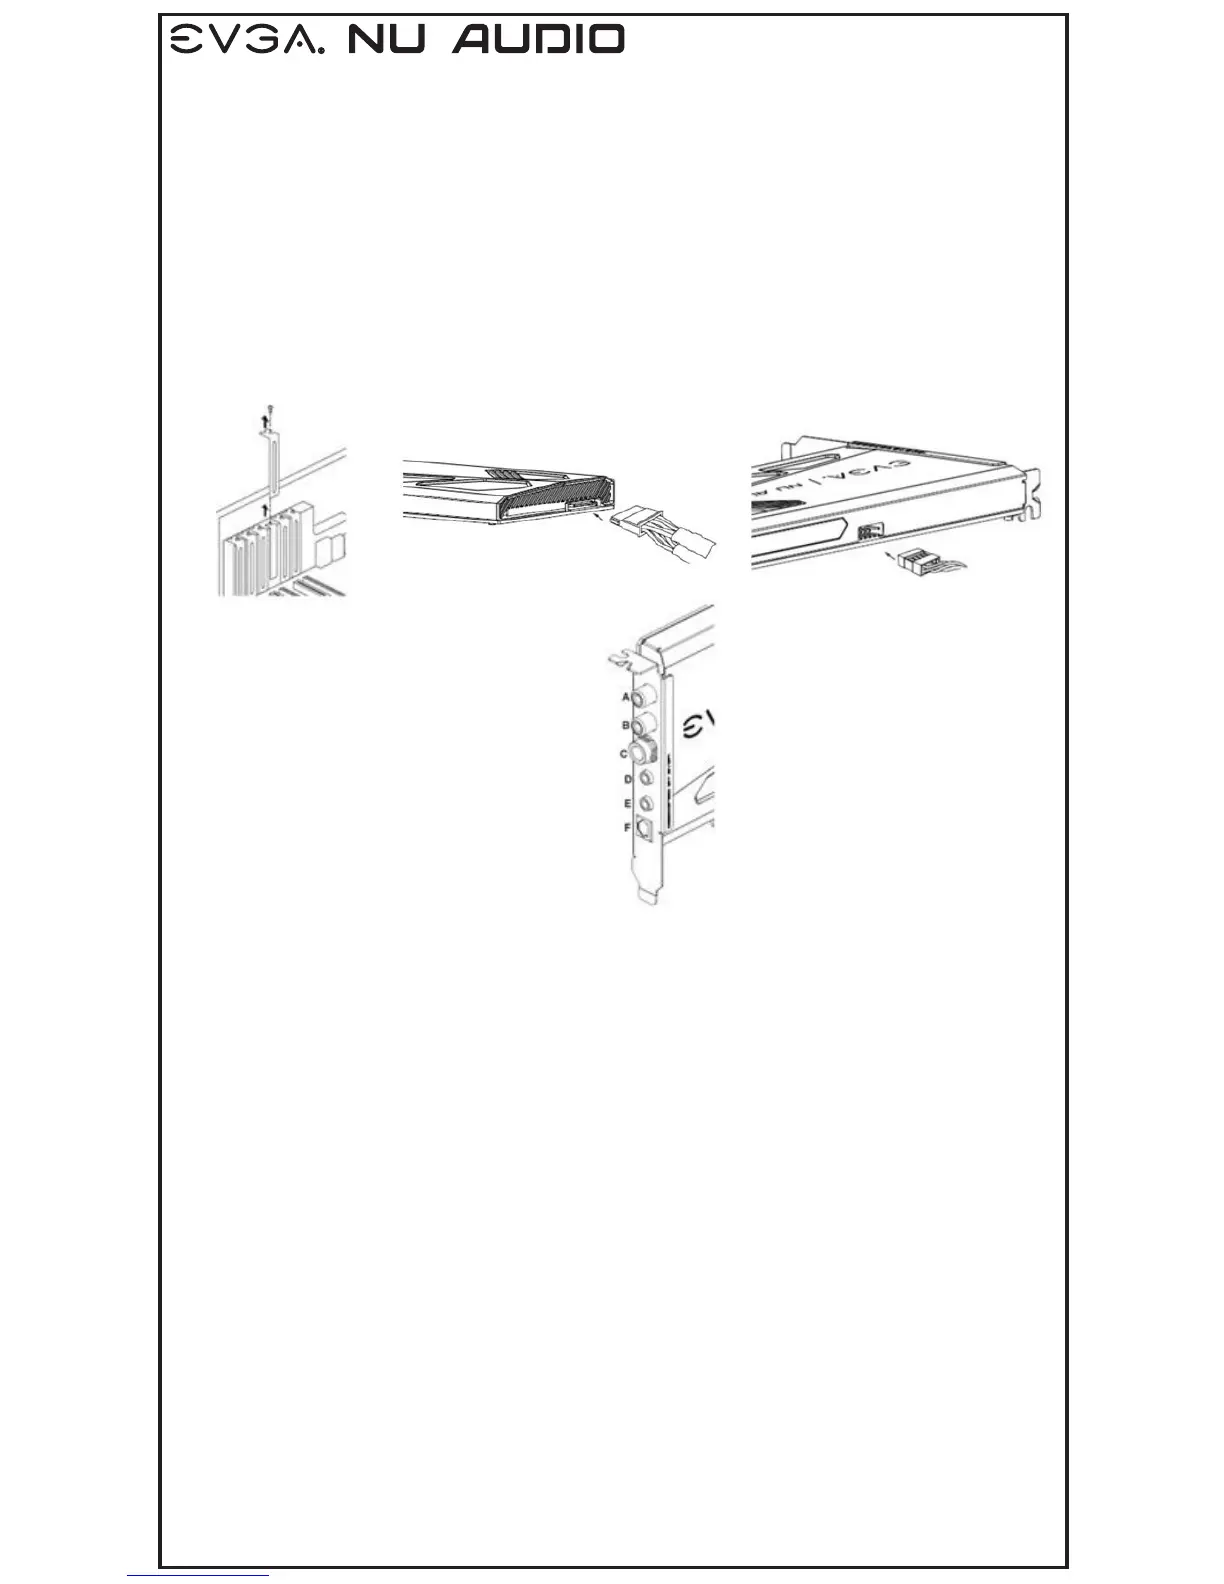
1. Turn off your computer, disconnect the power cord and remove any existing sound cards.
2. If applicable, remove the slot covers that correspond to the PCIe slots you are installing the
EVGA Nu Audio.
3. Connect system power to the EVGA Nu Audio.
4. Connect front panel header to the EVGA Nu Audio.
1. Connect the speaker, headphone or mic to your EVGA Nu Audio.
2. Reconnect your power cord to the PC.
Driver Installation
With the hardware installed, it is now time to install the audio driver.
1. Power up your computer.
2. Download the driver file from www.evga.com/drivers.
The setup program will take over and walk you through the driver installation process.
3. You may need to reboot your PC once the driver installation is complete.
Included Equipment
The following equipment is included in the EVGA Nu Audio box
• RCA L/R to 3.5mm adapter
• 6.5mm to 3.5mm adapter
A- Line Out RCA - R
B- Line Out RCA – L
C- Headphone Out
D- Line In
E- Mic In
F- Optical Out
2. 3. 4.