Do you have a question about the Evh 5150III 50W 6L6 and is the answer not in the manual?
Details on input jack, gain, volume, and channel select buttons for channels one, two, and three.
Explanation of low, mid, high, and presence tone controls across all channels.
Illumination status of the power lamp when the amplifier is on.
Information on power input, voltage, wattage, and fuse replacement.
Details on power, standby switches, and their operational sequence.
Description of headphone jack, MIDI IN, footswitch connection, and effects loop.
Explanation of preamp out, resonance, load impedance, and speaker outputs.
Step-by-step guide to assigning amp channels to MIDI program change messages.
Using MIDI messages to bypass or enable the effects loop.
Key technical details including power, impedance, tubes, dimensions, and weight.
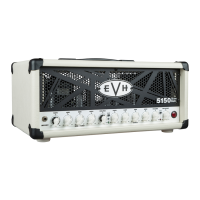
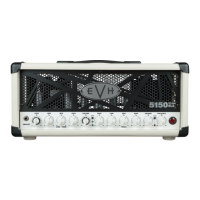
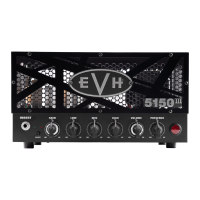
This document is the owner's manual for the EVH 5150III 6L6 50-Watt Head, a professional all-tube amplifier designed to meet the exacting specifications of Edward Van Halen. It represents an updated version of his original and previous models, incorporating new features intended to inspire unlimited artistic expression. The amplifier boasts a "cleaner" channel one and independent dual-concentric controls, which allow for precise gain and volume level matching. Its construction emphasizes fierce tone and uncompromising quality, promising phenomenal EVH performance for years to come. Key distinctive features include an ultra-high-gain preamp design, custom-voiced for maximum harmonic content, a front-panel metal grill, and black or ivory textured vinyl covering.
The front panel of the amplifier provides a comprehensive set of controls for shaping your sound. The INPUT jack is where you connect your instrument, and it's recommended to use only a high-quality shielded instrument cable for optimal signal integrity.
For channels one and two, there are dual concentric gain controls labeled CHANNEL ONE/TWO GAIN. The inner round knob adjusts the gain for channel one (clean), while the outer "chicken-head" knob controls the gain for channel two (medium gain). Adjacent to these are the CHANNEL ONE/TWO LOW/MID/HIGH controls, which are low-, middle-, and high-frequency tone controls specifically for channel one (clean) and channel two (medium gain). Similarly, CHANNEL ONE/TWO VOLUME features dual concentric volume controls, with the inner knob for channel one (clean) and the outer "chicken-head" knob for channel two (medium gain). For a cleaner sound from these channels, it's suggested to set these volume controls to their maximum and then gradually increase the gain controls (B) from their minimum settings to achieve the desired level.
To switch between channels one and two, the CHANNEL ONE/TWO SELECT is a momentary pushbutton. It alternately selects channel one (indicated by a green LED) and channel two (indicated by a blue LED).
Channel three, designed for high-gain, has its own dedicated controls. CHANNEL THREE GAIN is the preamp gain control, where higher settings increase preamp distortion. The CHANNEL THREE LOW/MID/HIGH controls are low-, middle-, and high-frequency tone controls for this high-gain channel. CHANNEL THREE VOLUME is the post-preamp gain control for channel three. To select channel three, use the CHANNEL THREE SELECT momentary pushbutton, which illuminates a red LED. The amplifier remembers the state of channel one or channel two when you switch back from channel three.
A global tone control, PRESENCE, adjusts the ultra-high frequency response for all three channels. Finally, the POWER LAMP illuminates to indicate when the amplifier is on.
Moving to the rear panel, the POWER INPUT is where you connect the included power cord, ensuring it matches the voltage and frequency ratings specified on the panel. The FUSE is a critical safety component and should only be replaced with a fuse of the same rating.
The POWER switch turns the amplifier on and off. After turning it ON, you should wait 30 seconds for the tubes to warm up before engaging the STANDBY switch. To turn the amplifier off, first place it in STANDBY mode (OFF position) for 10 seconds, then turn the POWER switch to OFF. The STANDBY switch itself is used to put the amp in STANDBY mode, which is recommended when taking a break from playing or before turning the amplifier off, as it helps prolong tube life.
For silent practice, the HEADPHONES jack allows you to connect headphones, automatically muting the speaker output.
The amplifier also supports MIDI control. The MIDI IN jack allows you to connect a MIDI controller for MIDI-commanded channel selection and effects loop bypass. The manual provides a detailed section on MIDI setup and use.
An included footswitch connects to the FOOTSWITCH jack, providing easy selection of each of the three channels and the effects loop. The footswitch LEDs (green, blue, red) correspond to the channel LEDs on the front panel, and a purple LED indicates when the effects loop is active.
The EFFECTS LOOP consists of a SEND jack (connects to an external effect input) and a RETURN jack (connects to an external effect output). This allows for integrating external effects processors into your signal chain.
The PREAMP OUT allows you to connect to another amplifier's effects return or power amp input for simultaneous multiple amp use. It can also send the preamp signal directly to a mixer.
RESONANCE is a control that adjusts the power amp's low-frequency response, allowing for further tonal shaping.
The LOAD IMPEDANCE switch is crucial for matching the amplifier's output impedance (4, 8, or 16 ohms) to your speaker load. It's important to note that the recommended EVH 5150III 212ST EL34 speaker enclosure has an impedance of 16 ohms, so the switch should be set accordingly when using that cabinet.
Finally, the SPEAKER OUTPUTS are for connecting to speaker cabinet(s). Either jack can be used when connecting a single cabinet. The manual emphasizes using only high-quality unshielded speaker cables. A critical safety reminder is that a speaker must always be plugged into one of the speaker jacks when the amplifier is on to prevent damage. Always turn the amplifier off or put it in STANDBY mode when changing speaker connections or impedance settings. The manual also provides a table illustrating various speaker configurations and their corresponding impedance settings.
For MIDI setup, the process involves initiating "learning mode" by simultaneously pressing both front panel channel SELECT buttons (E and I). The current amp channel LED will flash. You then send a desired program change message from your MIDI controller. The channel one LED will flash (or the LED for a previously assigned channel). Next, you select the target amp channel (one, two, or three) using the channel SELECT buttons. All three amp channel LEDs will briefly illuminate to confirm the assignment change. If the program change message is already assigned to a channel, you might need to press the channel select button twice to select the desired channel. This process can be repeated for each channel, and multiple program change messages can be assigned to the same amp channel for greater flexibility. The footswitch can be used to temporarily change channels during MIDI setup without affecting saved assignments. To exit "learning mode," press both front panel channel select buttons simultaneously again. The default MIDI channel is channel one, but it can be changed by sending a program change message from a different MIDI channel while in "learning mode."
MIDI can also be used to bypass the effects loop without any specific setup. By sending a control change #85 message with a value of 63 or less (from MIDI channel one or the assigned MIDI channel), the effects loop will bypass. A value of 64 or greater will enable the effects loop. For more in-depth information on MIDI programming for EVH 5150III series amplifiers, users are directed to the "Support" section of the EVH website (evhgear.com) under "MIDI Programming EVH® 5150III 50W Series Amps" within the "Schematics and Wiring Diagrams" heading.
| Power Output | 50 Watts |
|---|---|
| Power Tubes | 2 x 6L6 |
| Preamp Tubes | 7 x 12AX7 |
| Channels | 3 |
| Inputs | 1 x 1/4" |
| Effects Loop | Yes |
| Footswitch | 4-button footswitch included |
| Outputs | 1x 1/4", 1x XLR |