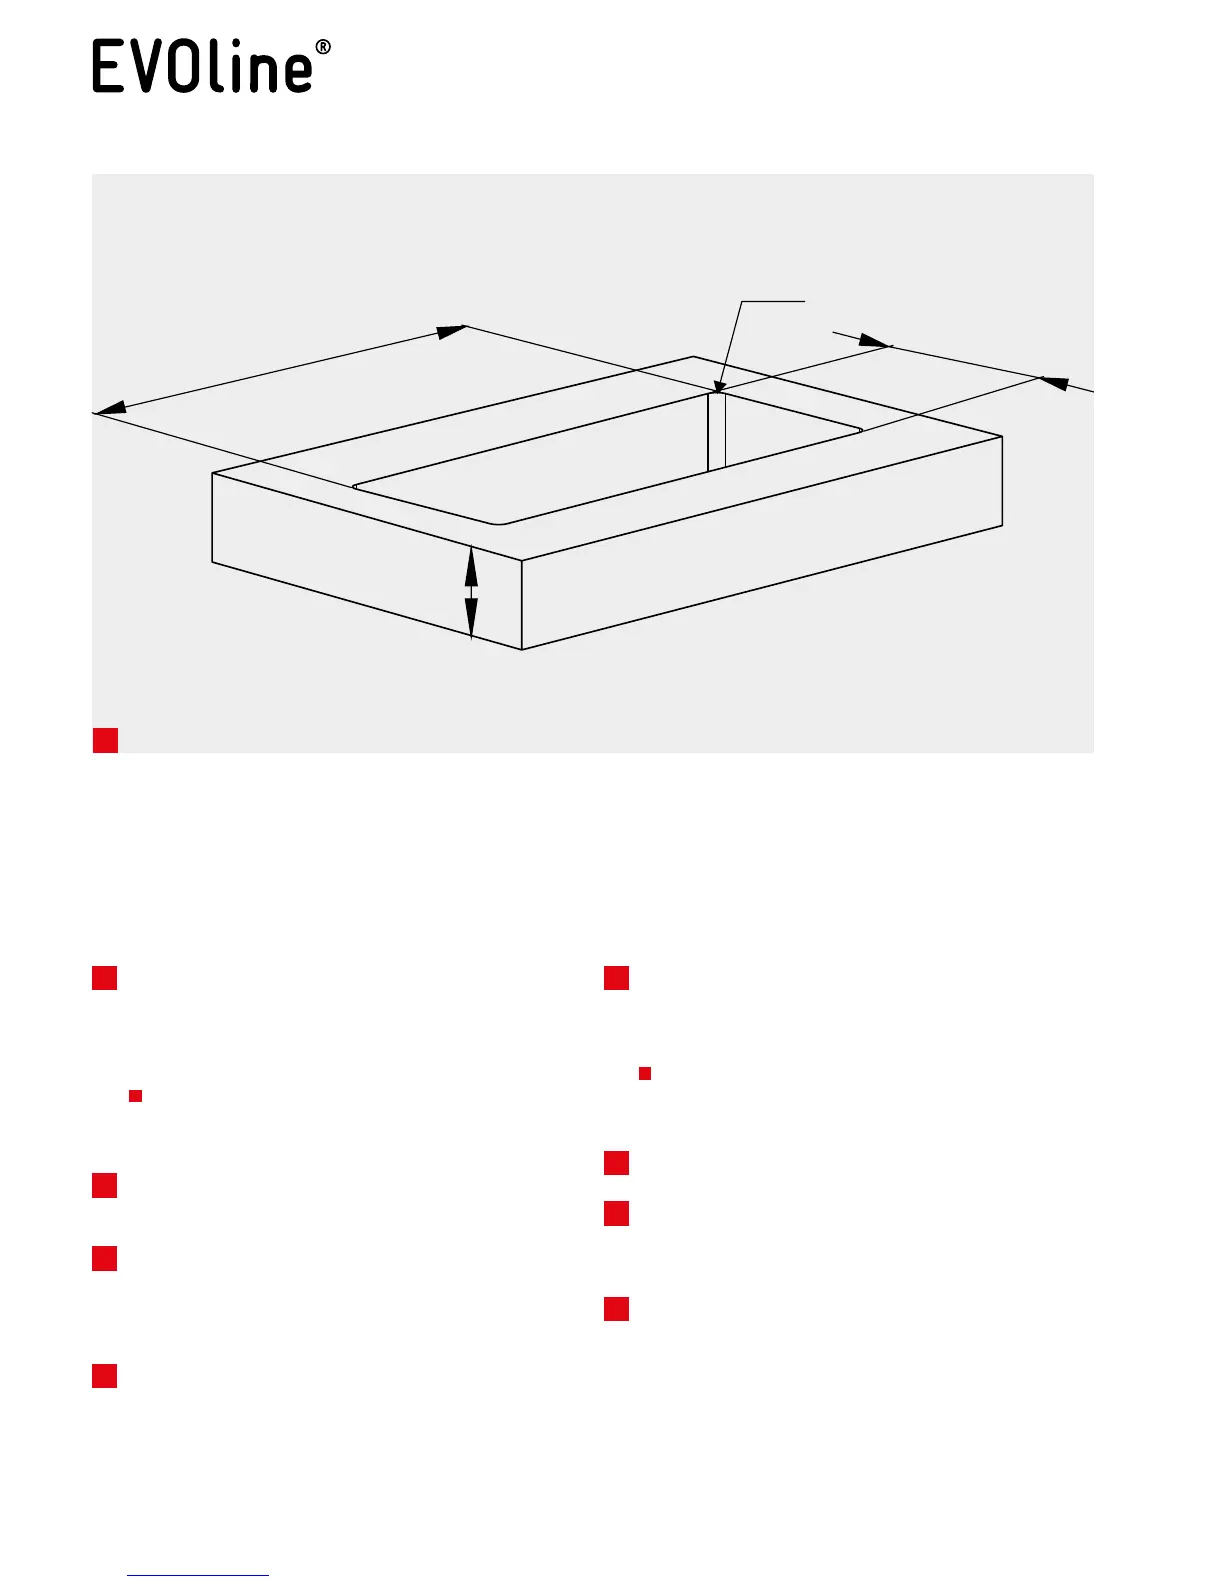
max
40 mm
88 mm
+1
0
1
Der EVOline BackFlip kann an jeder beliebigen Position in
die Arbeitsplatte (bis max. 40 mm Stärke) eingebaut wer-
den. Bei Einbau über Schränken oder Schubladen werden
diese in ihrer Funktion nicht beeinträchtigt. Der Arbeits-
platzausschnitt muss mit einem Mindestabstand von 50
mm zu Arbeitsplattenkanten platziert werden.
1
AuiegendeMontage:
Schneiden Sie die Öffnung mit den gezeigten
Abmessungen.
Beachten Sie die Abstände zu den Seiten.
Alle Sägespäne sorgfältig entfernen
Flächenbündige Montage: siehe Seite 6
2
Führen Sie den BackFlip mit Kabel von
oben in die Öffnung ein.
3
Setzen Sie die Fixierkeile mit der glatten Seite
in Richtung Platte in die zur Materialstärke
passende Führung ein und schieben Sie sie
bis zum Rastpunkt ein.
4
Die Fixierkeile zusätzlich mit senkrecht einge-
schraubten Schrauben sichern.
! Beachten Sie die breite Fuge
Montageanleitung
EVOline BackFlip can be installed in workplates with a
thickness of up to 40 mm. If mounted above drawers, their
functionalitywillnotbeinuenced.Theremustbeamini-
mum distance of 50 mm to the edges of the workplate.
1
Normal installation (salient):
Make a cutout using the shown dimensions.
Take care of the distance to the edges.
Carefully remove all sawdust.
Flush mounted installation : see page 6
2
Insert the BackFlip with the cable top down.
3
Insertthexingwedgeswiththeplainsidetothetop
into the guidances mating the thickness of the plate.
PushwedgesuntiltheyxthePortPush.
4
Fix the wedges additionally by tightening with screws.
! Be aware of the wide seam
Installation Instructions