9
Exact PipeCut 280 Pro Series / 360 Pro Series / 460 Pro Series pipe cutting system
operation instructions
Before operation the tool
- Ensure that motor unit is in the upright position.
- Check that the disc is correctly fitted, in good
condition and suitable for the material to be cut.
- Ensure the pipe saw guide wheels rotate.
- Ensure the support wheels rotate.
- Check the operation of the lower blade guard.
- Ensure the pipe is empty.
Connection to the mains power supply
Ensure that the mains voltage is the same as
indicated on the rating plate (Fig A / 13). Connect
the pipe saw to the power outlet only after having
checked the above points first.
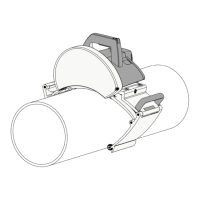
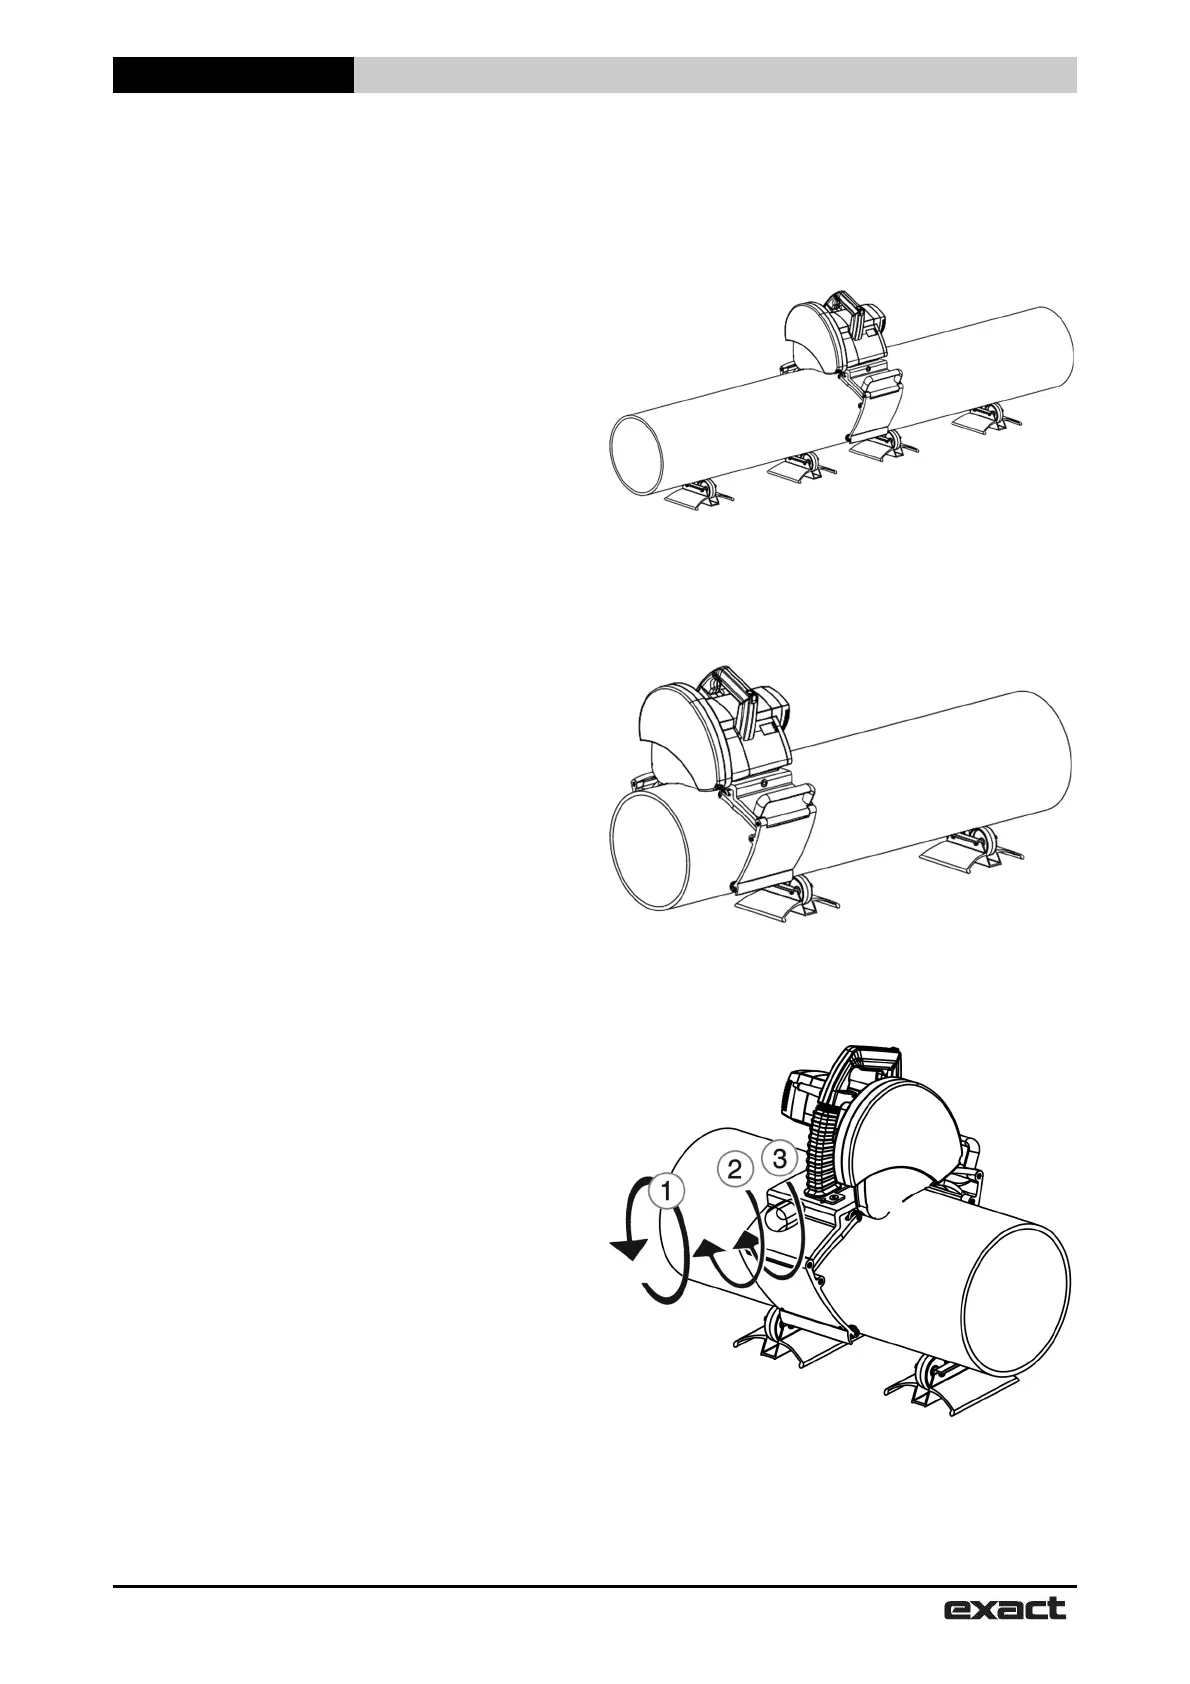
Setting the pipe on supports
Use the system supports when cutting pipes. This
will ensure safe working and optimum results. Work
on flat surface. Place the pipe on two supports so
that the cutting point is between the supports. Place
two more support under both ends of the pipe.
Check that all support wheels contact the pipe
(adjust if required e.g. with pieces of lumber) (Fig
B1). When cutting short and light weight pipes, place
the supports so that the cutting point is outside
supports (Fig B2). Support the pipe with your left leg,
if required. Proper arrangements will prevent the
blade from jamming as the pipe is cut through.
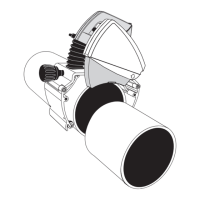
Attaching the pipe saw to the pipe
Open the pipe saw's gripper unit enough to suit the
diameter of the pipe by rotating the adjustment
handle located at the rear of the saw (Fig C / 1).
Position the pipe saw on top of the pipe so that the
edge of the lower blade guard is at the cutting mark.
Fasten the pipe saw to the pipe by turning the
gripper adjustment handle until the gripper grips
firmly the pipe to be cut (Fig C / 2).
Lock the mechanism by turning the gripper safety
(Fig C / 3). Hold the pipe in place and ensure that
pipe saw moves freely in the direction the pipe is
fed. For sake of safety ensure the pipe saw leads
are to the left of the pipe saw. The pipe saw is now
ready for cutting.
FIGURE B1
FIGURE B2
FIGURE C