This document provides setup instructions for an Exmark device, specifically for serial numbers 314,000,000 and higher. It covers initial assembly, pre-operation checks, and basic maintenance procedures.
California Proposition 65 Warning:
The device includes a warning regarding Proposition 65, indicating that it contains chemicals known to the State of California to cause cancer, birth defects, or reproductive harm. This warning applies to the product itself and the engine exhaust. Users are advised to be aware of these potential hazards.
Loose Parts:
The manual includes a "Loose Parts" section, listing components shipped with the device in a "Dealer Pack" and a "Literature Pack." This section helps verify that all necessary parts are present for assembly and operation.
Dealer Pack Components:
- Bracket-Hitch (Part # 117-1232-03): Quantity 1. Used for installing the rear hitch.
- Nut-Nyloc 5/16-18 Flg (Part # 104-8300): Quantity 2. Used for installing the rear hitch.
- Screw-HH FLG 5/16-18 x 1 (Part # 3234-29): Quantity 2. Used for installing the rear hitch.
- Washer (Part # 3256-25): Quantity 1. Used for connecting the foot pedal (50-inch unit only).
- Pin, Cotter (Part # 3272-10): Quantity 1. Used for connecting the foot pedal (50-inch unit only).
- Plate, Seat Stop (Part # 120-5512): Quantity 1. Used for connecting the seat stop.
- Screw-Shoulder HHF 5/16-18 x .96 (Part # 116-2670): Quantity 1. Used for connecting the seat stop.
- Nut-Nyloc 5/16-18 Flg (Part # 104-8300): Quantity 1. Used for connecting the seat stop.
- Key, Exmark Logo (Part # 103-2106): Quantity 1. Used for filling out the online warranty registration form and placing keys into the literature pack.
Literature Pack Components:
- Manual, Operator's
- Manual, Engine Operator's
- Hose, Connector
- Hose, Oil Drain
Checking Tire Pressure:
Before operation, it is crucial to check and adjust tire pressure.
- Drive Tires: Proper inflation is 13 psi (90 kPa).
- Caster Tires: Proper inflation is 13 psi (90 kPa).
Adjust pressure as necessary to ensure optimal performance and safety.
Installing the Rear Hitch:
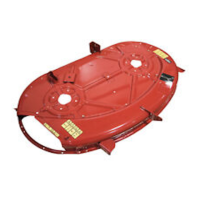
The rear hitch bracket needs to be installed onto the frame. This involves using the 5/16-18 x 1 inch screws and 5/16 inch nyloc nuts provided in the dealer pack. The manual includes figures (Figure 1 and Figure 2) to guide the installation process, showing the bracket's placement before and after assembly.
For 50-inch units, the foot pedal needs to be connected.
- Remove the washer and cotter pin from the dealer literature pack.
- Rotate the foot pedal forward.
- Insert the rod into the foot pedal hole.
- Install the washer and secure it with the cotter pin. Figure 3 illustrates the components: foot pedal, rod, washer, and cotter pin.
Connecting the Seat Stop:
The seat stop is an important safety and operational feature.
- Remove the seat stop plate and associated hardware from the dealer literature pack.
- Route the seat stop plate over the front rail of the seat support. Figure 4 provides a visual guide for this step.
- Install the seat stop plate to the seat frame using the 5/16-18 x .96 inch shoulder screw and 5/16 inch nyloc nut. Figure 4 identifies the shoulder screw, seat stop plate, seat, and flanged nut.
Servicing the Battery:
The device is shipped with a filled lead-acid battery.
- Access: Tilt the seat up to access the battery.
- Safety Warnings (DANGER):
- Charging or jump-starting the battery can produce explosive gases, leading to serious injury.
- Keep sparks, flames, or cigarettes away from the battery.
- Ventilate the area when charging or using the battery in an enclosed space.
- Ensure the venting path is always open once the battery is filled with acid.
- Always shield eyes and face from the battery.
- Battery Electrolyte Warning (DANGER):
- Battery electrolyte contains sulfuric acid, which is poisonous and can cause severe burns. Swallowing electrolyte can be fatal, and skin contact can cause severe burns.
- Wear safety glasses and rubber gloves to protect skin and clothing when handling electrolyte.
- Do not swallow electrolyte.
- In case of an accident, flush with water and call a doctor immediately.
- Checking Voltage and Charging:
- Check the battery voltage with a digital voltmeter.
- Refer to the provided table for recommended charging intervals based on voltage readings.
- Important: Ensure the negative battery cable is disconnected. The battery charger should have an output of 16 volts and 7 amps or less to avoid damage.
- CAUTION: Ensure the ignition switch is in the "OFF" position before charging to prevent sparks and accidental engagement of components.
- Charging Table:
- 12.6 or greater (100% Charge): No Charging Required (Maximum Charger Settings: 16 volts/7 amps).
- 12.4–12.6 (75-100% Charge): 30 Minutes (Maximum Charger Settings: 16 volts/7 amps).
- 12.2–12.4 (50-75% Charge): 1 Hour (Maximum Charger Settings: 16 volts/7 amps).
- 12.0–12.2 (25-50% Charge): 2 Hours (Maximum Charger Settings: 14.4 volts/4 amps).
- 11.7–12.0 (0-25% Charge): 3 Hours (Maximum Charger Settings: 14.4 volts/4 amps).
- 11.7 or less (0% Charge): 6 Hours or More (Maximum Charger Settings: 14.4 volts/2 amps).
- Connecting Battery Cables:
- Connect the negative battery cable.
- Note: If both positive and negative cables are disconnected, connect the positive (red) cable to the positive battery terminal first, then the negative (black) cable to the negative battery terminal. Slip the insulator boot over the positive terminal.
- Note: If charging is not possible, connect the negative battery cable and run the vehicle continuously for 20 to 30 minutes to sufficiently charge the battery.
Servicing the Engine:
The engine is shipped with oil.
- Check the oil level and fill to the appropriate level if necessary.
- Exmark 4-Cycle Premium Engine Oil is recommended.
- Refer to the Engine Owner's Manual for alternative acceptable oils.
Servicing the Hydraulic Oil (50 Inch S-Series Only):
The machine is shipped with hydraulic oil.
- Verify Level: Check the hydraulic oil level on the expansion tank (Figure 5).
- Purge Air: Start the engine and drive the machine forward and backward for a few minutes to purge any extra air from the hydraulic system.
- Stop and Check: Stop the engine, wait for all moving parts to stop, remove the key, and engage the parking brake.
- Add Oil: Check the expansion tank again. If necessary, add Exmark Premium Hydro oil to the "FULL COLD" line.
- Note: The factory fills the reservoir with the proper amount of oil. If it's slightly overfull, do not remove fluid; the level will decrease as air purges from the system.
- Figure 5 identifies the expansion reservoir, full cold line, and engine.
- Replace Cap: Replace the expansion tank cap and tighten until snug. Do not overtighten.
Lowering the Discharge Deflector:
Remove the packing restraint that holds the side discharge deflector up, and then lower the deflector into its operating position.
Filling Out the Product Registration:
Complete the online warranty registration form and place the provided keys into the literature pack. This step is crucial for warranty purposes.