4
Extron Headquarters
+800.633.9876 Inside USA/Canada Only
Extron USA - West Extron USA - East
+1.714.491.1500 +1.919.850.1000
+1.714.491.1517 FAX +1.919.850.1001 FAX
Extron Europe
+800.3987.6673
Inside Europe Only
+31.33.453.4040
+31.33.453.4050 FAX
Extron Asia
+800.7339.8766
Inside Asia Only
+65.6383.4400
+65.6383.4664 FAX
Extron Japan
+81.3.3511.7655
+81.3.3511.7656 FAX
Extron China
+4000.EXTRON
+4000.398766
Inside China Only
+86.21.3760.1568
+86.21.3760.1566 FAX
Extron Middle East
+971.4.299.1800
+971.4.299.1880 FAX
Extron Korea
+82.2.3444.1571
+82.2.3444.1575 FAX
Extron India
1800.3070.3777
Inside India Only
+91.80.3055.3777
+91.80.3055.3737 FAX
© 2013 Extron Electronics All rights reserved. All trademarks mentioned are the property of their respective owners. www.extron.com
68-2036-50
Rev. B 02 13
Dante Network Audio Setup
The following is the recommended procedure for conguring DMP128AT models on a Dante network.
NOTE: A connection to both the Dante (AT) Ethernet switch and the DMP128 LAN port is required to follow this setup
procedure. If the control computer has only one Ethernet port, connect it to a rear panel AT port (item
j
on page 2). Then
connect a short CAT5 cable from the LAN port (item
ç
on page 2) to an unused AT port (item
j
on page 2). Alternately
use an Ethernet switch to connect the control computer to both the LAN and AT ports.
1. Connect the control computer to an AT (Dante) port on the DMP128. Also connect the control computer to the DMP128 LAN
port. (See “Note” above.)
2. Start DSPCongurator in Live mode (see steps 1, 2, and 3b of DMP 128 Configuration, above).
3. From the DSP Congurator menu bar, select Tools, then select Device Settings.
4. In the Unit Name: box, enter a descriptive name for the DMP128 (typically the device name and location) that enables it to
be easily identied on the network.
5. Click Apply, then close the dialog box.
6. From the DSP Congurator menu bar, select Network Audio Control. If Dante Controller does not launch, see the Dante
Controller Software Installation section (previous section).
7. Using Dante Controller, from the menu bar, select Device>Device View.
8. Choose the Dante device. The DMP128 will appear as DMP128, plus the last six digits of the Dante MAC address.
NOTE: Connect DMP128 units to the Dante network one at a time to easily identify which one is being named. To
confirm the proper device is being configured, compare the Dante MAC address printed on the rear of the unit with the
MAC address in the Device View..
9. Select the Device Cong tab in Dante Controller.
10. Rename the device to match the DSP128 name given in DSP Congurator (see step 4 above), then press enter.
11. Select Yes to conrm the new name.
12. To connect additional DMP128s, repeat this procedure with the next device.
See the Dante Controller section in the DMP128 User Guide for operation of the controller software.
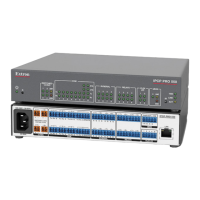
Telephone Ports (DMP 128 C P and DMP 128 C P AT only)
The DMP128 provides a telephone interface with separate input and output signal processing paths (labeled “Telephone Rx”
and “Telephone Tx” on the DSP Congurator main screen on the previous page). The country code must be entered before
attaching the DMP128 to a phone system.
To set or change the country code of the phone model:
1. Follow Steps 1 and 2 from “To Configure the DMP128” on the previous page, then
select Live in the Mode box.
NOTE: The device settings dialog can only be accessed in live mode and
only when the DMP128 is connected to the control computer using the LAN
port. RS-232 and USB connection cannot be used to access the phone
dialer.
2. From the main DSP Congurator toolbar, select Tools, then select Device Settings.
3. From the Device Settings dialog, select the Phone Settings tab (see diagram at
right).
4. If the correct country code is not listed after the “Selected Country:”, click Change
Phone’s Country Code, then select the correct country code for your region from the
dropdown list.
5. Click Apply, then close the dialog boxes.
See the DMP 128 User Guide for operating details of the phone modem.

 Loading...