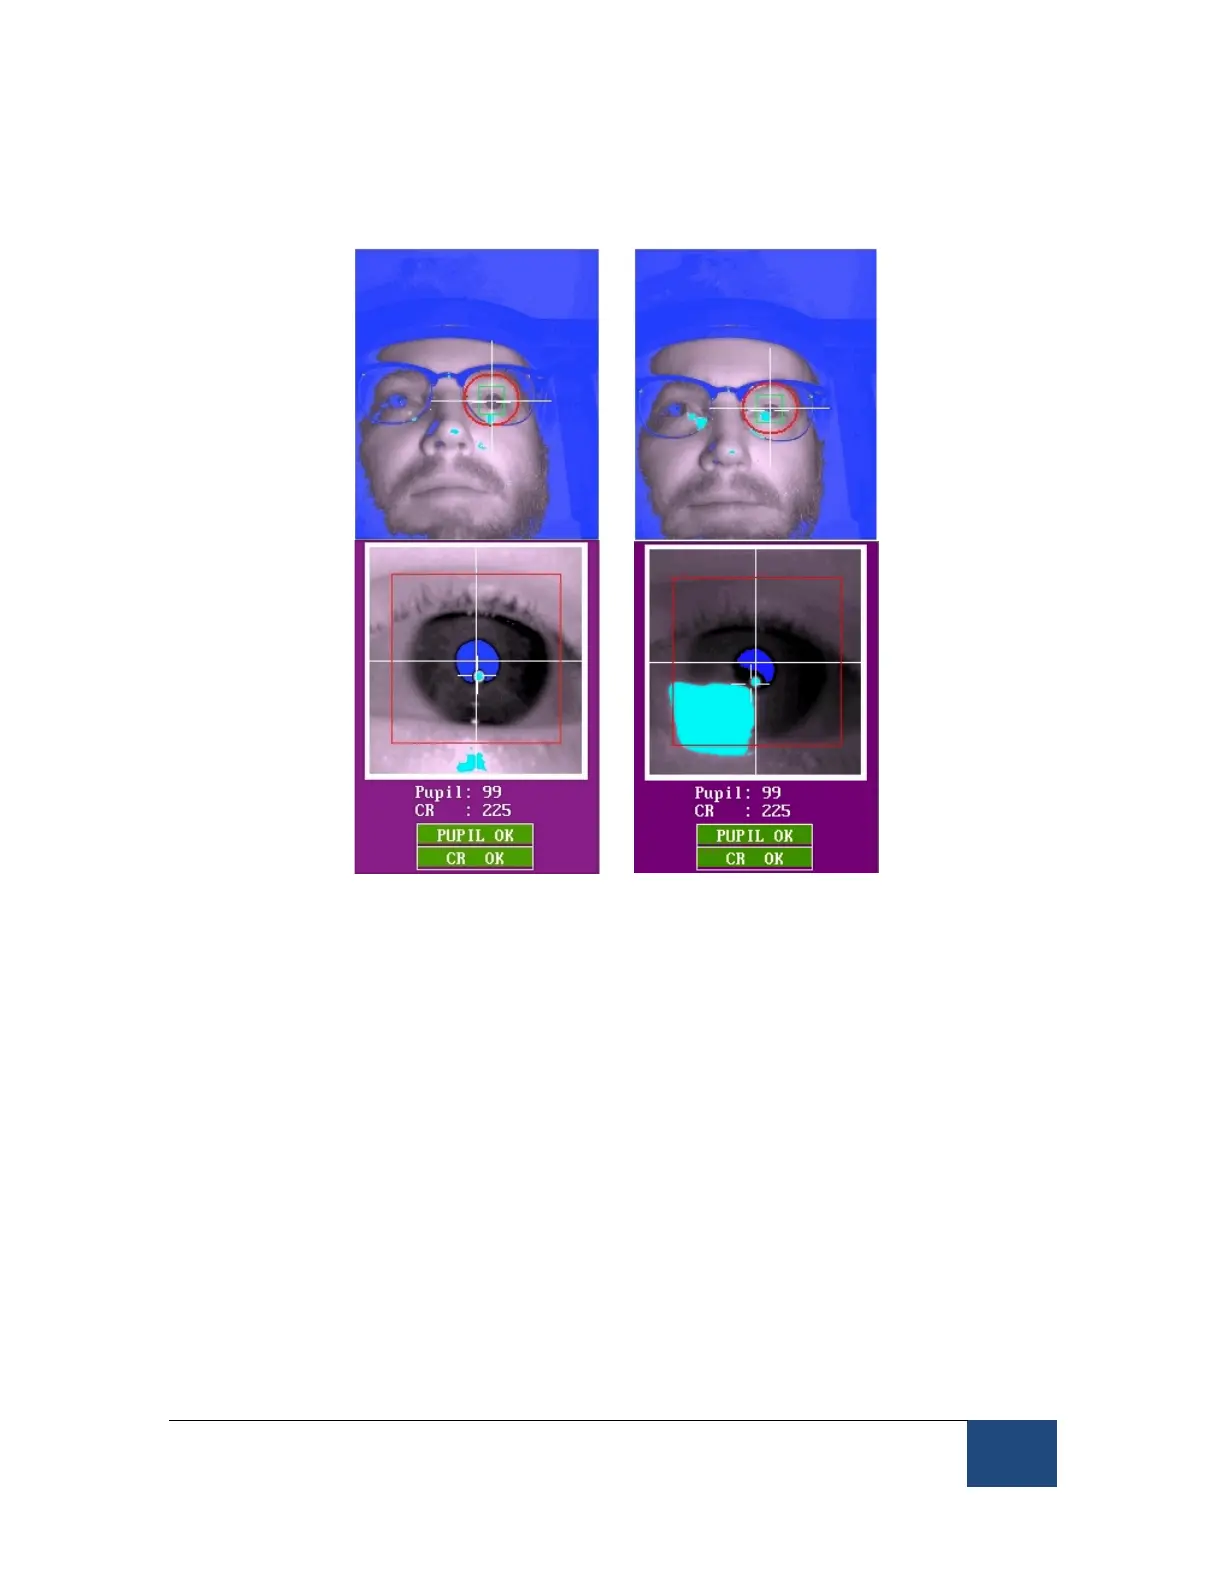
the illuminator and camera) so that reflections from the glass will not interfere
with pupil acquisition. The left panel of the following figure illustrates a good
camera setup whereas the reflections in the right panel block the pupil image.
Figure 3-3: Camera Setup with Participants Wearing
Glasses
If the image becomes too dark or too light, wait one second while the auto-
contrast adjusts itself. If the blue thresholded area in the display is interfering
with setup, press the “Threshold Coloring” button (or ‘T’ on the keyboard) to
remove the threshold color overlay. In TRACK.EXE, you can use keys on either
the Display or Host PC to perform all keyboard shortcut operations while the
eye image is displayed.
The camera should be focused by rotating the lens focusing ring. Turn the lens
by placing your thumb on the bottom of the lens and turning the focusing ring
by sliding your index finger along the top of the focusing ring. This will prevent
the camera image or the illumination to the eye from being blocked (see Figure
3-4). Look closely at the eye image on the zoomed view while adjusting the
focusing ring until the eye image is clear. If a turquoise (CR signal) appears
near the pupil, the best focus will minimize the size of this colored circle.


 To Next Page