Operation/Fonctionnement/Operaciones
ENGLISH
Install the EZVIZ International App
Search “EZVIZ” on the App Store or Google Play
TM
to install the EZVIZ
International app.
Launch the app and register.
Search “EZVIZ” on the App Store or Google Play
TM
to install the EZVIZ
International app.
Launch the app and register.
6
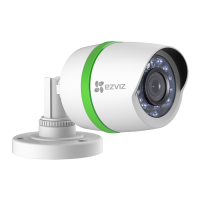
Connect Cameras to DVR
Find the yellow BNC connectors of the Power + Video cable. Connect one end of the
BNC connector to the camera’s BNC connector and the other end to the DVR’s BNC
connector.
1
Access the DVR
7
Connect the Network Cable
4
Connect the DVR to the router with a network cable via the network port.Connect the DVR to the router with a network cable via the network port.
(Recommended) You can access the DVR through the EZVIZ International App. Find
the QR code on the upper surface of the DVR or the start-up wizard on the display.
Log into the EZVIZ International App, scan the QR code, and then follow the
prompts to add the DVR to the EZVIZ account.
You can also access the DVR by operating the local menu. A start-up wizard will
pop up on the screen after the DVR starts, click the Start Wizard button, and follow
the wizard to set the DVR.
Connect the External Display and Mouse
3
Connect the monitor and DVR with the HDMI cable (included) if you want to
operate the system with the local menu. The DVR also supports VGA output (VGA
cable not included).
Connect the mouse to DVR via the USB port.
Connect the monitor and DVR with the HDMI cable (included) if you want to
operate the system with the local menu. The DVR also supports VGA output (VGA
cable not included).
Connect the mouse to DVR via the USB port.
Start Up the DVR
5
Connect the DVR to the power socket with the power cable.
For the CS-X5-108T and CS-X5-116T only, turn on the power switch on the rear
panel to start the DVR.
ESPAÑOL
Conexión de las cámaras al DVR
1
POWER
WAN LAN2 LAN4LAN1 LAN3
WPS/
RESET
1
2
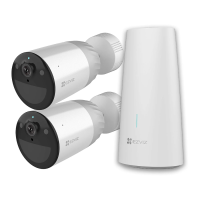
Find the red power connectors of the Power + Video Cable.
Connect one end of the red power connector to the camera’s power input, and
the other end to the Isolated Power Module.
Then use the 1-to-4 power cable if you have many cameras to connect
(Optional). Connect the Power + Video cable or 1-to-4 power cable to the
Camera Power Adapter.
Plug the camera power adapter into a power socket to power on the camera(s).
Power on the Camera(s)
2
1
2
3
1
2
4
1
2
3
4
1
2