f1.mts-gruppe.com16
EN
Operation
Before use
Warning!
Before using this device be sure to read the ope-
rating manual for the battery and the vehicle and
understand all safety notices.
•
Use safety goggles and acid-proof safety
gloves.
•
Ensure adequate ventilation.
•
Ensure the battery poles are clean. If the batte-
ry has removable vent caps, fill each battery cell
with distilled water to the level recommended
by the battery manufacturer. Do not overfill the
cells.
•
If the battery must be removed from the vehicle
before charging, always disconnect the earthed
connector from the battery first. Also ensure all
other loads in the vehicle are off.
•
If the battery does not have caps, refer to the
manufacturer instructions on charging and the
charging speed.
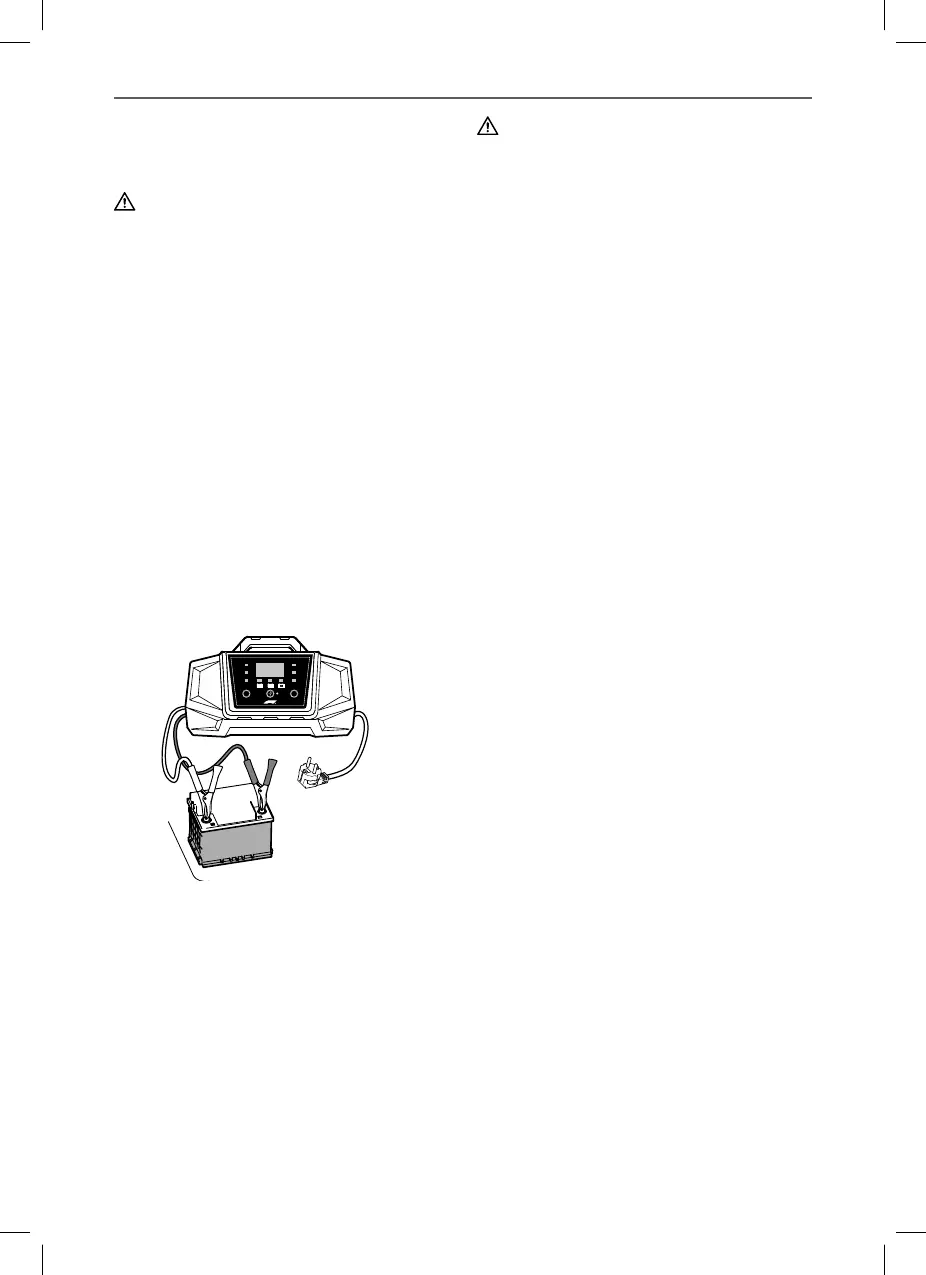
Connecting the device
1. Connect the red (+) terminal connection cable
with clamp (8) to the positive battery terminal.
2. Connect the black (-) terminal connection
cable with clamp (7) to the negative battery
terminal.
Note:
The black (-) clamp can also be connected to the
vehicle chassis (Please refer to the auto maker‘s
instructions!). Be sure both clamps have good
contact and are securely seated.
V
A
%
V/A/%Mode
2A
10A
2A6V
12V
12V
Warning!
Risk of fire and electric shock! If possible, connect
the charger to the 230 V power socket without
extension cable. In exceptions, use the shortest
possible undamaged and unrolled 230 V exten-
sion cable.
3. Plug the charger plug into a 230V power
socket.
The display shows the current battery voltage.
10 seconds after starting, the „Charge“ LED (12)
will light up and the charging voltage will be at the
preset lowest charging rate.
If the battery is connected incorrectly, the “Error”
LED (11) will light up. In this case, unplug the
charger and check the battery and the correct
connection (also see “Troubleshooting”).
4. Verify the device’s preset charging voltage
(6 V or 12 V) corresponds with the connected
battery. If the charging voltage is too high, the
connected battery may be damaged/dest-
royed.
5. During the charging process, you can select
the charging voltage, the charging status in %
and the charging current by repeatedly pres-
sing the „V / A / %“ button (2) (see „Charging
current“).
6. Only BC715:
Repeatedly press the TYPE button (4) whilst
charging to select the battery type (see „Swit-
ching Battery Types“).
Start charging
If the charging device is correctly connected it will
automatically start charging.
The “Charge” LED (12) will light up.
The charging process is fully automatic.
When the battery is fully charged, the “Full” LED
(13) will light up and the “Charge” LED (12) goes
out.
Note:
Once the battery is fully charged, the charger will
switch to trickle charge to maintain the charging
status and protect the battery from overcharging.
 Loading...