Do you have a question about the Faema CARISMA S-1 and is the answer not in the manual?
Address malfunctions by contacting service, especially for power cord issues.
Ensure qualified technicians perform checks and use original spare parts for maintenance.
Ensure correct circuit breaker installation and efficient earthing for electrical safety.
Verify connection type, voltage, and condition of the power supply cable.
Avoid using adaptors, multiple plugs, or extension cords for electrical connections.
Ensure potable water, check pH/chloride, and use treatment if hardness exceeds 8°F.
Place machine on flat surface, fill reservoir, connect water lines per regulations.
Verify water connections for leaks and confirm normal functioning of pressure gauges and valves.
Wash internal components by dispensing water and steam before initial use.
Wash internal components daily or after inactivity using group, hot water, and steam dispensing.
Follow procedures for steam, coffee, and hot water dispensing after periods of inactivity.
Be aware of hot surfaces, general safety rules, and manufacturer liability disclaimers.
Use cup warmer plate correctly for cups/glasses only, ensuring they are drained.
Follow steps for machine shutdown when left unattended for extended periods.
Dispose of electrical equipment according to EU directives for recycling, avoiding urban waste.
Follow local laws for dismantling and disposal to protect the environment and avoid penalties.
Rinse the water tank, lid, filters, and filter holders before filling with water.
Fill the tank with potable water, noting hardness recommendations for optimal performance.
Connect the power cable to the machine and plug it into a prepared electrical socket.
Press the main switch, observe the display, and allow the machine to heat for approximately 3 minutes.
Hook up the filter holder and dispense water to match group temperature and rinse the circuit.
Follow steps for filling, tamping, inserting filter holder, and dispensing coffee for Carisma S and A models.
Use the cup warmer tray to enhance the organoleptic qualities of espresso coffee before serving.
Froth milk using the steam wand, adjusting pitcher position for optimal foam.
Clean steam dispensing pipes and nozzle after use to remove residues and prevent blockages.
Access the programming menu by pressing and holding the OK key for 4 seconds.
Use +/- keys to set boiler temperature and confirm with the OK key.
Set the boiler temperature using +/- keys after accessing the programming menu.
Program frothing, hot steam, start/stop air temperatures for steam keys.
Enter programming by pressing the button and holding for 10 seconds.
Fill filter holder, press button for desired serving, stop when cup is full, repeat for both buttons.
View boiler temperature or pressure on the display by pressing the center OK key.
Monitor the water level indicator; refill the tank to the maximum level to avoid safety device intervention.
Empty the drip tray when 'EMPTY ME' appears to prevent overflow.
Clean the dispensing unit components daily using detergent and water rinse cycles.
Clean filter-holders and filters by soaking in detergent solution and rinsing.
Clean steam and hot water dispensing pipes and nozzles after each use.
Remove, rinse, and clean the grille and drip basin daily.
Clean the machine's bodywork with a soft cloth and mild cleaning products, avoiding sprays.
Weekly, remove and clean the water tank and lid with a sponge and water.
Replace the water filter based on autonomy or at least every 18 months for drink quality.
Follow steps to remove, rinse, soak, and install the new water filter-softener.
Troubleshoot issues like no power, no coffee, leaks, and incorrect dispensing with provided solutions.
Check and reset the safety thermostat if the machine does not reach operating pressure.
Refer to figures for installation steps, including connection diagrams and machine components.
Details on ECO LINE cleaning products for cappuccino makers, groups, filter holders, and dispensers.
| Category | Coffee Maker |
|---|---|
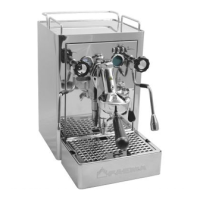
| Number of Groups | 1 |
| Voltage | 220-240 V |
| Group Head | E61 |
| Steam Wand | Yes |
| Hot Water Tap | Yes |
| Color | Stainless Steel |
| Frequency | 50 Hz |
| Water Tank Capacity | 2.5 liters |
| Water Supply | Direct connection or water tank |