SAFETY INFORMATION
FOR YOUR SAFETY
READ ALL INSTRUCTIONS BEFORE OPERATING FAN
REFER TO MODEL STICKER UNDER POP N’ LOCK SCREEN FOR MODEL NUMBER
SAFETY ALERT SYMBOLS
Safety Symbols alerting you to potential personal safety hazards.
Obey all safety messages following these symbols.
WARNING
avoid possible
injury or death
CAUTION
avoid possible injury
and/or property damage
WARNING ELECTROCUTION
• Disconnect power supply prior to installation.
INSTALLATION
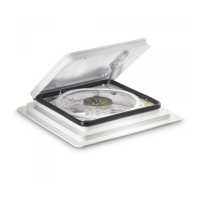
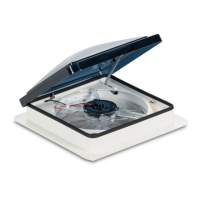
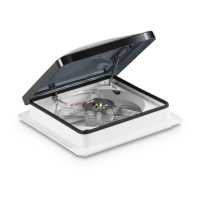
ROOF MOUNTING INSTRUCTIONS: OEM (ORIGINAL EQUIPMENT MANUFACTURERS)
& AFTERMARKET
Gasket or Sealer is required between mounting ange bottom & top of roof. Additional
compatible sealant over screws & at ange where it meets roof. Clamp fans; use a double
bead of compatible sealant only between the mounting ange and roof (No putty tape,
butyl or gaskets to be used with Clamp Fans). For rubber roofs use EPDM compatible roof
sealant, e.g. Dicor 551 LSW or 502 LSW.
RECOMMENDED WIRE FOR POWER
SUPPLY:
A minimum of 16-gauge stranded copper
must be used. Insulated connectors must
be used.
WIRE COLOR CODE:
Black - Positive or Fused
White - Negative or Ground
Fan-Tastic Vent
P.O. Box 1627 Elkhart, IN 46515
PHONE: 800-521-0298 FAX: 800-201-4973
INTERNET: http://www.fantasticvent.com
DOCUMENT PART NUMBER 8613-01
Fan-Tastic Vent Fans
& Controllers
Protected by U.S. Patents 7,731,574
and/or 7,731,249
Other Patents Pending
ENGLISH, FRANCAIS, (CANADA)
Revised 2/18/15
RECOMMENDED SCREWS:
No. 8 self-tapping at head - 3/4” to 1” in length. All 16 holes must be used for proper
seal. After ceiling fan has been mounted and wired, install interior garnish with screws
provided. Garnish may be trimmed for thinner roofs. For deeper than standard garnish
call Fan-Tastic Vent Toll Free. OEM Clamp fans require mounting screws and correct height
garnish pre-determined by OEM Customer and Fan-Tastic Vent. Torque all screws equally.
Do not over tighten.
FUSE: SYSTEM HAS BEEN FUSED BY FAN-TASTIC VENT. REPLACE ONLY WITH A 4 AMP
SLO BLO TYPE FUSE. REPLACEMENT INSTRUCTIONS:
Locate the round black cap of the fuse holder (about the size of a dime) on the face of
the fan. Push up and quarter turn counter clockwise and pull down to expose the fuse.
Replace the old fuse with a new one and push in the fuse holder. Secure with clockwise
rotation of the cap. REPLACEMENT MUST BE SAME TYPE AND RATING.
REVERSE SWITCH MOUNTED ON THE FAN:
Units equipped with a reverse switch in the fan motor and fan blade must be completely
stopped before reversing fan.
BULB TYPE THERMOSTAT INSTRUCTIONS:
No additional external wiring.