Do you have a question about the fantastic furniture COMO BEDSIDE 2 DRW and is the answer not in the manual?
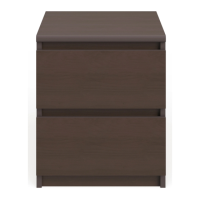
| Brand | fantastic furniture |
|---|---|
| Model | COMO BEDSIDE 2 DRW |
| Category | Indoor Furnishing |
| Language | English |
Includes a critical warning about following basic steps to avoid warranty-voiding damage and six general tips for assembly.
Lists all components (panels, rails, hardware) and necessary tools (screwdrivers, mallet) for assembling the bedside unit.
Attaches CL Runner Tracks (H6) to Left Side Panel (P2) and CR Runner Tracks (H7) to Right Side Panel (P3) using small screws.
Inserts dowels (H1) into Left Side Panel (P2) and attaches cam bolts (H3) into both side panels (P2, P3).
Connects rails (P4, P5, P6) to Left Side Panel (P2) using cam nuts (H4), then attaches Right Side Panel (P3).
Installs Back Panel (P7) with screws (H5) and hammers plastic glides (H12) onto side panels (P2, P3).
Inserts cam bolts (H3) into Top Panel (P1), then secures it to the main body using dowels (H1) and cam nuts (H4).
Attaches small cam bolts (H10) to Drawer Front (P8) and secures Drawer Sides (P9, P10) using small cam nuts (H11).
Slides Drawer Base (P11) into grooves and attaches Drawer Back (P12) with long screws (H2) to the drawer sides.
Secures the drawer by attaching wedges (H13) between drawer sides and base using screws (H14).
Attaches DL Runner (H8) to the bottom of Left Drawer Side (P9) and DR Runner (H9) to Right Drawer Side (P10) with screws (H5).
Places the assembled drawers into the chest and ensures all screws and bolts are tightened securely.