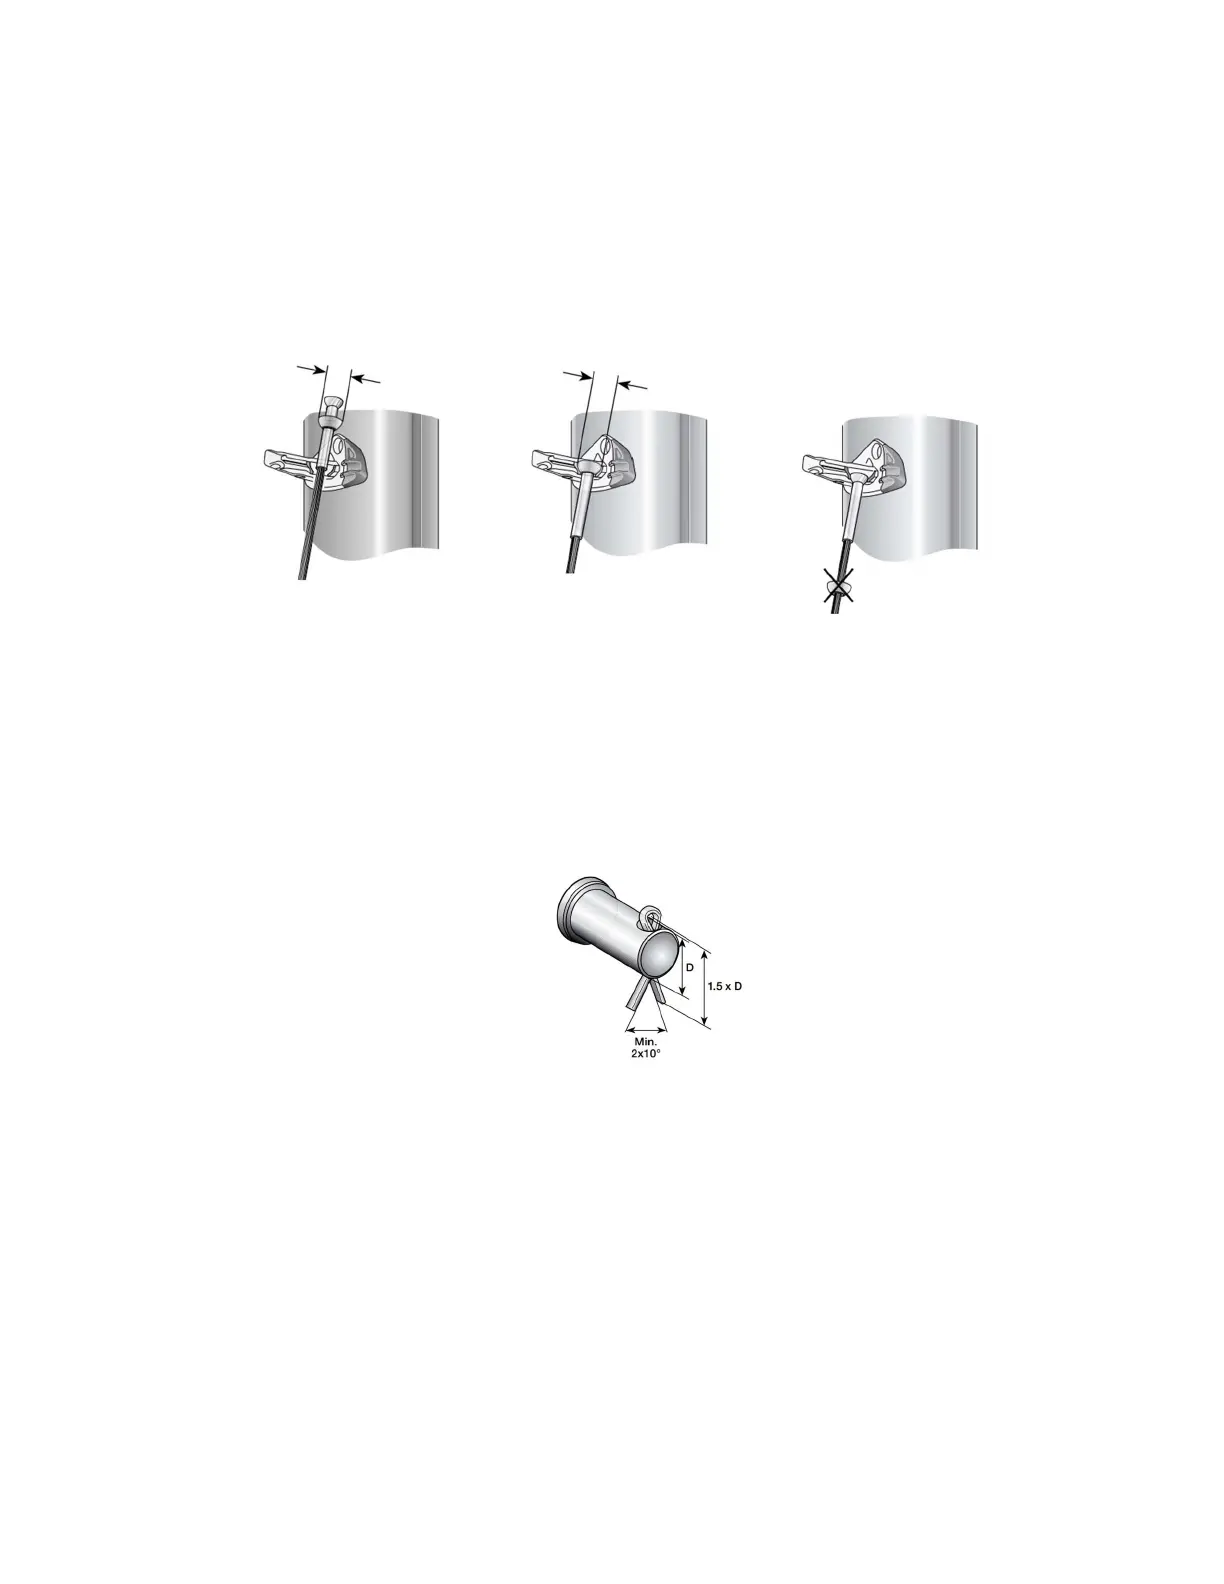
5
f) Insert the top of the lower side stays to the spreader’s bracket. To do so, the stem ball
terminal and the cup must be inserted from the bottom of the bracket and through the
furthest hole of the bracket. Once the cup is through, the terminal and the cup stay in the
closest hole of the mast bracket.
Image 4: Assembly of the stem ball terminal and cup with the spreader’s bracket
g) The spreader can now slide onto the spreader’s bracket. To secure the spreader in place,
insert the cutter pin and open the split pin at least 20 degrees. Use rigging tape or electrical
tape to cover the split pin. This will prevent the gennaker to get ripped by it.
Image 5: Cutter pin and split pin assembly
h) If all three halyards were pull to the top of mast, bring them down and tie the snap shackles
to the gooseneck. Make sure the mainsail halyard is behind the mast and the jib/gennaker
halyards are in front of the mast.
 Loading...