9
o) Attach the boom vang.
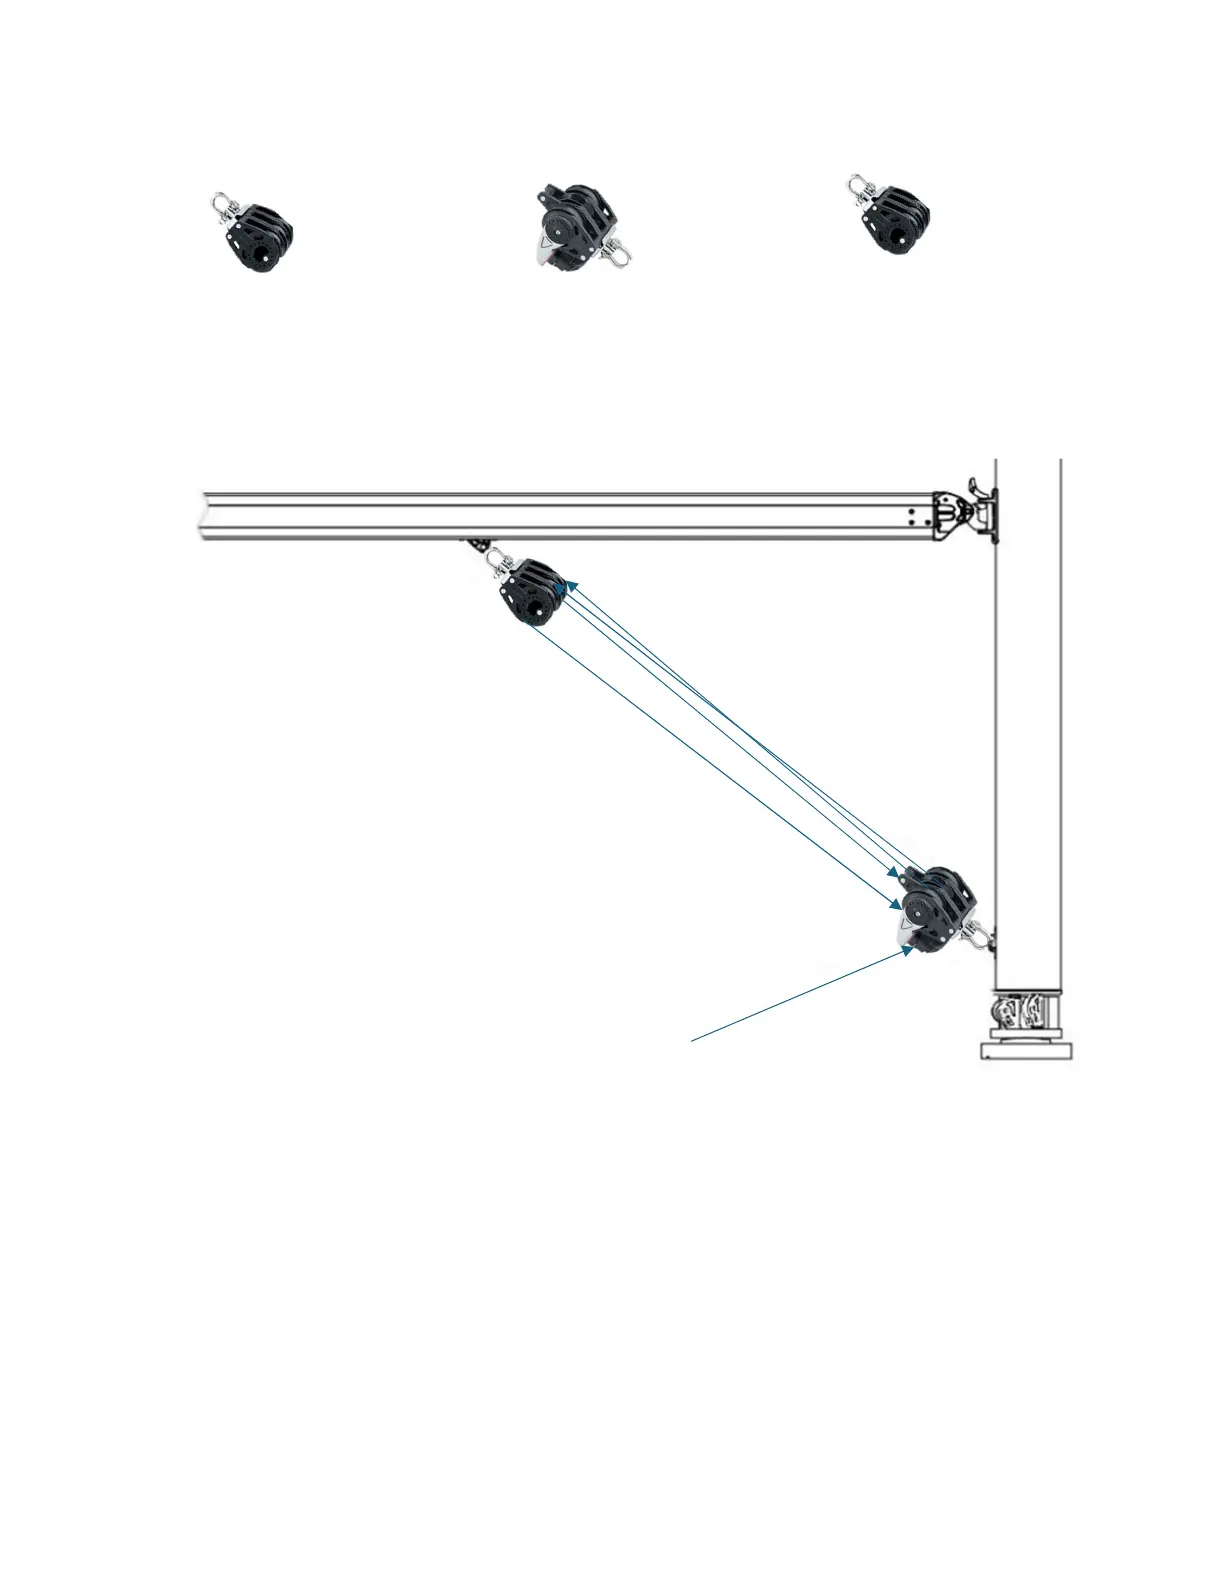
For the assembly, the block reference will be #1 to #3. Block #1 being the most port block and
block #3 being the most starboard block.
Image 9: Boom vang control line assembly
The boom van is the only control line that won’t have all the purchase parallel to each other. It is easier to start from
the cam cleat and go through the middle of the bottom triple ratchet block (Cam cleat -> #2TRB). Feed the line from
the top and in the middle block of the triple block (#2TRB->#2TB). Feed the line to the bottom triple ratchet block.
Feed it from the bottom and use the starboard block (#2TB->#3TRB). Feed the line to the top triple block from the
top. Use the starboard block (#3TRB->#3TB). Feed the line to the triple ratchet block. Do it from the bottom and use
the starboard block (#3TB->#1TRB). Feed the line to the top triple block. Do it from the top and use the port block
(#1TRB->#1TB). Bring the end of the line to the becket and make a bowline (#1TB->Becket).
referred as ‘’TB’
block with becket
on the triple block



 To Next Page