W
Wanda RuizJul 25, 2025
Why is my Fat Shark Transmitter reception so poor?
- DDonald CarrJul 25, 2025
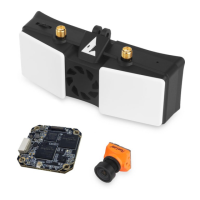
Poor reception with your Fat Shark Transmitter can occur for several reasons: * Using RP-SMA antennas instead of standard SMA connectors. * RC antennas being too close to video antennas; maintain maximum separation. * Shadowing of the VTX antenna; try a different VTX antenna with a longer coaxial section. * A loose VTX antenna connection; ensure the VTX antenna and any adapters are secured. Disconnecting during operation can degrade performance and damage the VTX. * VTX entering overheat protection mode; cycle to a different flight mode. * Overheating; disconnect power and allow cooling, then reconnect. * Poor airflow; improve airflow to the video transmitter RF board or add a cooling fan. * Loose MMCX connection on TX5M.1; ensure the MMCX connector is seated securely.