11
6
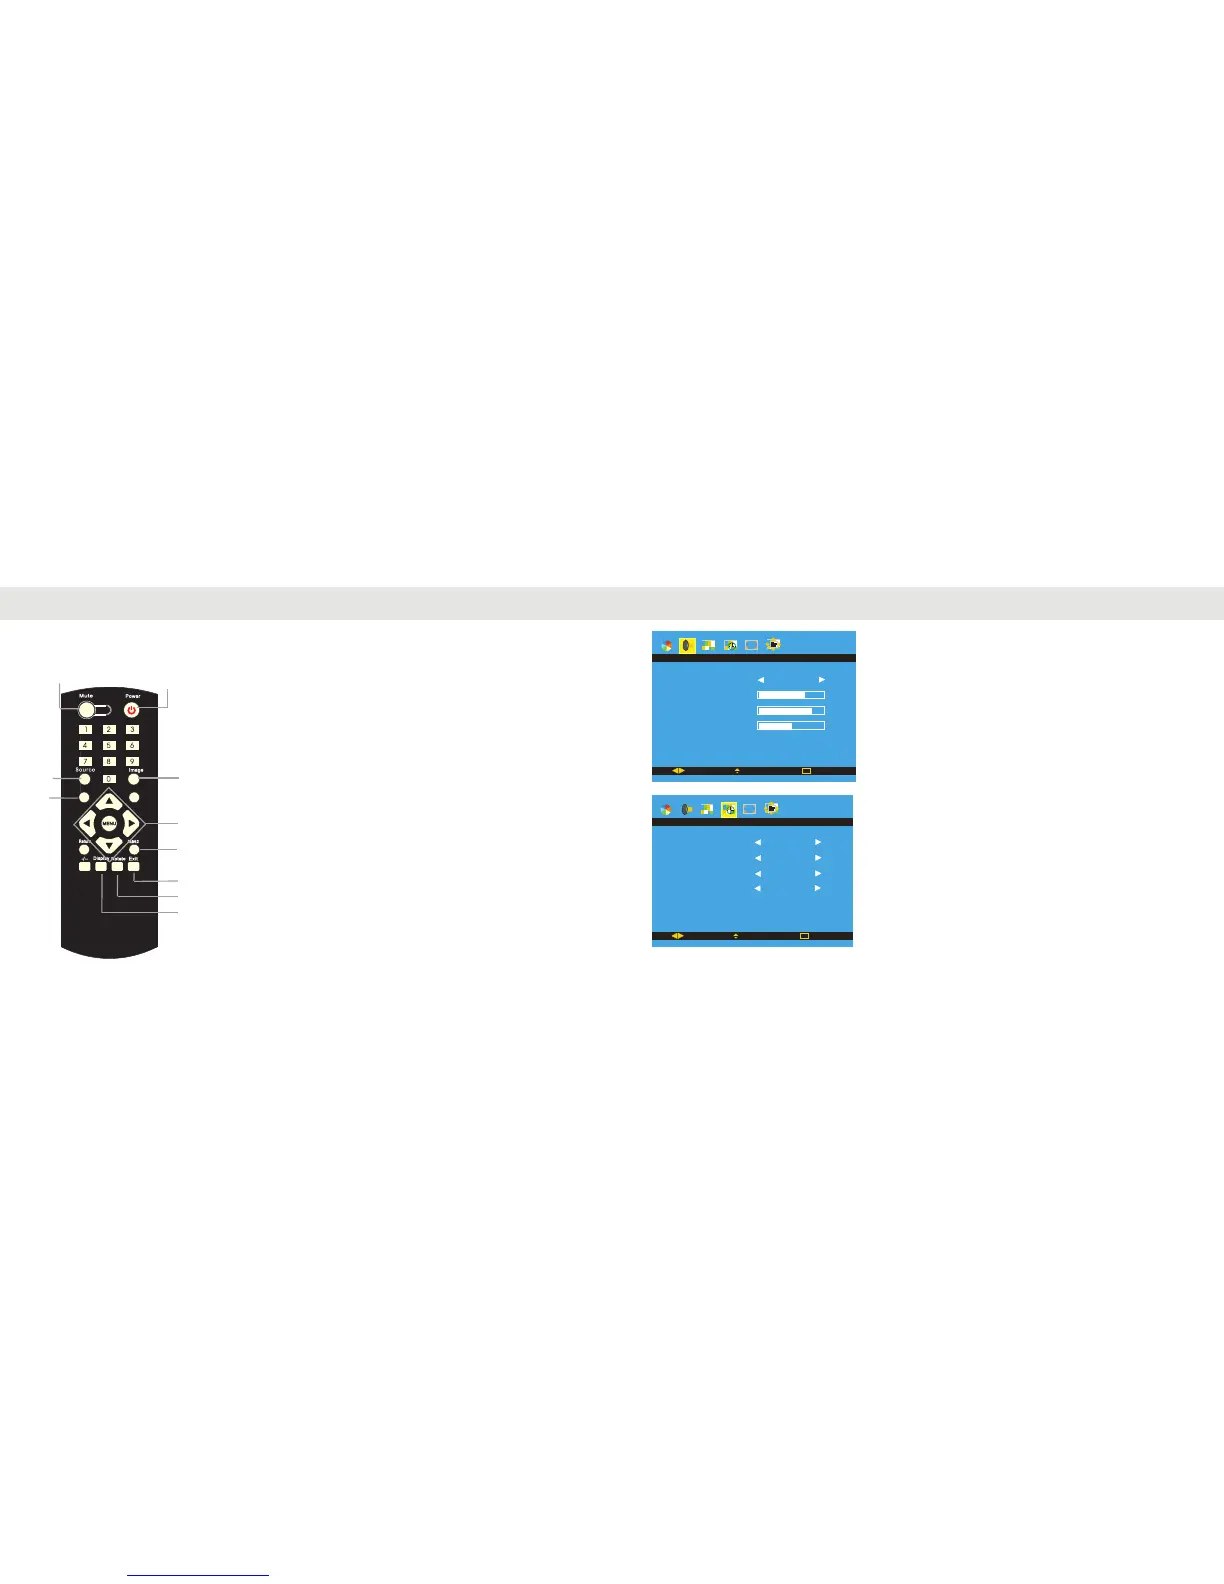
The remote control that comes with your projector is also used for other models, some of which
have different sets of features. The image below points out which buttons activate features on
your projector.
1
2
3
4
5
6
7
1: Mute button.
2: Power button.
3: I
mage preset select button.
4: Menu, and navigation arrow buttons.
5: Aspect ratio selection button. (Not available in all modes)
6: Exits from any menu screen.
7: Image flip button.
BAS S
TR E BLE
BALA NC E
SO UND E FFE C T
STAND ARD
SO UND
MO V E
SE LEC T
EX IT
ME NU
PC
The sound menu screen allows you to adjust settings such as
treble, bass, and balance. You can choose between several
CTI
ROTATE
MO DE2
O FF
O FF
O N
BLE
DNR
MO VE
SE LEC T
EX IT
ME NU
PC
Fu nct io n
The function menu allows you to activate the advanced picture
settings such as Color Transient Improvement (CTI),
Black level extender (BLE), and digital noise reduction (DNR).
You can also flip the projected image both horizontally and
vertically.
Getting started (continued)
Menu settings (continued)
presets, or customize the audio settings to your liking.
8: Displays the current video mode the projector is set to.
8
OK
9: Brings up the video mode selection menu.
10: Selects the highlighted option in the video mode selection
menu.
9
10