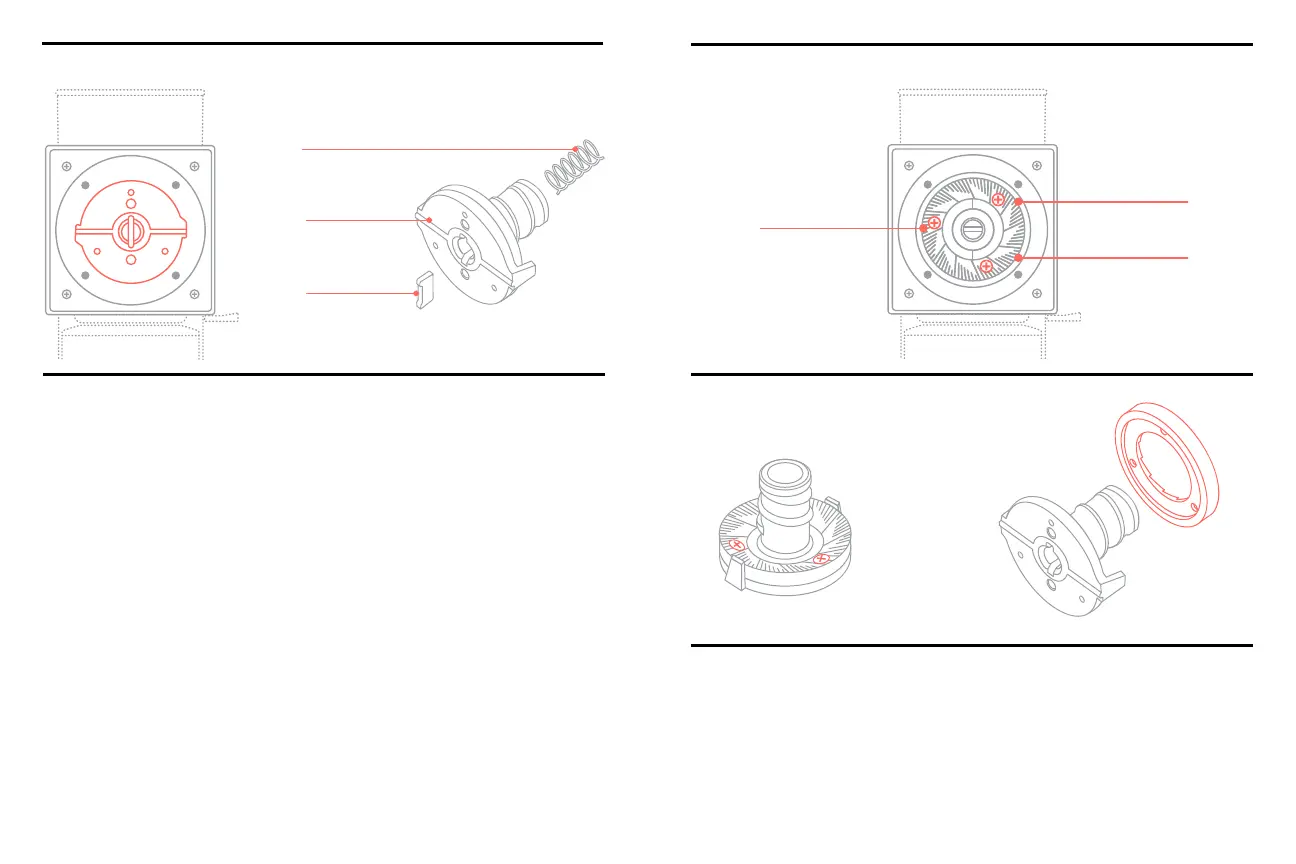
1514
Take care not to lose any pieces as you remove. See Diagrams
D & E for reference.
dust off of the burrs and replace burrs.
If you are replacing the burrs, continue onto the next steps.
6. The stationary burr is attached to the grinds chamber. To remove
remove the three screws that hold it in place. If there is ground
brush to clear the ground coffee before attempting to remove the
screws. Carefully remove the stationary burr
(Diagram F).
7. The rotational burr is attached to the auger. To remove the
remove the three screws that hold it in place. If there is ground
a small brush to clear the ground coffee before attempting to
remove the screws
(Diagrams G & H).
8. Carefully lift the rotational burr away from the auger.
To replace the burrs, repeat these steps in reverse order.
sure that the rotational burr is reattached to the auger and that
the stationary burr is reattached to the grinds chamber.
Diagram D Diagram E
Spring
Rotational Burr
and Auger
Auger Key
Diagram F
Diagram G Diagram H