A
B
C
D
E
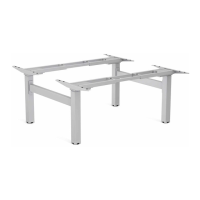
Mounting Brackets adjust to three sizes.
Les supports de fixation se règlent sur trois tailles.
Los soportes de montaje se ajustan a tres tamaños diferentes.
Montagehalterungen sind auf drei Größen einstellbar.
Staffe di montaggio regolabili in tre misure.
Montagebeugels instelbaar voor drie maten.
Monteringskonsolerna kan anpassas till tre storlekar.
Wsporniki monta˝owe posiadajà trzy regulowane po∏o˝enia wysokoÊci.
Монтажные кронштейны могут регулироваться по трем размерам.
F
F
F
Front edge of desk reference line.
NOTE: Front of keyboard tray
will stick out slightly.
Ligne de référence du bord avant
du bureau.
REMARQUE : le devant du
plateau de clavier dépasse
légèrement.
Línea de referencia del borde
frontal del escritorio.
NOTA: La parte frontal de la
bandeja del teclado sobresale
ligeramente.
Vorderkante der Schreibtisch-
Bezugslinie.
HINWEIS: Die Vorderseite
des Tastaturfachs wird etwas
vorstehen.
Linea di riferimento per bordo
frontale scrivania.
NOTA: La parte frontale del
ripiano tastiera fuoriesce
leggermente.
Referentielijn voor voorzijde
bureau.
OPMERKING: De voorkant van de
toetsenbordlade zal enigszins uit-
steken.
Framkant på bordets referens-
linje.
OBS! Tangentbordsbrickans front
kommer att sticka ut lite grand.
Przednia kraw´dê linii
odniesienia biurka.
UWAGA: Przednia cz´Êç pod-
stawy pod klawiatur´ b´dzie
nieco wystawaç.
Передняя кромка линии
отсчета стола.
ПРИМЕЧАНИЕ: Передняя
сторона лотка для клавиатуры
будет слегка выступать.
x1 x2 x4 x4 x4
Drill template is actual size • Le gabarit de perçage est en grandeur réelle • La plantilla de taladrado está en tamaño real • Bohrschablone entspricht den tatsächlichen Abmessungen • Sagoma in dimensioni reali per praticare i fori
Sjabloon voor boorgaten is op ware grootte • Borrmallen är i verklig storlek • Szablon do wywiercenia obrotów ma rzeczywiste wymiary •
Шаблон для сверления имеет фактический размер
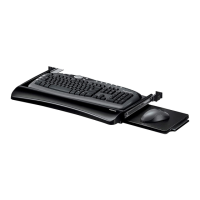
Stop to hold keyboard
Butée de retenue clavier
Tope de retención de teclado
Tastatur-Halteanschlag
Barra d’arresto tastiera
Toetsenbord stopmechanisme
Tangentbord stoppmekanism
Element zderzakowy klawiatur´
Ограничитель перемещения клавиатуры
Installation Instructions
1. Align Drawer slide with the key-
b
oard tray. Insert
1
⁄2”
chrome self
tapping screws. Repeat for other
side of tray.
2
. Secure Adjustable Mounting
Brackets on right side with
1
⁄4”
brass machine screws. Repeat
f
or other side of tray.
3
. Attach drill template at desired loca-
tion underside of your desk or table.
D
rill
3
⁄3
2
"
(2.5mm) diameter pilot
holes approximately
3
⁄8" (9.5mm)
deep in 4 locations. Be careful not
t
o drill through the top of desk.
4
. Insert
1
⁄2”
chrome self tapping
screws into Adjustable Mounting
Brackets. Repeat for other side.
A
B
E
1
2
3
4
D
C
D
F
x
8