ENGLISH
4
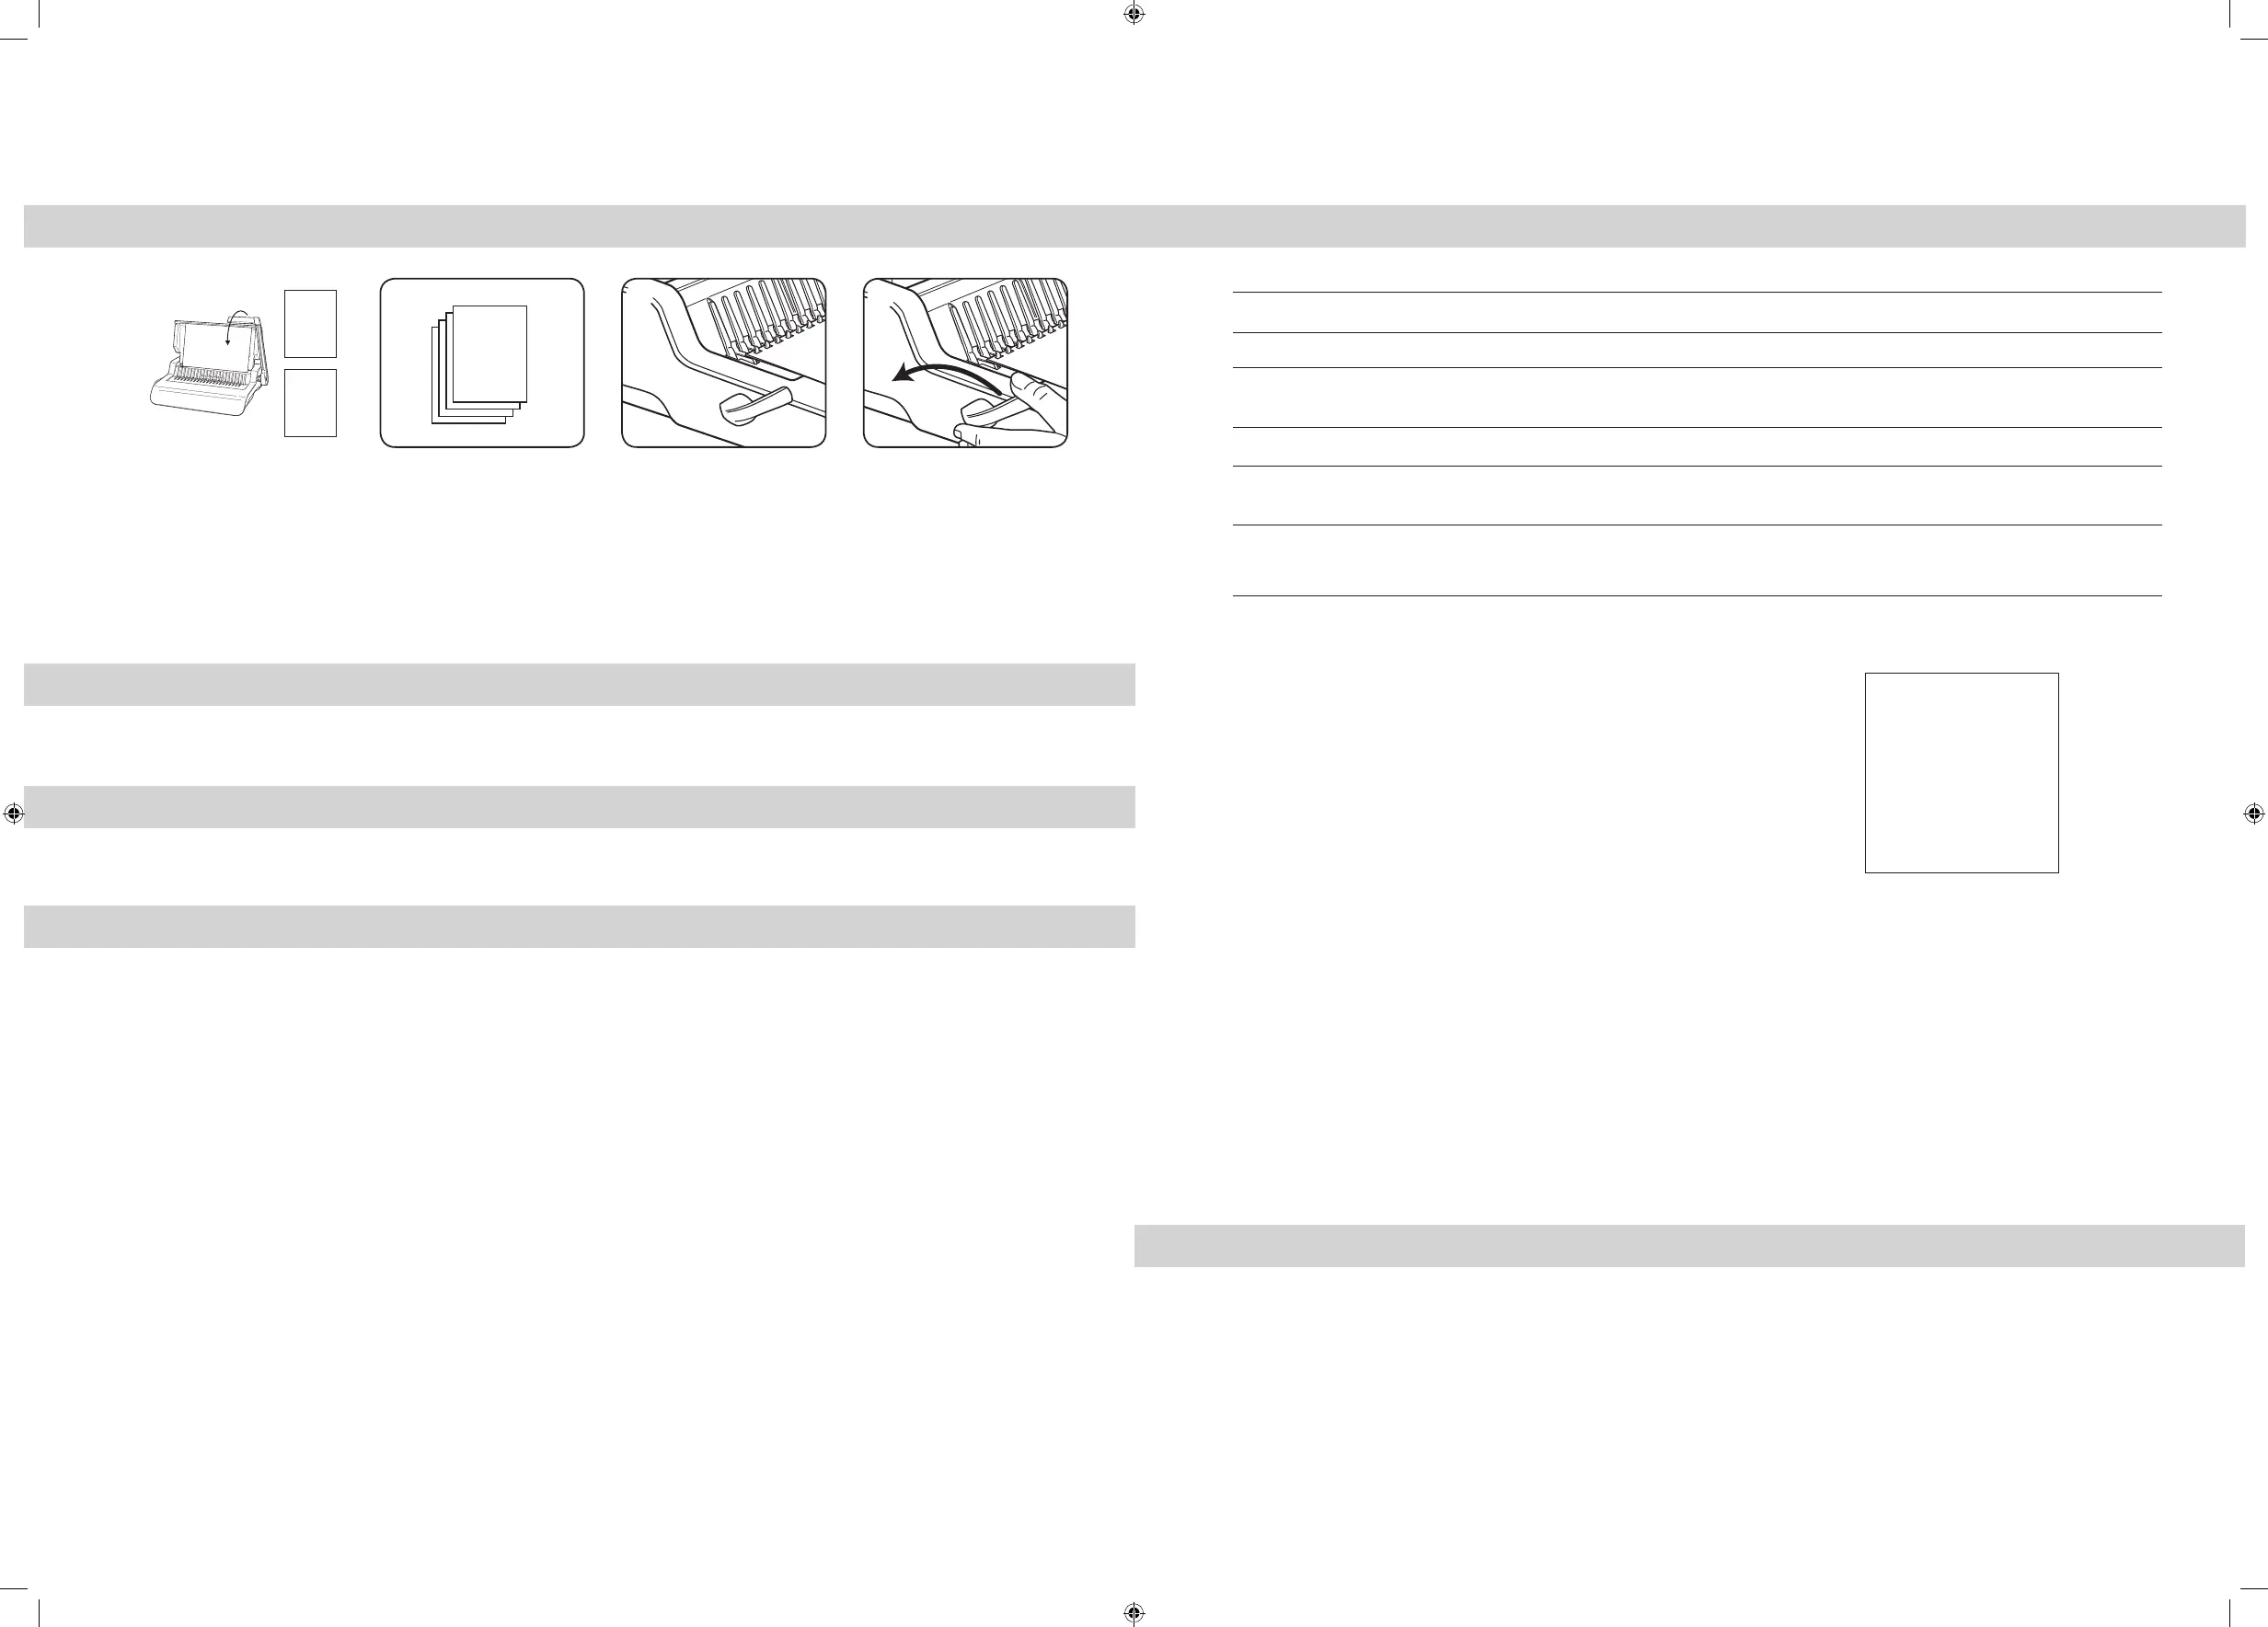
STEPS TO BIND
21 3 4
1. Punch front and back covers
first.
2. Punch sheets in small
batches that do not overload
the machine or the user.
3. Load punched sheets directly
onto the opened comb. Starting
with the front of the document.
4. When all punched sheets are
loaded onto the comb, push the
comb lever backwards to close
the comb and remove the bound
document.
CORRECTING A BOUND DOCUMENT
Additional sheets may be included or removed at any time by opening and then closing the comb as previously described.
REMOVAL OF WASTE CLIPPINGS
The waste tray is located under the machine and is accessed from the right side. For best results empty the tray regularly.
STORAGE
Lower the punch handle to the horizontal position. Lower the lid. The Pulsar comb binder is designed to be stored horizontally on the desktop.
Front
Cover
Back
Cover
30
Max 17
(80gsm)
(20 lb)
5
WARRANTY
Fellowes warrants all parts of the binder to be free of defects in material and workmanship for
2 years from the date of purchase by the original consumer. If any part is found to be defective
during warranty period, your sole and exclusive remedy will be repair or replacement, at
Fellowes’ option and expense, of the defective part. This warranty does not apply in cases of
abuse, mishandling or unauthorised repair. Any implied warranty, including that of merchant-
ability or tness for particular purpose, is hereby limited in duration to the appropriate warranty
period set forth above. In no event shall Fellowes be liable for any consequential damages
attributable to this product. This warranty gives you specic legal rights. You may have other
legal rights that vary from this warranty. The duration, terms and conditions of this warranty are
valid worldwide, except where different limitations, restrictions or conditions may be required by
local law. For more details or to obtain services under this warranty, please contact Fellowes or
your dealer.
TROUBLESHOOTING
Problem
Punched holes are not central
Machine will not punch
Punch holes are not parallel to edge.
Partial holes
Damaged hole edges
Waste tray leaks
Cause
Edge guide not set
Blockage
Debris is stuck below dies.
Sheets not correctly aligned to punch pattern.
Possibly overloading the machine
Waste tray is not correctly inserted or ‘burst feature’
has activated
Solution
Adjust edge guide to correct paper or cover size.
Check waste tray is empty. Check for blockage to paper entry.
Take stiff cardboard and slide into the paper entry. Move the card-
board sideways to release any stray clippings into the waste tray.
Adjust edge guide and test punch scrap sheets until correct
Punch plastic covers with paper sheets. Reduce number of sheets
being punched.
Check waste tray is empty and ‘burst feature’ is closed.
Need Help?
Customer Service….
www.fellowes.com
Let our experts help you
with a solution.
Always call Fellowes
before contacting
your place of purchase.
Australia Residents Only:
Our goods come with guarantees that cannot be excluded under the Australian Consumer Law. You are entitled to a replacement or refund for a major failure and for compensation for any other
reasonably foreseeable loss or damage. You are also entitled to have the goods repaired or replaced if the goods fail to be of acceptable quality and the failure does not amount to a major failure.
The benets under Fellowes’ Warranty are in addition to other rights and remedies under a law in relation to the machine.
Pulsar Plus 300_407969_RevC_23L_103116.indd 5 10/31/16 3:51 PM
 Loading...