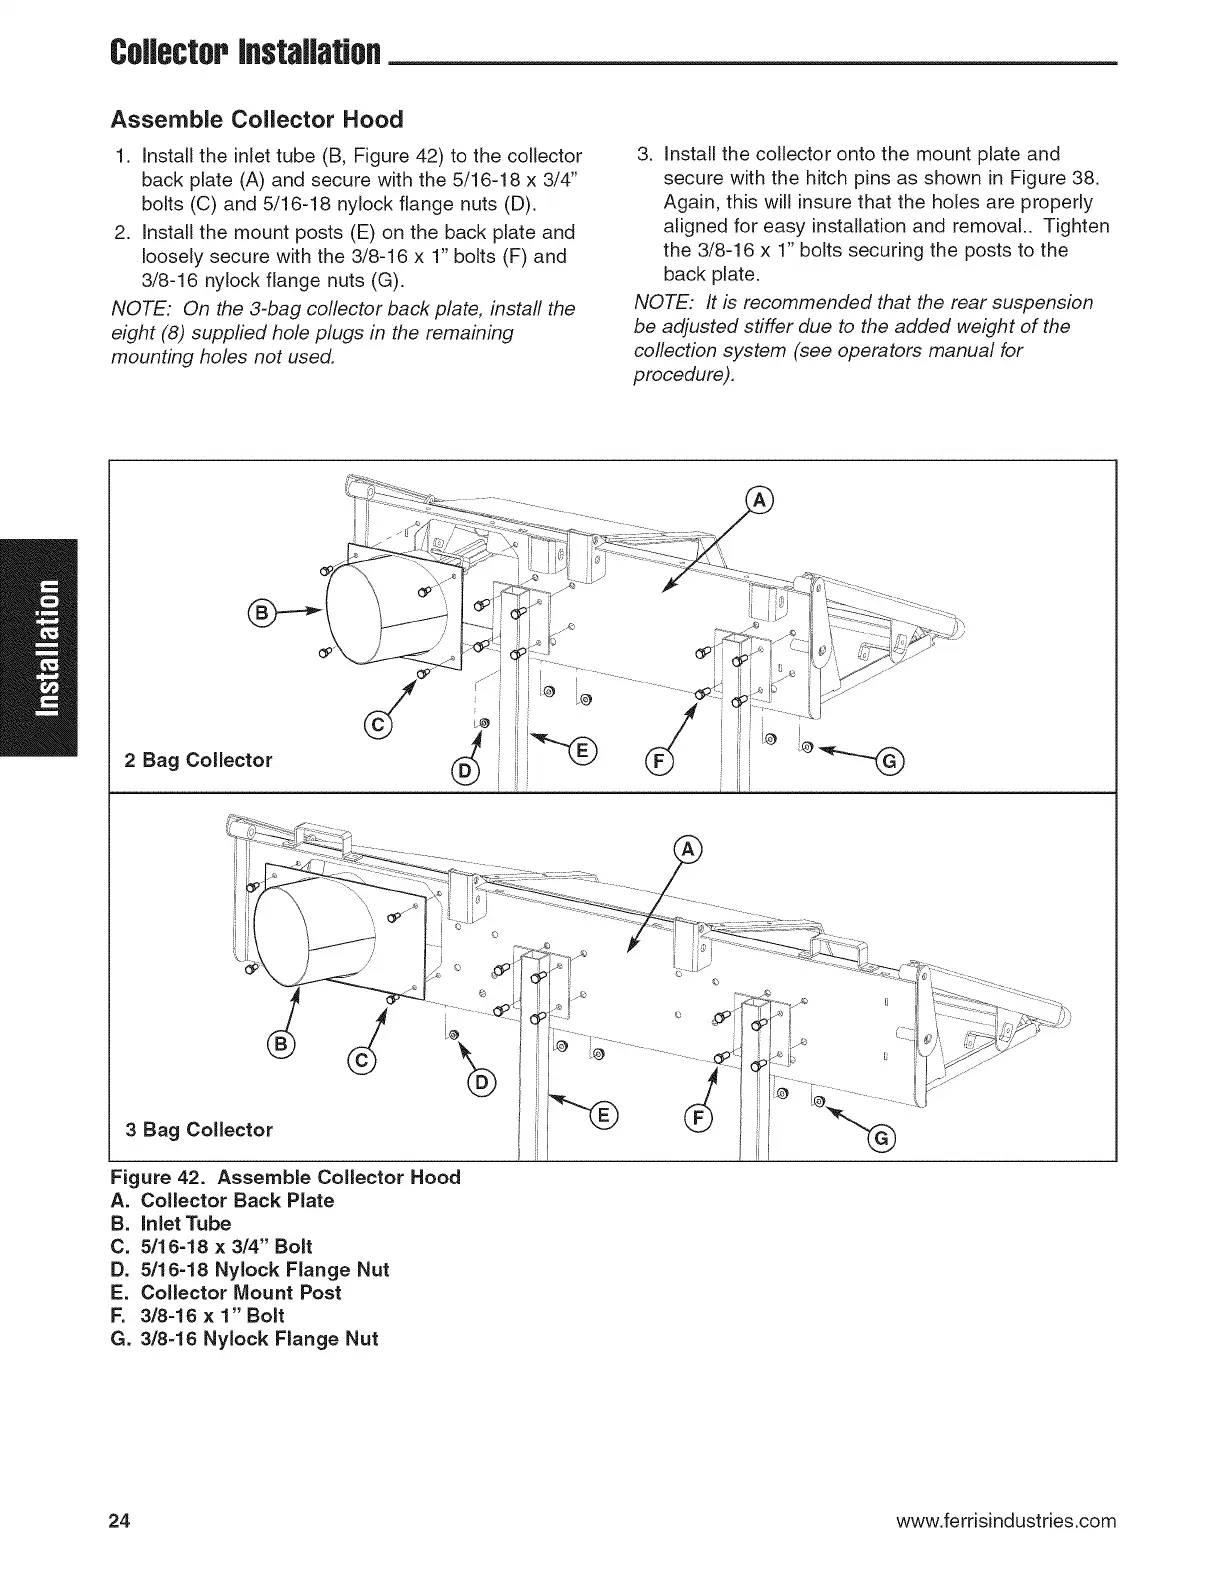
CollectorIflstaJlatm
Assemble Collector Hood
1. Install the inlet tube (B, Figure 42) to the collector
back plate (A) and secure with the 5/16-18 x 3/4"
bolts (C) and 5/16-18 nylock flange nuts (D).
2. Install the mount posts (E) on the back plate and
loosely secure with the 3/8-16 x 1" bolts (F) and
3/8-16 nylock flange nuts (G).
NOTE: On the 3-bag collector back plate, instafl the
eight (8) suppfied hole plugs in the remaining
mounting holes not used.
3. Install the collector onto the mount plate and
secure with the hitch pins as shown in Figure 38.
Again, this will insure that the holes are properly
aligned for easy installation and removal.. Tighten
the 3/8-16 x 1" bolts securing the posts to the
back plate.
NOTE: It is recommended that the rear suspension
be adjusted stiffer due to the added weight of the
collection system (see operators manual for
procedure).
i@ i ._
dl
2 Bag Collector (_
.... !i
i@ !
3 Bag Collector
Figure 42. Assemble Collector Hood
A. Collector Back Plate
B. inlet Tube
C. 5/16-18 × 3/4" Bolt
D, 5/16=18 Nylock Flange Nut
E. Collector Mount Post
F. 3/8-16 × 1" Bolt
G, 3/8-16 Nylock Flange Nut
24 www.ferrisindust ries.com
 Loading...