9.4 Positioning the guard/cutting guard [7]
The guard is preassembled. You can simply
turn the guard to adapt its position to the re
quirements of the task.
►
Press and hold the locking lever on the
guard.
►
Adjust the guard on the power tool so
that sparks and particles are deflected away
from the body.
►
Release the locking lever and continue
to turn the guard until it locks in place.
The cutting guard, available as an acces
sory, can be positioned in the same way.
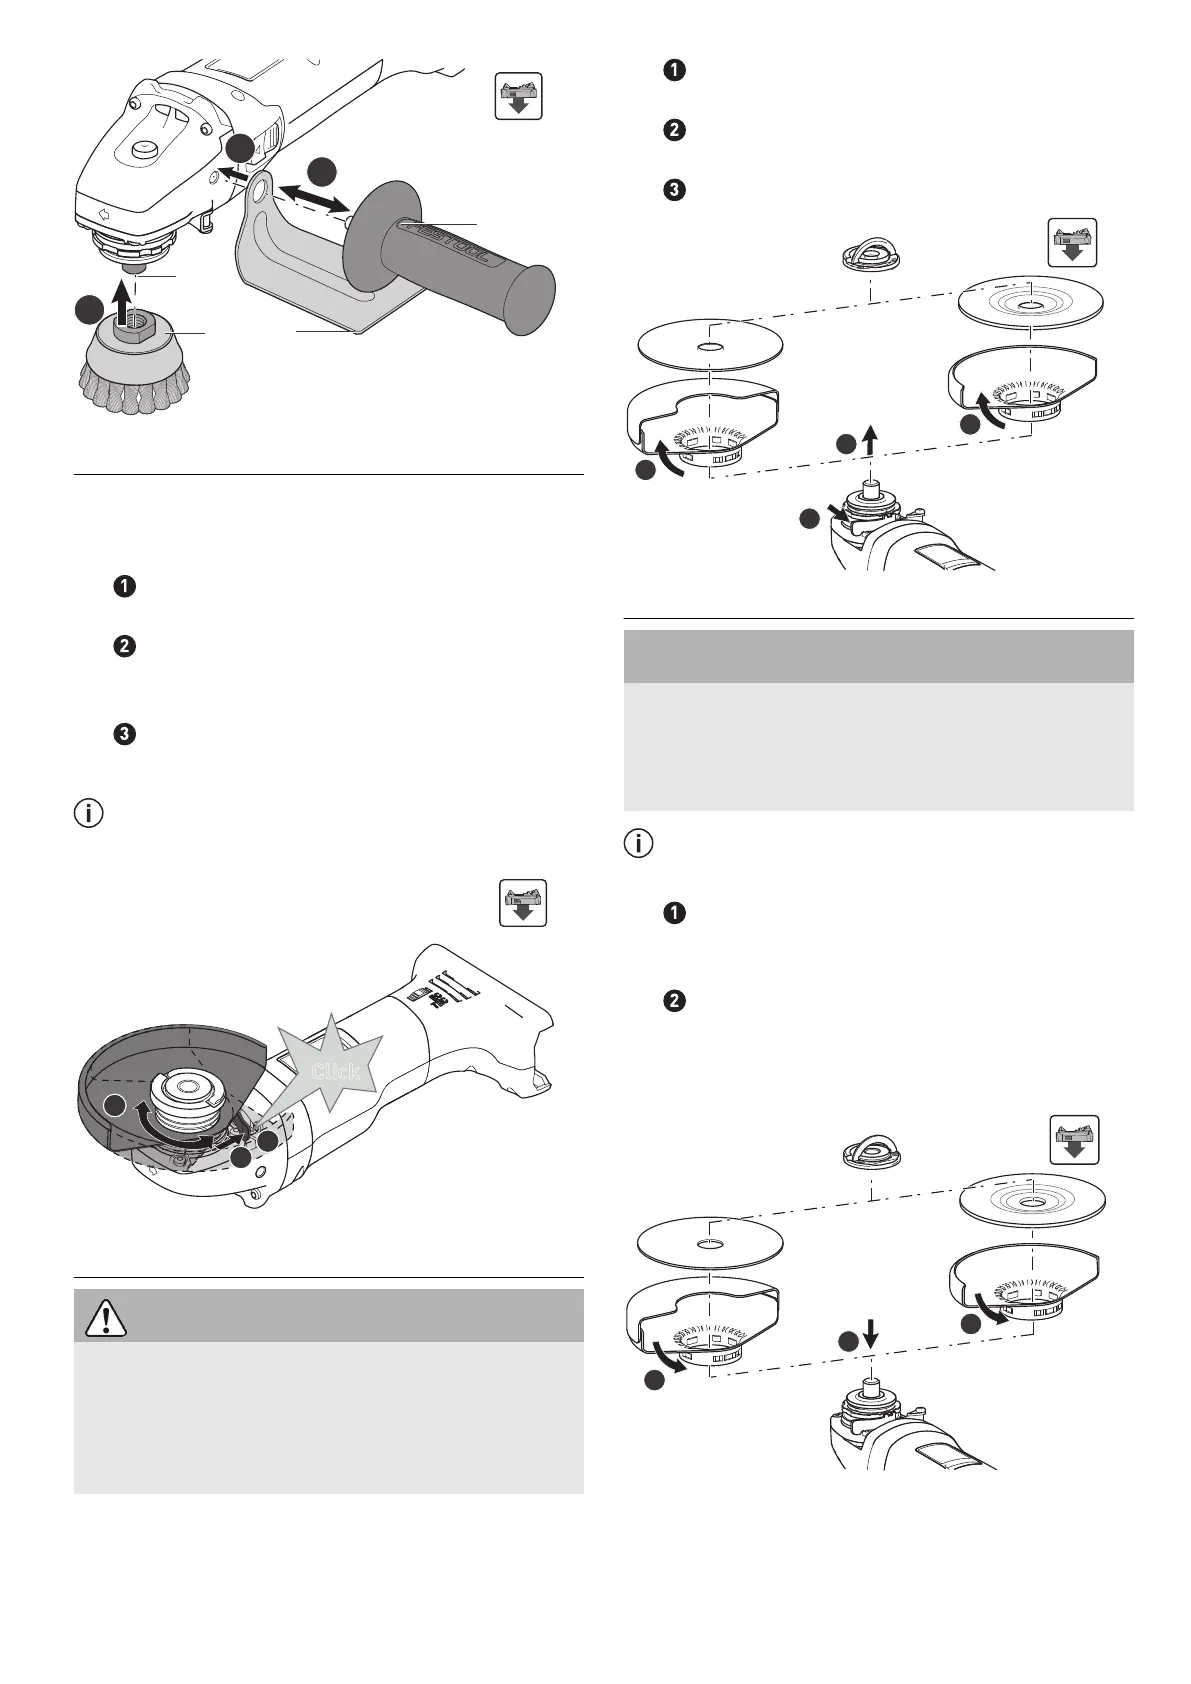
9.5 Removing the guard/cutting guard [8]
CAUTION
Risk of injury due to flying sparks and bro
ken cutting discs.
► For abrasive cutting, use the cutting guard
that is available as an accessory: See sec
tion 10.2
► Remove the sanding tool that has already
been fitted to the power tool: See section
9.2 .
►
Press and hold the locking lever on the
guard.
►
After passing the pressure point, turn
the guard forwards.
►
Remove the guard from the power tool.
9.6 Fitting the guard/cutting guard [9]
NOTICE
Signs of wear on the cutting guard.
► Before switching on the sanding tool, check
that it can move freely. The sanding tool
must not sand against the cutting guard.
Use the guard provided for the application
in each case.
►
Insert the guard in the front position.
Make sure that the position of the pin and
groove match.
►
Turn the guard to the required position
until the locking lever engages automatical
ly.
To fit the sanding tool, see section 9.2 .
English
15