Page 5 of 7
SYSTEM SETTINGS - MENU ITEMS
Press and hold SETUP to enter the setup menu. The following describes each available menu item.
LRN BEACON ID menu (learn beacon ID)
Each beacon is manufactured with a 4-digit unique identifier (beacon ID). This menu allows to bind
a new beacon to the handheld unit receiver. Currently the receiver is capable to handle up to 30
beacons.
• Enter SETUP > LRN BEACON ID
• Choose a free slot in the displayed list of beacon identifiers (ID1, .., ID30)
• Confirm the desired slot with ENTER
• power ON the new beacon and accept or discard its beacon ID when it appears on the LCD
SET ACTIVE ID menu (set active ID)
The receiver can track one beacon at a time. This menu allows to change the tracked beacon.
• Enter SETUP > SET BEACON ID
• Choose the desired beacon from the displayed list of beacon identifiers (ID1, .., ID30)
• Confirm with ENTER. The active beacon ID will be changed and displayed in the lower left corner
of the LCD
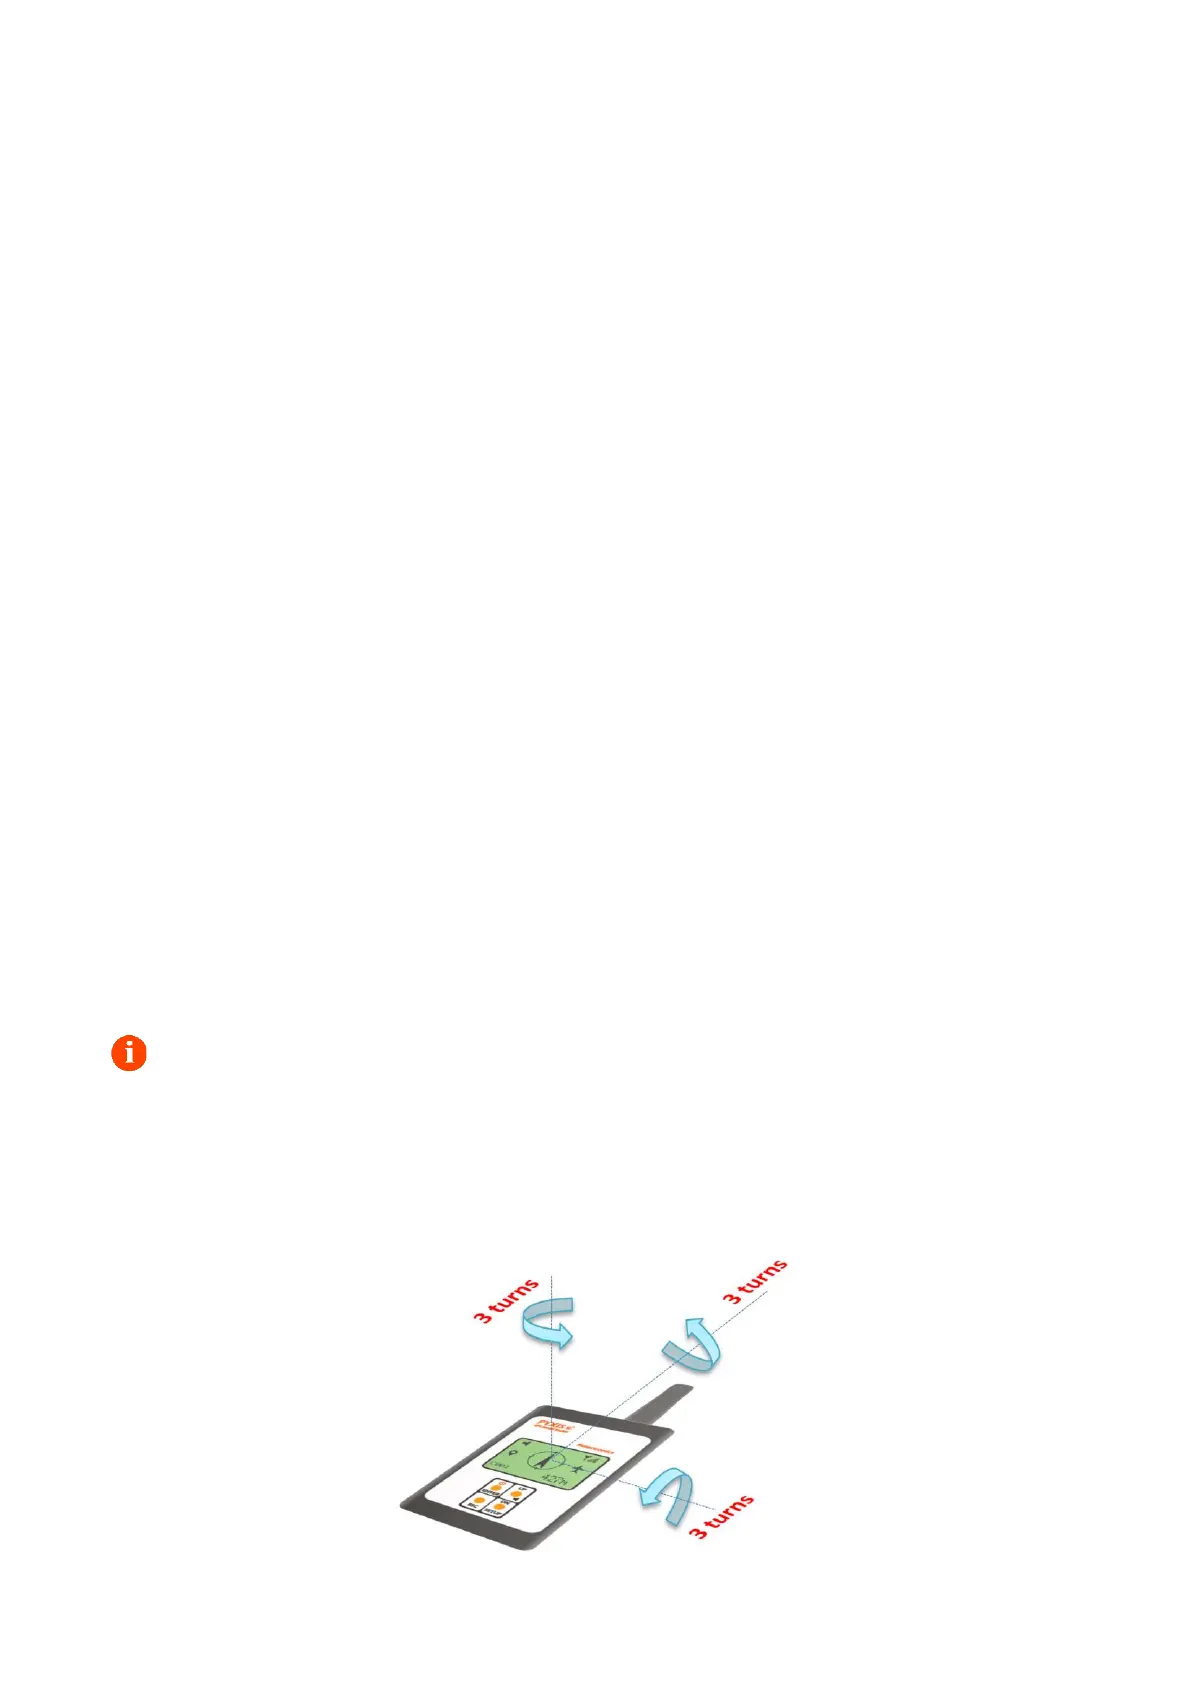
COMPASS CALIB menu (e-compass calibration)
This procedure is necessary to calibrate the integrated magnetometer and accelerometer sensors.
Calibrate the compass the very first time the receiver is used and check or repeat calibration from
time to time. It is advisable to recalibrate the compass when you move into different fields.
The compass calibration must be performed in an open area, away from magnetic fields or
metal objects. During the compass calibration a progress bar is displayed. The procedure ends
automatically after 20 seconds approx.
• Enter SETUP > COMPASS CALIB
• Rotate the receiver 3 or 4 times for each x, y, z axis in any order as indicated in the drawing
below
 Loading...