79-15169-00 Rev. A http://www.fiberstars.com Page 1 of 4
WPCRMR
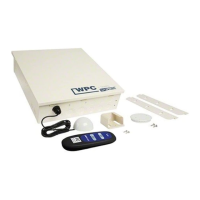
WPC REMOTE RECEIVER
FOR WPC1 AND WPC2 INSTALLATIONS
The WPCRMR is shipped with a label indicating the Channel Code. Check the Channel Code with the Channel
Code on the Remote Control. If the Codes do not match, it will be necessary to change the transmission code on
the WPCRMR AND/OR the WPC transmitter.
TRANSMITTER DIP SWITCHES – Remove all screws from rear of remote. Separate the bottom cover from the
top cover. Ensure that the rubber gasket does not come off of the receiver. Locate the DIP switch as illustrate
elow. Change the DIP switches according to the illustration below. Reassemble the transmitter in reverse order
of disassembly. When tightening screws, ensure that they are all finger tight first. Then gradually tighten the
screws until they are snug. Over-tightening will damage the receiver enclosure and may allow moisture to seep
inside.
RECEIVER DIP SWITCHES – NOTE: IF CHANGING CHANNEL CODE ON RECEIVER, PERFORM
CHANNEL CHANGE BEFORE INSTALLING INTO THE WPC UNIT. Unscrew the four (4) screws
located on the back of the receiver to release the cover. NOTE: Take notice of how the wires enter and exit the
receiver. Remove the cover and look on the PCB to locate the DIP switch as illustrated. Change the DIP switches
according to the illustration below. Reassemble the receiver in reverse order of disassembly.
NOTE: The four DIP switches have an ON and an OFF position. Chan
in
ust one DIP switch will chan
e
the code. MAKE SURE BOTH THE RECEIVER AND TRANSMITTER HAVE THE SAME DIP
SWITCH SETTINGS.
Receiver
screws
DIP switch
DIP Switch
Rear screws
15913
2 6 10 14
3 7 11 15
4 8 12 16
CHANNEL
DIP Switch
DIP SWITCH1234
Channel 1 OFF OFF OFF OFF
Channel 2 ON OFF OFF OFF
Channel 3 OFF ON OFF OFF
Channel 4 ON ON OFF OFF
Channel 5 OFF OFF ON OFF
Channel 6 ON OFF ON OFF
Channel 7 OFF ON ON OFF
Channel 8ONONONOFF
Channel 9 OFF OFF OFF ON
Channel 10 ON OFF OFF ON
Channel 11 OFF ON OFF ON
Channel 12 ON ON OFF ON
Channel 13 OFF OFF ON ON
Channel 14 ON OFF ON ON
Channel 15 OFF ON ON ON
Channel 16 ON ON ON ON
Note: Sample shown is of Channel 9