FZN 2505-E
12E N Machine assembly | Starting the tool | Hedge trimming
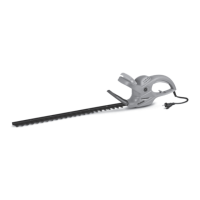
8. MACHINE ASSEMBLY
Protective guard and blade assembly
Slide the attached protective guard (Fig. 1 - point 2) onto the grooves in the hedge trimmer
Connection to the electric mains
The hedge trimmer should only be connected to a single-phase power supply powered by
alternating current.
Check whether the parameters of the power network match the values specified in the
tool’stype label.
Plug the power cord to an appropriate extension cable.
Create a loop and slide it through an opening in the rear handle and hitch it onto the cord
holder (Fig. 1 - point 5).
9. STARTING THE TOOL
ATTENTION! Warning!
Use the tool solely for purposes specified in the chapter Scope of Application.
Switching on the tool
Press the rear handle switch (Fig. 1 - point 6) and the front handle switch (Fig. 1 - point 3)
Switching off the tool
Release the switch (Fig. 1 - point 6) or (Fig. 1 - point 3).
Note:
The cutting blade brake stops the movement of the blades within 0.5 s, i.e. almost instantly.
Small flash in the area of upper vent holes is normal and poses no risk either for you or the
tool.
body and fasten it on both sides using the attached fixing bolts.
simultaneously with both hands.
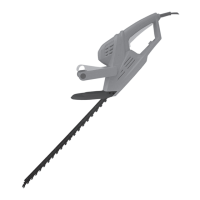
Handle adjustment
The rear handle can be adjusted to 4 horizontal positions. The
individual positions are 45° and 90°, right and left.
Pull the button (Fig. 2 - point 1) and set the desired position.
CAUTION! Make sure the adjustment button returns to its home position and the rear
handle is locked in one of the positions. If this is not the case, the scissors will not start.
(Pic. 2)