7
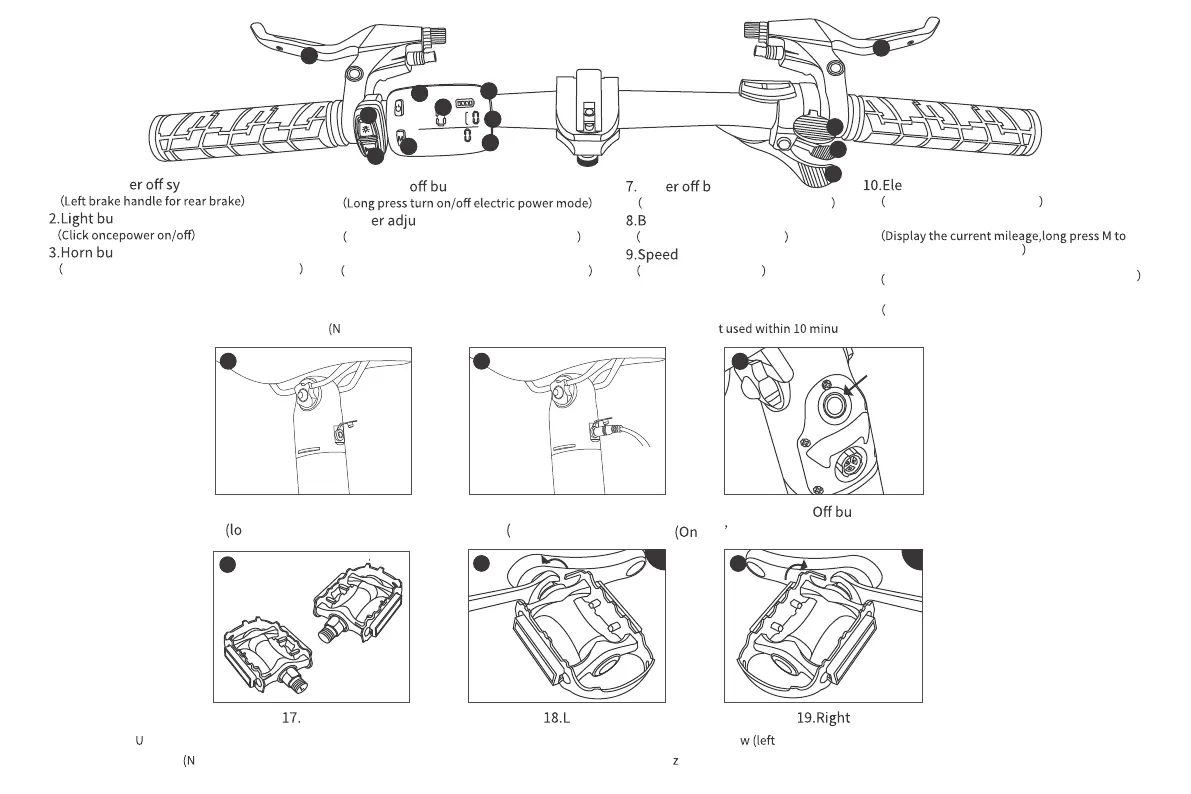
1.Brake pow stem
tton
tton
Click the button once to signal the whistle
4.Power on/ tton
5.Pow stment
Click once to shift gears, a total of 3 gears
6.Thumb shifter
Turn the handle outward to reduce the gear
Pow rake
Right brake handle for front brake
attery level
Display remaining battery
Display current speed
ctric assist gear
Display power gear number
11.Odometer
display the total mileage
12.Thumb shifter
Turn the handle outward to increase the gear
13.Electric-assist throttle
Provide electric assistant)
ote: The bike will automatically shut down when it is stationary if no tes.)
se a 15mm spanner to screw the pedal spindle into the thread hole and tighten it in the direction of the arro counterclockwise, right and clockwise, as shown).
ote: When installing the pedal, be aware of the left and right, align the installation hori ontally to prevent the pedal from slipping out of the crank.)
1
3
5
7
1
2
3
4
5
9
8
6
12
7
10
11
13
16.On/ tton
ce it s on, the tail light will turn on as well.)
16
18
L
R
19
17
R
Pedal eft
14.Battery charging port
cated below the saddle)
15.Insert the charger port
Standard charger)
1514