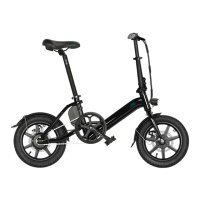
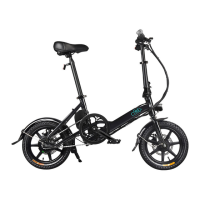
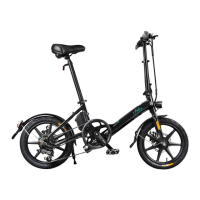
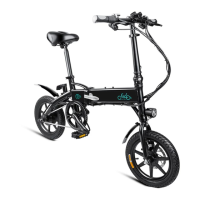
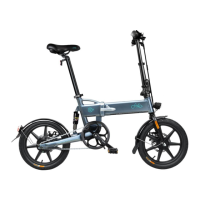
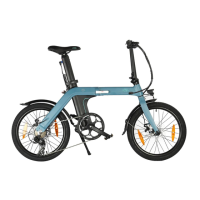
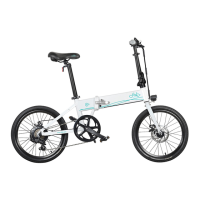
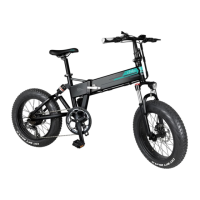
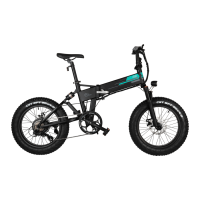
This document describes the Fiido D3Pro Electric Bike, a compact and foldable electric bicycle designed for urban commuting and leisure.
Function Description
The Fiido D3Pro is an electric bicycle that offers both pedal-assist and electric-only modes, providing flexibility for various riding conditions. It is designed to be user-friendly, with features that enhance safety, convenience, and portability. The bike incorporates a power-off system for both front and rear brakes, a light button, and a horn button for signaling. The display shows current speed, remaining battery, and odometer readings (current and total mileage). An electric-assist throttle is available for ease of use. The bike is equipped with a USB charging port for external devices.
Important Technical Specifications
- Electric Bike System: Fiido System
- Electric Motorcycle Support: Yes
- Power Assist System: 3 Gears Assist
- Max Load Weight: 120kg
- Maximum Speed: 25km/h
- Maximum Range: Power assisted models up to 60KM
- Battery: High quality lithium-ion battery, 36V 5.2/7.8Ah options
- Battery Adaptation: DC 42V2A
- Recharge Time: 5 hours
- Drive Type: Rear Drive
- Frame Material: Aluminum Alloy
- Front Brake: Mechanical Disc Brakes
- Rear Brake: Mechanical Disc Brakes
- Brake Type: Mechanical Disc Brakes
- Chain: KMC S1
- Rear Hub/Rated Power: XiongDa Motor/250W
- Rims: Alloy
- Wheel Size: 14"
- Tyre Size: 14×2.125inch
- Tyres: Cheng Shin Tire
- Net Weight: 17.5kg
- Folded Size: 126cm × 35cm × 60cm
- Unfolded Size: 126cm × 58cm × 105cm
- Manufacturing Tolerances: The above data allow for 5% manufacturing tolerances.
- Product Variations: After receiving the goods, there may be some differences between individual accessories and display drawings, which are different due to the different batches, and do not affect the use.
Usage Features
Safety First:
- Always wear a suitable and safe helmet.
- Wear clothes with fluorescent and reflective stripes when riding at night.
- Adhere to traffic rules and do not exceed the speed limit.
- Avoid touching the charging hole with metal objects to prevent short circuits.
- When emergency braking, apply the rear wheel brake first, then the front wheel, especially at high speeds, to prevent tipping over.
- Ensure the frame lock, standpipe lock, and seat tube lock are securely fastened before riding.
- Check tire pressure and inflate adequately for a safe and comfortable ride.
Optimizing Endurance Mileage:
- Utilize assist mode.
- Avoid frequent braking and zero starting.
- Do not overload the bicycle.
- Maintain adequate tire pressure.
Charging:
- Ensure no foreign matter is in the charging port.
- Connect the charger to the bicycle first, then to the AC power to prevent sparking.
- For long-term storage, turn off the main switch and fully charge the battery to prevent power loss.
Folding and Unfolding:
- Unfolding:
- Fold the riser to the upper end, lock the riser folding handle, adjust the riser safety hook, and adjust the T handle position.
- Open the seat tube clamp, insert the seat tube to the marking line, adjust seat height, and fasten the clamp.
- Confirm all locks (frame, standpipe, seat tube) are secured.
- Ensure the brake system is normal and tires are adequately inflated.
- Release the handlebar clamp, adjust the handlebar up/down (ensuring insertion depth is above the scale mark), lock the clamp, and release the handlebar clamp again.
- Rotate the handlebar to the proper position and lock the clamp.
- Release the seat post clamp, insert the pump into the proper position, and lock the clamp.
- Folding:
- Open the quick lock on the head end to make the handle perpendicular to the frame.
- Open the quick lock on the stem, lower the riser, and lock the quick lock.
- Open the seat tube quick lock, decentralize the seat, and lock the quick lock. (Note: Both riser and seat tube have MAX/MIN marks; use within safe range).
- Turn the standpipe buckle clockwise, pull down, and fold the front.
- Open the frame holder of the fuse buckle, pull the fold, and fold the frame.
Pedal Installation:
- Use a 15mm open spanner to clamp the pedal shaft core.
- Tighten the left pedal counterclockwise and the right pedal clockwise.
- Ensure correct left/right pedal orientation and horizontal alignment to prevent slipping.
Pumping Instructions:
- Release the quick clamp on the seatpost pump.
- Take out the pump.
- Twist the bottom of the inflator until fully twisted.
- Pull out the lower side of the pump.
- Twist the tire inflation ear caps.
- Align one side of the pump with the valve core of the tire.
- Squeeze the pump into position.
- Lock the pump towards the downside.
- Open the place where you can step on the bottom of the pump.
- Start pumping by stamping the pump.
Maintenance Features
- Environmental Protection: Avoid prolonged exposure to sun or rain. Do not store in places with high temperature or corrosive gas to prevent chemical corrosion of electroplating parts and paint, and damage to electrical components.
- Battery Care: When not in use for extended periods, turn off the main switch and charge the battery fully. Avoid storing the battery in a state of power loss to prevent serious damage.
- Regular Checks: Before riding, ensure the brake system is normal and tires are adequately inflated.
- Cleaning: Keep the bicycle clean and free from corrosive substances.
This manual emphasizes the importance of safety, proper usage, and basic maintenance to ensure a long and enjoyable experience with the Fiido D3Pro Electric Bike.