3
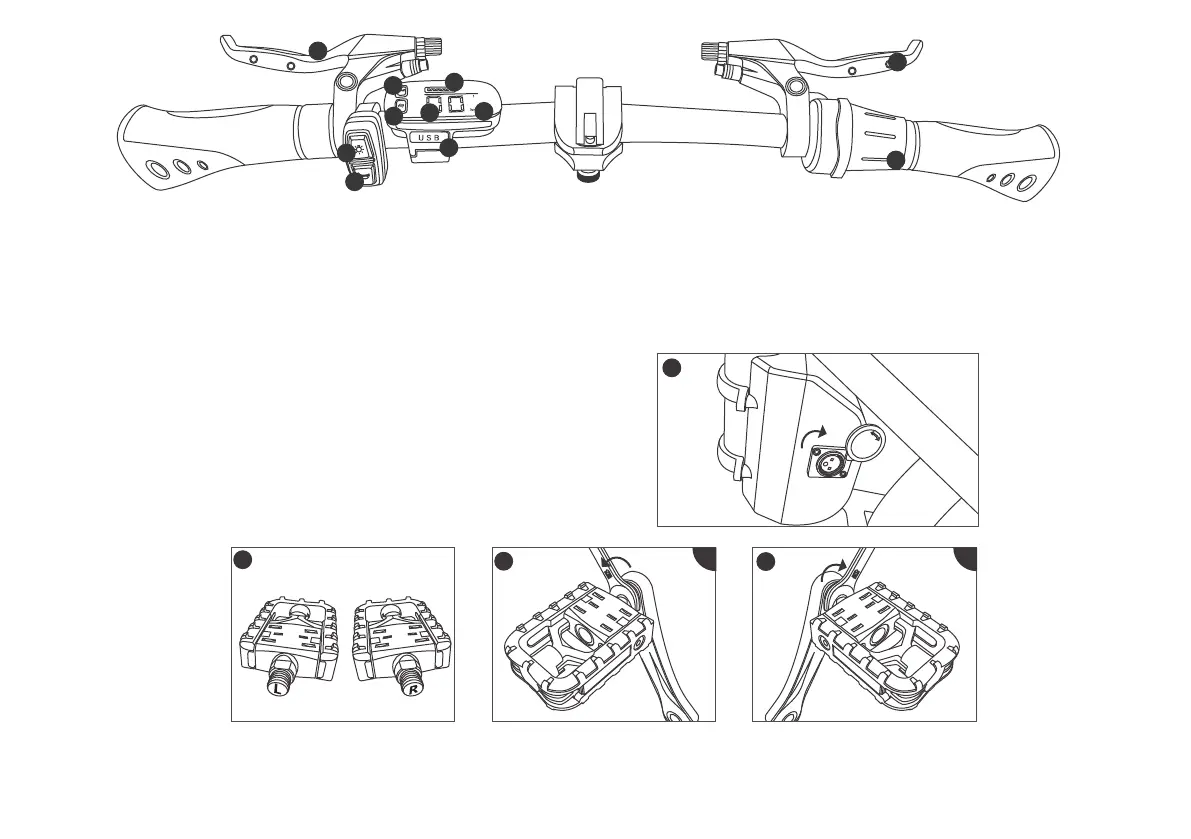
12.Battery charging port
(located behind the middle tube of the frame)
1.Brake power off system
(Left brake handle for rear brake)
2.Light button
(Click oncepower on/off)
3.Horn button
(Click the button once to signal the whistle)
7.Provide electric assistant
(Electric-assist throttle)
8.Speed
(Display current speed)
9.Battery power
(Display remaining battery)
4.Power on/off button
(Long press turn on/off electric power mode)
5.Power adjustment
(Click once to shift gears, a total of 3 gears)
6.Brake power off system
(Right brake handle for front brake)
10.Odometer
,egaelim tnerruc eht yalpsiD(
long press M to display the total mileage)
11.USB charging port
12
13
14
15
Use a 15mm open spanner to clamp the pedal shaft core and tighten it in the direction of the arrow (left counterclockwise, right clockwise, as shown).
(Note:When installing the pedal, be aware of the left and right, align the installation horizontally to prevent the pedal or crank slip)
13.Pedal 14.Left 15.Right
L R
6
7
1
2
3
4
5
9
8
10
11
(Noted: After the bike is stationary for 10 minutes, the display will automatically shut down and enter sleep mode)