PRIMERO LEAN ESTE MANUAL
Estas instrucciones se sumministran para permitir un fácil montaje de la quitasol RIO y para su seguridad. Hay que seguir
de forma exacta las instrucciones suúinistrada. Si no lo hicieran se pueden producir daños a objetos o causar heridas a
personas. En caso de duda consultar siempre a una persona técnicamente experta.
Este símbolo indica informacíon de grande importancia. Prestar mucha atención a lo que se encuentra donde
aparace este símbolo. Esto no quiere decir que las otras infomaciones que se encuentran ne este manual no
sean importantes.
Guarden este manual para poderlo utilizar en futuro.
INSTRUCCIONES IMPORTANTES PARA LA SEGURIDAD
SE APLICA A TODO EL CONTENIDO DE ESTA SECCIÓN
1. INSTRUCCIONES - Leer y seguir completamente todas las instruccíones. Se pueden producir daños o causar heri-
das si el quitasol no se ha montado o no se utiliza según las instruccíones. Para garantizar un empleo seguro es
muy importante que el utilizador haya leído completamente y por adelantado las instruccíones. No dejar utilizar el
quitasol por pesonas que no tengan práctica en los aspectos que conciernen la seguridad del quitasol.
2. PRECAUCIONES - El quitasol "RIO" es una protección contra el sol, no es una protección contra toda la inclemen-
cie. Al llegar el viento fuerte o en caso de temporales se debe cerrar y quitar el quitasol de la estructura, así como
en presencia de lluvia intensa o de nieve. Cerrar siempre y quitar el quitasol de la estructura por la noche, cuando
no se está en casa y cada vez que no se puede controlarlo. La base debe ser lastreada con un peso minimo de 120
kg (240 libras). Quitar siempre la manivela del cabestrante y no dejarla al alcance de los niños.
INSTRUCCIONES DE MONTAJE
READ THIS HANDBOOK IMMEDIATELY
These instructions are provided for your safety and to facilitate the assembly of the RIO umbrella. Please follow the instruc-
tions carefully. Failure to do so may result in injury or damage. If in doubt contact your dealer.
This symbol indicates very important information. Follow instructions accompanied by this symbol with extreme
care. This does not mean that the other information contained in this handbook is not important.
Keep this handbook for future reference.
IMPORTANT SAFETY INSTRUCTIONS
APPLIES TO ALL IN THIS SECTION
1. INSTRUCTIONS - Please read and follow all the instructions. Damage or injury may result if the umbrella is not
assembled and used as described herein. For safe use it is essential that anyone using the umbrella read all the ins-
tructions in advance. Only persons familiar with the safety aspects should operate this umbrella.
2. PRECAUTIONS - The RIO umbrella serves as a protection from the sun, not as protection from all bad weather. It
must be closed and removed from the frame in the presence of strong winds or thunderstorms, as well as heavy
rain or snow. Always close and remove the umbrella from its frame at night, when you are not at home and whene-
ver it is not under control. The base must be weighed down with a minimum weight of 120 kg (240 Ibs).
ASSEMBLY INSTRUCTIONS
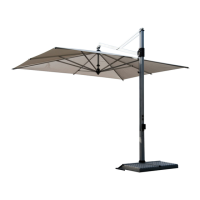
COMPONENTES (fig. 1):
A: Componente (A) de la base - B: Componente (B) de la
base - B': Componente (B') de la base - C: Tubo de la base
- D: Tubo vertical - E: Tubo inclinado - F: Quitasol - M: Bolsa
herramienta.
MONTAJE DE LA BASE (fig. 2)
Montar la base como se indica en la figura 2. Disponer las 4
baldosas en los especiales huecos de la base.
IMPORTANTE: los 2 agujeros (a) del tubo de la base (C)
deben corresponder con los dos agujeros (a) del compo-
nente (B) de la base.
Cerrar con fuerza los bulones de la base.
Lastrear la base con un peso de almenos 120 KG (240
libras).
MONTAJE DE LA ESTRUCTURA (fig. 3 - 3a - 3b - 3c)
1. (fig 3a) introducir el tubo inclinado (E) en el tubo vertical (D)
y bloquear las dos partes con el bulón (P).
Cerrar con fuerza el bulón (P).
2. (fig. 3b) introducir el tubo vertical (D) en el tubo de la base (C).
IMPORTANTE: el tubo vertical (D) se debe introducir a fondo
en la hueco cuadrado del anillo de orientación (0).
3. (fig. 3c) tomando el quitasol introducir la conexión del qui-
tasol (R) en el tubo inclinado (E).
La conexión del quitasol (R) se debe introducir com-
pletamente en el tubo inclinato (E).
4. Para el montaje del montante vertical D con la conexiòn
de la sombrilla R poner cuidado que la posiciòn del botòn
automàtico d’ sea la indicada en la fig.3 a.
5. (fig. 3) hacer pasar el cable de acero (Z) en la polea (S).
Su RIO está listo.
COMO UTILIZAR SU “RIO”
ABERTURA DEL QUITASOLSOL (fig.3 - 3d - 9)
IMPORTANTE: Antes de abrir lel quitasol quitar el lazo y abrir
ligeramente con las manos el quitasol actuando en las varillas.
Para abrir la sombrilla tirar suavemente la manilla G y fijar la
cuerda en el dispositivo de bloqueaje d’ como indicado en
la fig. 3d.
Con el fin de dar estabilidad a la sombrilla, fijar la cobertura
a la estructura mediante el botòn automàtico
d’ como indi-
cado en la fig.9.
CIUDADO: para evitar de dañar la cobertura, recor-
darse de desenganchar el tejido desde la estructura
antes de cerrar la sombrilla.
ROTACION DEL QUITASOL ALREDEDOR DE LA BASE
(fig. 2 - 4)
La estructura puede rodar alrededor de su base de 360° y se
puede fijar en 20 posiciones distintas mediante introduc-
ción de la clavija (U) en el anillo de orientación (0) (fig. 4).
IMPORTANTE: La clavija (U) tse debe introducir en el aguje-
ro de orientación (0) en correspondencia del agujero (a) del
tubo de la base (C) (fig. 2).
MANTENIMIENTO Y CUIDADOS
REMOCIÓN DE LA COBERTURA DEL QUITASOL (fig. 5 - 6 - 7)
1. (fig. 5) destornillar el tornillo (V) de la manera a soltar la
cuerda (Z).
2. (fig. 6) desenganchar los 6 tirantes (X) de las 6 varillas (W).
3. (fig. 7) quitar el tornillo (V') de la conexión del quitasol (R).
4. Sacar la conexión del quitasol (R) del tubo del quitasol (J).
5. Sacar la cuerda (Z) del tubo del quitasol (J) y de la
conexión del quitasol (R).
6. Sacar la cobertura del tubo del quitasol (J).
LIMPIEZA DE LA COBERTURA
1. Quitar la cobertura del quitasol.
2. Lavar la cobertura a mano con agua y jabón a 30 °C (90 °F).
3. Secar la cobertura y no planchar.
4. Volver a montar la cobertura de la estructura.
SUSTITUCIÓN DE LA VARILLA (Fig 6 - 8 - 8a)
1. Desenganchar los 6 tirantes de las 6 varillas (W) (fig. 6).
2. Desenganchar la varilla a sustituir (W) del componente (Y')
tirando con fuerza hacia lo alto (fig. 8).
3. Rodar la varilla (W) de 180° y desenganchar la otra extremi-
dad del doblenuez (Y") tirando con fuerza hacia lo alto (fig. 8a).
4. Sustituir la varrilla volviendo a hacer al contrario las ope-
raciones descritas arriba.
COMO GUARDAR EL QUITASOL AL FINAL DE LA TEM-
PORADA
Al final de la temporada antes de reponer su RIO limpiar la
estructura con un paño húmedo y secarla.
Verificar la integridad de todos los componentes. En
caso que algunas partes estén dañada dirigirse al
comerciante dónde se ha efectuado la adquisición
para pedir las piezas de recambio correspondientes.
Barnizar de nuevo las partes dañadas. Para una perfecta
conservación de RIO durante los mese invernales se acon-
seja reponerlo en lugar seco.
IMPORTANTE: para evitar daños derivados de mohos o oxi-
daciones no reponer nunca RIO cuando mojado o húmedo.
RIO ALU
E
COMPONENTS (fig. 1):
C: Base pole
D: Vertical pole
E: Cantilever pole
F: Umbrella
M: Bag of hardware.
BASE ASSEMBLY (fig. 2)
Follow the instructions of the provided base.
Tighten the base bolts well.
Ballast the base with a weight of at least 120 KG (240
Ibs).
FRAME ASSEMBLY (fig. 3 - 3a - 3b - 3c)
1. (fig 3a) Slip the cantilever pole (E) into the vertical pole (D)
and block the two parts with the bolt (P).
Tighten the bolt (P) well.
2. (fig 3b) Insert the vertical pole (D) in the base pole (C).
IMPORTANT: the vertical pole (D) must be pushed all the way
into the square housing of the adjustment ring (0).
3. (fig. 3c) grip the umbrella and slip the umbrella attachment
(R) into the cantilever pole (E)
The umbrella attachment (R) must be pushed all the
way into the cantilever pole (E).
4. When assembling the vertical pole (D) with the attachment
(R) proceed in such way that the position of the pressure
button d’ as indicated in (Fig.3a)
5. (fig.3) pass the cord (Z) through the pulley (S).
HOW USE YOUR “RIO”
OPENING THE UMBRELLA (fig.3 - 3d - 9)
IMPORTANT: Before opening the umbrella remove the tie
string and with your hands on the ribs slightly open the
umbrella.
To open the umbrella , gently turn the handle G and fix the
cord in the cleat d’ indicated in (Fig.3d).
To give stability to the sunshade fix the cover with the pres-
sure button
d’ indicated in (Fig.9)
IMPORTANT: to avoid damages release the cover from
the frame before closing the umbrella.
ROTATION OF THE UMBRELLA AROUND THE BASE (fig.
2 - 4)
The frame can rotate 360° around the base and can be fixed
in 20 different positions by inserting the key (U) into the
adjustment ring (0) (Fig. 4).
IMPORTANT: The key (U) must be inserted into the adjust-
ment ring (0) at hole (a) of the base pole (C) (fig. 2).
MAINTENANCE AND CARE
REMOVING THE COVER OF THE UMBRELLA (fig. 5 - 6 - 7)
1. (fig. 5) undo screw (V) and free the cord (Z).
2. (fig. 6) release the 6 tabs (X) from the 6 ribs (W).
3. (fig. 7) remove the screw (V') from the umbrella attachment
(R).
4. Remove the umbrella attachment (R) from the umbrella
pole (J).
5. Remove the cord (Z) from the umbrella pole (J) and from
the umbrella attachment (R). In this way you can remove it
(G) from the umbrella.
6. Remove the cover from the umbrella pole (J).
WASHING THE COVER
1. Remove the cover from the umbrella.
2. Wash the cover by hand in lukewarm water 30 °C (90 °F).
3. Allow the cover to dry but do not tumble dry or iron.
4. Replace the cover on the frame.
CHANGING A RIB (fig. 6 - 8 - 8a)
1. Release the 6 tabs from the 6 ribs (W) (fig. 6).
2. Release the rib to be changed (W) from the housing (Y')
pulling forcefully upwards (fig. 8).
3. Rotate the rib (W) 180° and release the other end from the
band (Y") pulling firmly upwards (fig. 8a).
4. Change the rib repeating the above operations in reverse.
STORING THE UMBRELLA AT THE END OF THE SEASON
At the end of the season, before storing your umbrella away,
clean the frame with a damp cloth and dry.
A Check that no parts are damaged. Should any parts
be damaged contact the dealer where it was purcha-
sed and order the spare parts.
Touch up any chipped paint. For perfect conservation of the
RIO during the winter months store in a dry place.
IMPORTANT: to avoid damage caused by mould or oxidation
never put your RIO away when wet or damp.
RIO ALU
GB
FIMistruzioniRIO 6-03-2009 14:42 Pagina 2
 Loading...