Patent Pending
Note: All power connections to be installed to local/national codes by a Certified Electrician. Finelite, Inc. • 30500 Whipple Road • Union City, CA 94587-1530 • (510) 441-1100 • Fax: (510) 441-1510 • www.finelite.com
7 of 13
© 2018 FINELITE, INC. ALL RIGHTS RESERVED. Form CE - 98532. 03/18
HP-2 / HP-4 / HP-6 Recessed or Regressed Spackle & Visible Flange Mitered Corner
Installation Instructions
This is a hypothetical build to show the capabilities of this luminaire family and mount type. Your build may vary.
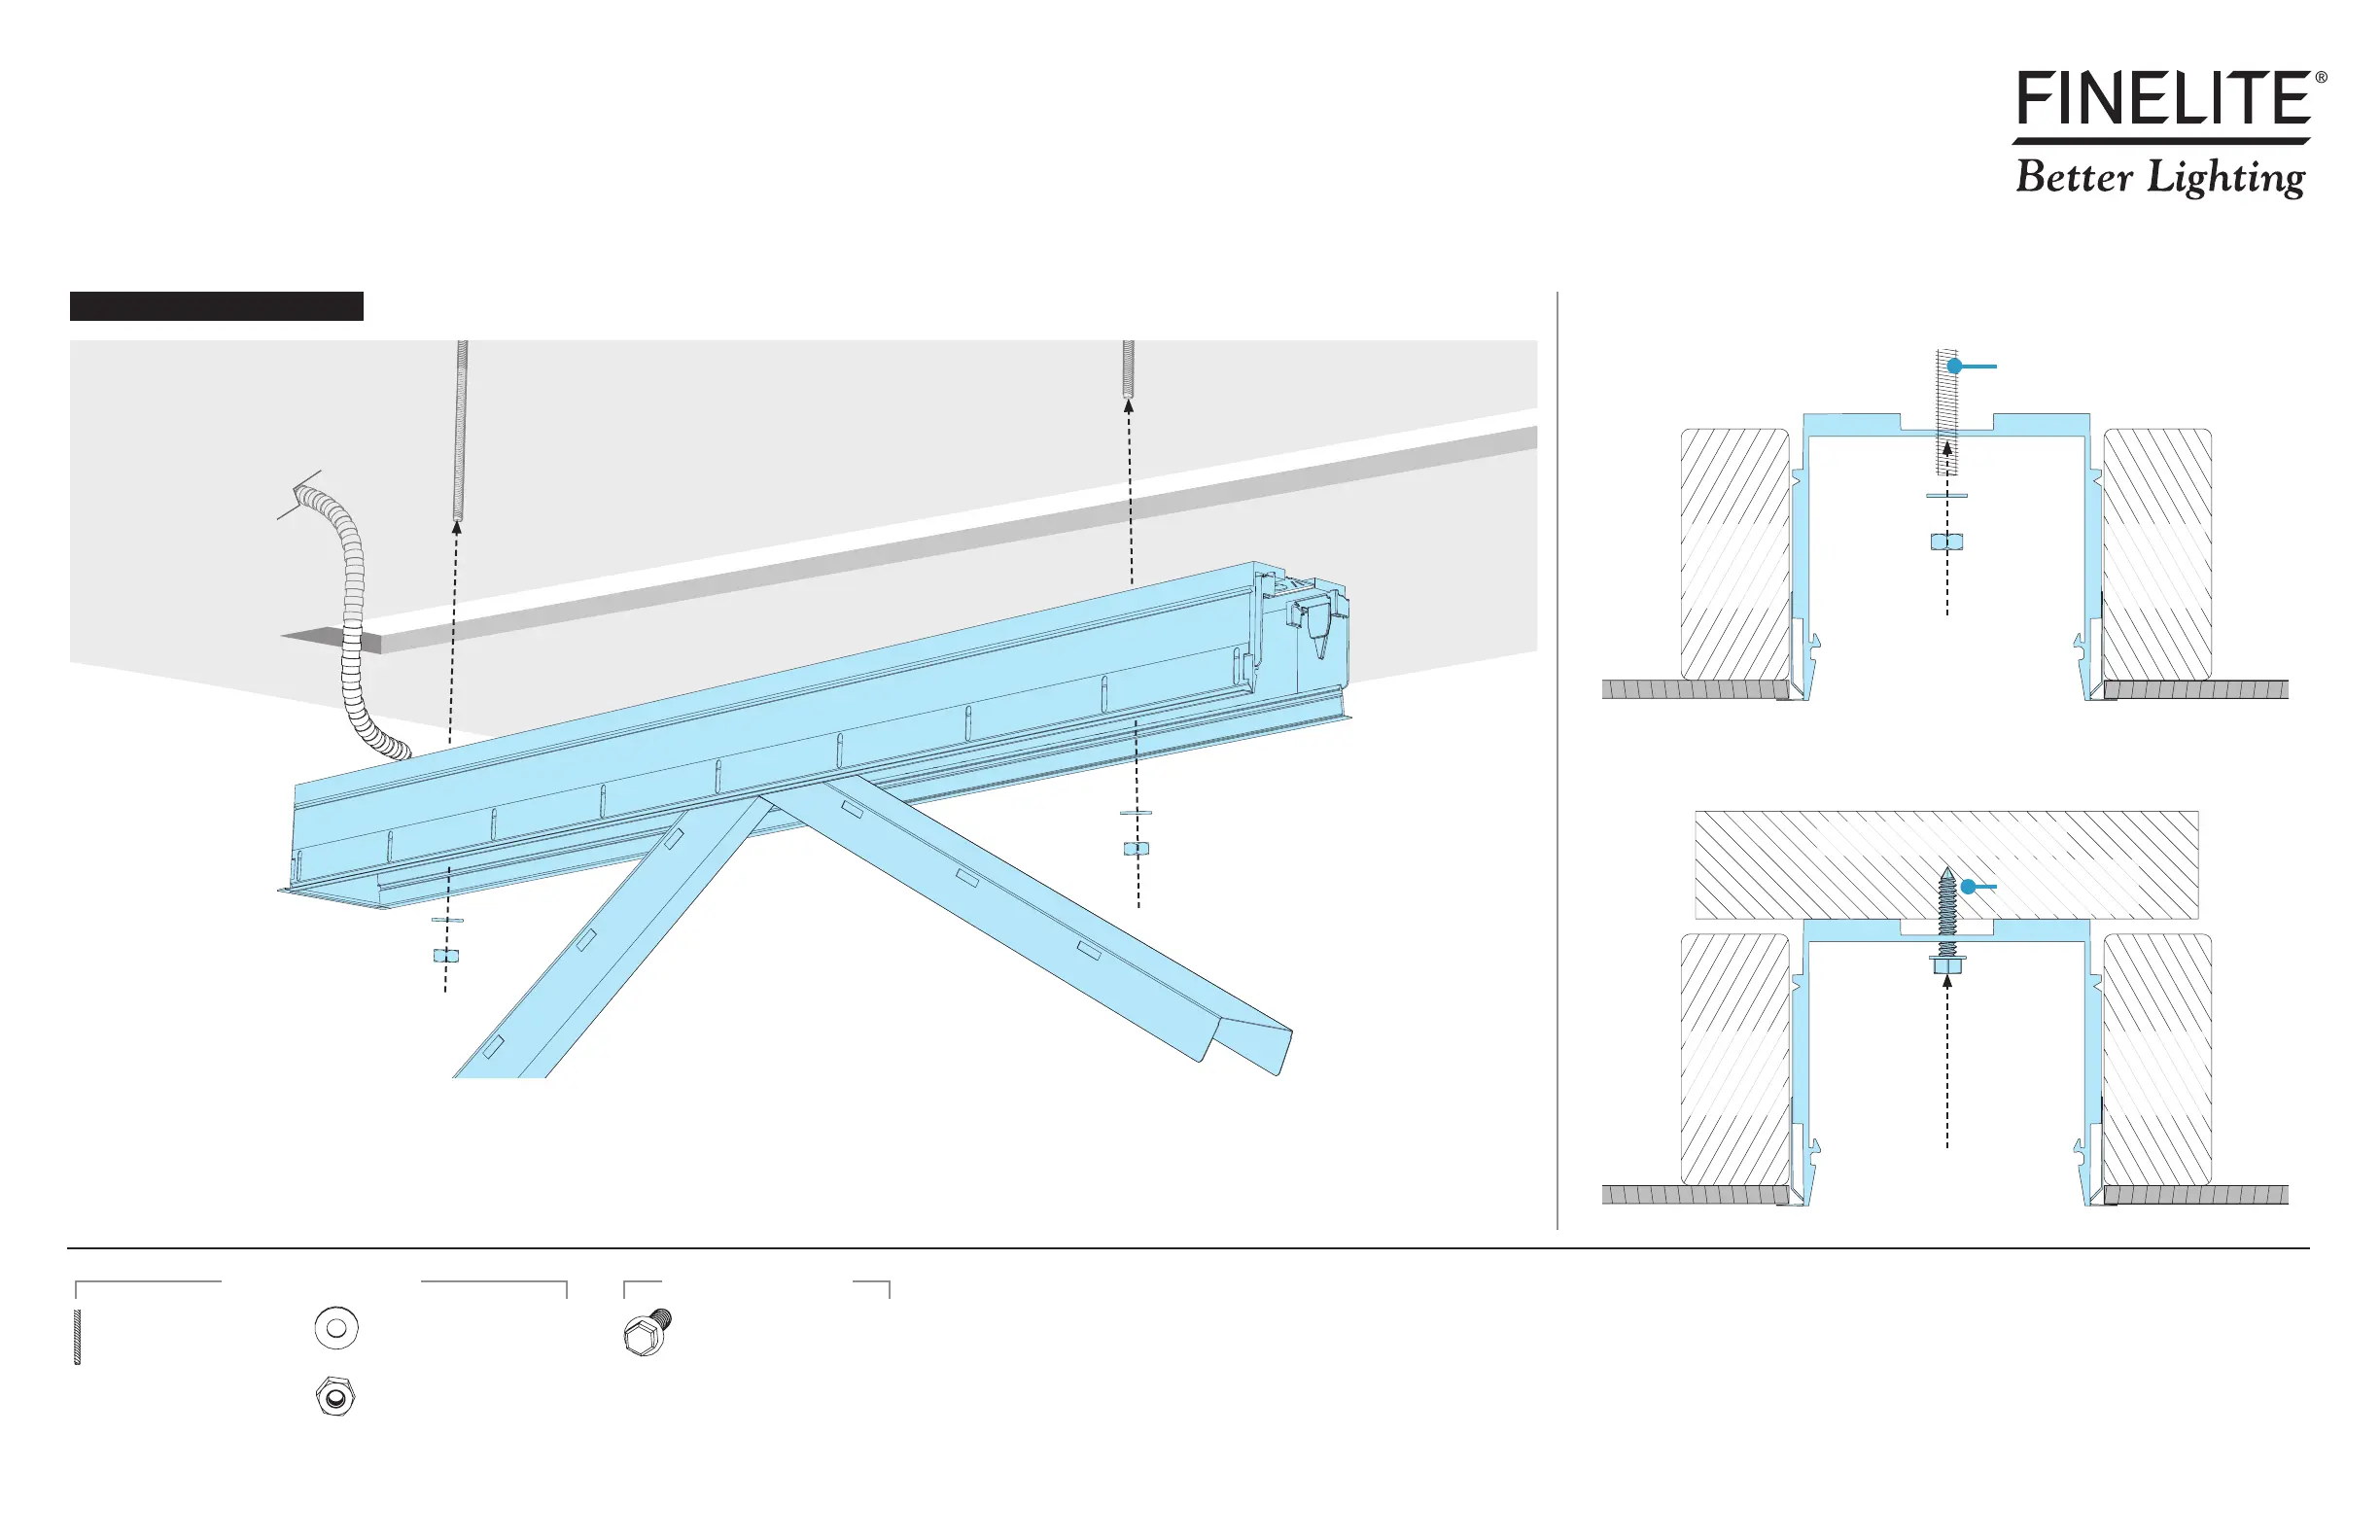
Step 4 - Mounting Starter to Structure
Option 1 (Shown) - Mount to Threaded Rod
• Align threaded rods with mounting holes and slide luminaire into wall/ceiling.
• Install 1/4"-20 nut and 1/4"-20 washer onto 1/4"-20 threaded rod.
• CRITICAL: If installing a joiner luminaire in the next step, leave the nut loose,
allowing the luminaire to hang out of ceiling at an angle.
• If there is no joiner. PROCEED TO STEP 7.
Option 2 - Mount to Structure
• Slide luminaire into wall/ceiling and mount to structure support with hardware
appropriate for the structure type.
• CRITICAL: If installing a joiner luminaire in the next step, leave the bolt/screw
loose, allowing luminaire to hang out of ceiling at an angle.
• If there is no joiner. PROCEED TO STEP 7.
Ceiling
Starter
1/4"-20 Threaded Rod
(by others)
Drywall Ceiling Drywall Ceiling
Drywall Ceiling Drywall Ceiling
Option 1 (Shown) - Mount to Threaded Rod
Option 2 - Mount to Structure
1/4"-20 Lag Bolt
(by others)
Support
Blocking
(by others)
Support
Blocking
(by others)
Support
Blocking
(by others)
Support
Blocking
(by others)
Structure Support (by others)
B. Mount Starter to Structure
1/4"-20 Washer
(by others)
1/4"-20 Nut
(by others)
Threaded Rod
(by others)
1/4"-20 Lag Bolt
(by others)
Mounting Option 2Mounting Option 1

 Loading...