21
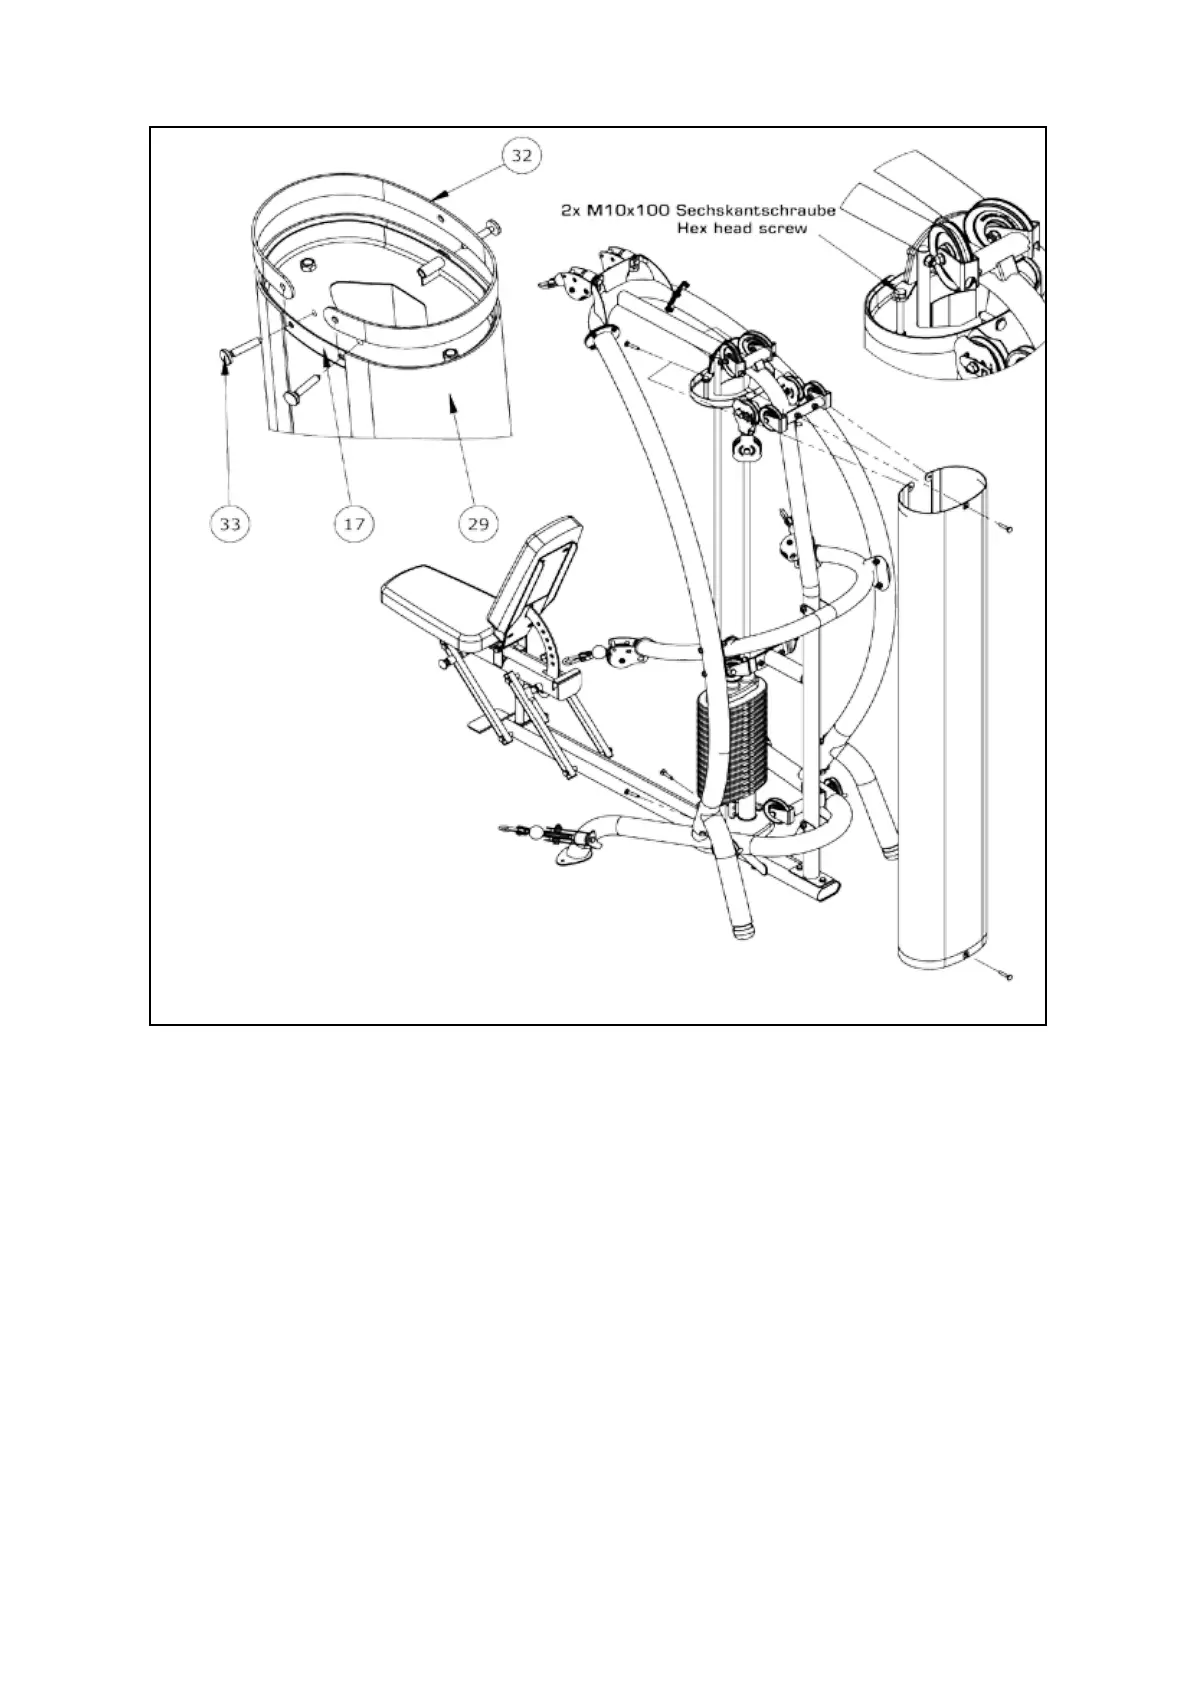
Schritt / Step 17
A) Assemble the top shroud plate (17) with two hex head screws
(68) in a lower position, so that the shroud can be assembled
easily.
B) Slide the C shaped Shroud Bracket into the pocket at one end
of Shroud. (Pocket seam should
face the inside). Work the shroud around the bracket until the
opening in the back of the shroud lines up with the hole on the
back of the bracket. Repeat this on the opposite end of the
shroud.
C) Now position the shroud assembly around the upper and
lower Shroud Mount Plates by working around the guide rods
and stack. Align the holes at the top and bottom brackets with
the holes in the plates and insert T-Pins (33) in each hole (3 on
top and 3 on bottom).
D) Secure the Top Shroud Plate (17) using the 2-M10x100
Shroud Tensioning Bolts on the Top Beam Assembly (16).
Stretch the shroud tight by threading the bolts at the top. Work
between the 2 bolts to adjust each side evenly.
A) Fixieren Sie die obere Halterung für Gewichteverkleidung (17)
mit zwei Sechskantschrauben (68) relativ weit unten, sodass Sie
die Verkleidung ungespannt anbringen können.
B)Führen Sie die Halterung (32) für die Gewichteverkleidung
oben und unten von einer Seite aus in den Saum der
Gewichteverkleidung (29) ein. Achten sie darauf, dass der Saum
nach innen zeigt.
C) Positionien Sie nun die Gewichteverkleidung (29) um die
obere und untere Gewichteverkleidungsein- stellungsplatte (17).
Positionieren Sie die Befestigungslöcher der Gewichteverkleidung
(29) über den Löchern der Gewichteverkleidungseinstellungs-
platten (17). Fixieren Sie die Gewichteverkleidung (29) nun
indem Sie oben und unten je drei T-Stifte (33) eindrücken.
D) Um die Gewichteverkleidung (29) zu spannen, drehen Sie
abwechselnd an beiden Sechskantschrauben in der oberen
Gewichteverkleidungsplatte (17), bis die Gewichteverkleidung
(29) gespannt ist.
 Loading...