16
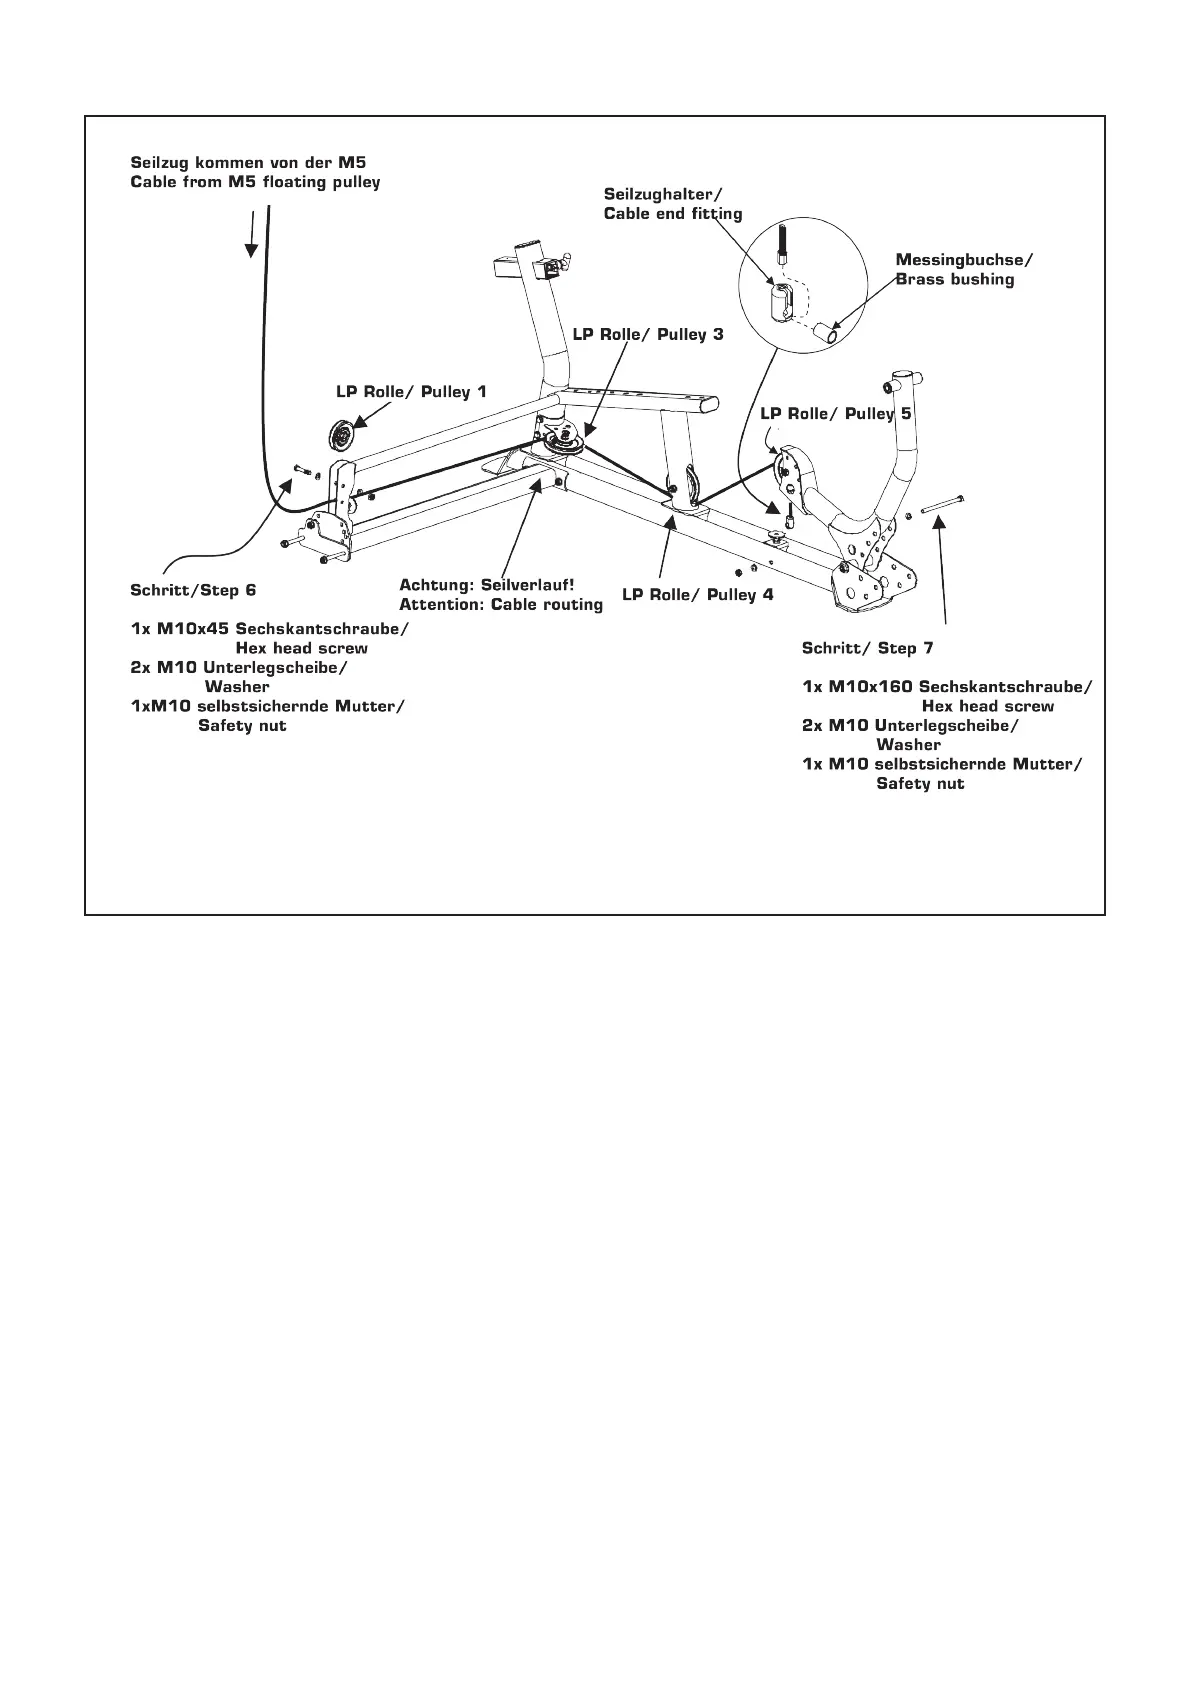
Étape / Step 6+7
STEP 6: Continue routing the LP3-M5 Cable
from the top of the M5 gym to LP3 Pulley 1.
Thread the cable through the plates that holds
Pulley 1 as the pulley is placed on top of the
cable and bolted into place.
STEP 7: Now, route the cable towards the back
side of LP3 Pulley 3, making sure to route the
cable between the pulley and the cable retainer
pin. The cable must be routed between the pin
and the pulley or the Cable will be damaged.
From there, route the cable down to the bottom
side of Pulley 4 as shown. From Pulley 4, go up
to the top of Pulley 5 and then down the front
and anchor the cable end with the Cable End
Fitting and Brass Bushing as show in the
highlighted circle.
Étape 6: Passer le câble provenant du M5
sous la polie LP1 et l'assembler.
Étape 7: Faire passer le câble c derrière la
polie LP3, mais assurez-vous que le câble se
trouve entre le rouleau et la goupille
métallique, sinon le câble sera endommagé.
Maintenant, le faire passer sous la polie LP4
et ensuite sur la polie LP5. Fixez le câble au
support de câble (illustré ci-dessus) sur le
châssis principal.
Attention: acheminement des câbles/
Câble de la poulie flottante M5/
 Loading...