HOW
TO
INSTALL
THIS
SMOKE
ALARM
A.
DANGER: ELECTRICAL
SHOCK
HAZARD. Turn
off
power
at
the
main
fuse
box
or
circuit
breaker
by removing
the
fuse
or
switching
the
circuit
breaker
to
the
OFF position.
A.
WARNING: This
smoke
alann
should
be
installed
only
by
a qualified
electrician.
Smoke
alann
installation
must
be
in
accor-
dance
with
the
requirements
of
Article
760
of
the
National Electrical Code
and
any
local codes
that
may
apply.
THIS SMOKE ALARM SHOULD BE INSTALLED
IN
ACCOR-
DANCE WITH THE NATIONAL FIRE PROTECTION ASSOCIA-
TION'S STANDARD 72 (National Fire Protection Association,
Batterymarch Park, Quincy, MA 02269).
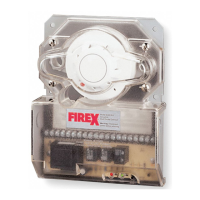
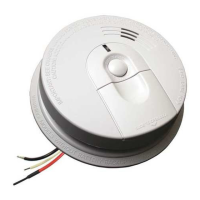
• Install smoke alarm on a 4-inch octagon or single gang junction
box only.
1.
From back of smo
ke
alarm,
remove mounting plate.
(To
later
engage tamper-resist feature,
twist out and set aside one of the INTERCONNECT
pins molded into the plate. Both
CON~J~~ORS
pins are exactly the same.)
YELLOW
2. Align recessed slots on plate with
WHITE
mounting holes of a 4-inch octa-
~~~~$;=--
gon or single gang junction box.
3.
Gently pull household wires
through center hole
of
plate.
4.
Secure plate to junction box
using mounting screws.
5.
With a small wire connector, con-
nect white wire from connector plug to white household wire.
6.
Connect black wire from connector plug to black household wire.
7.
If interconnection is desired, connect yellow wire from connec-
tor to interconnect wire between smoke alarms. See section,
INTERCONNECTING SMOKE ALARMS.
NOTE: If this will be a single-station smoke alarm, cover yellow
wire with electrical tape and tuck into junction box.
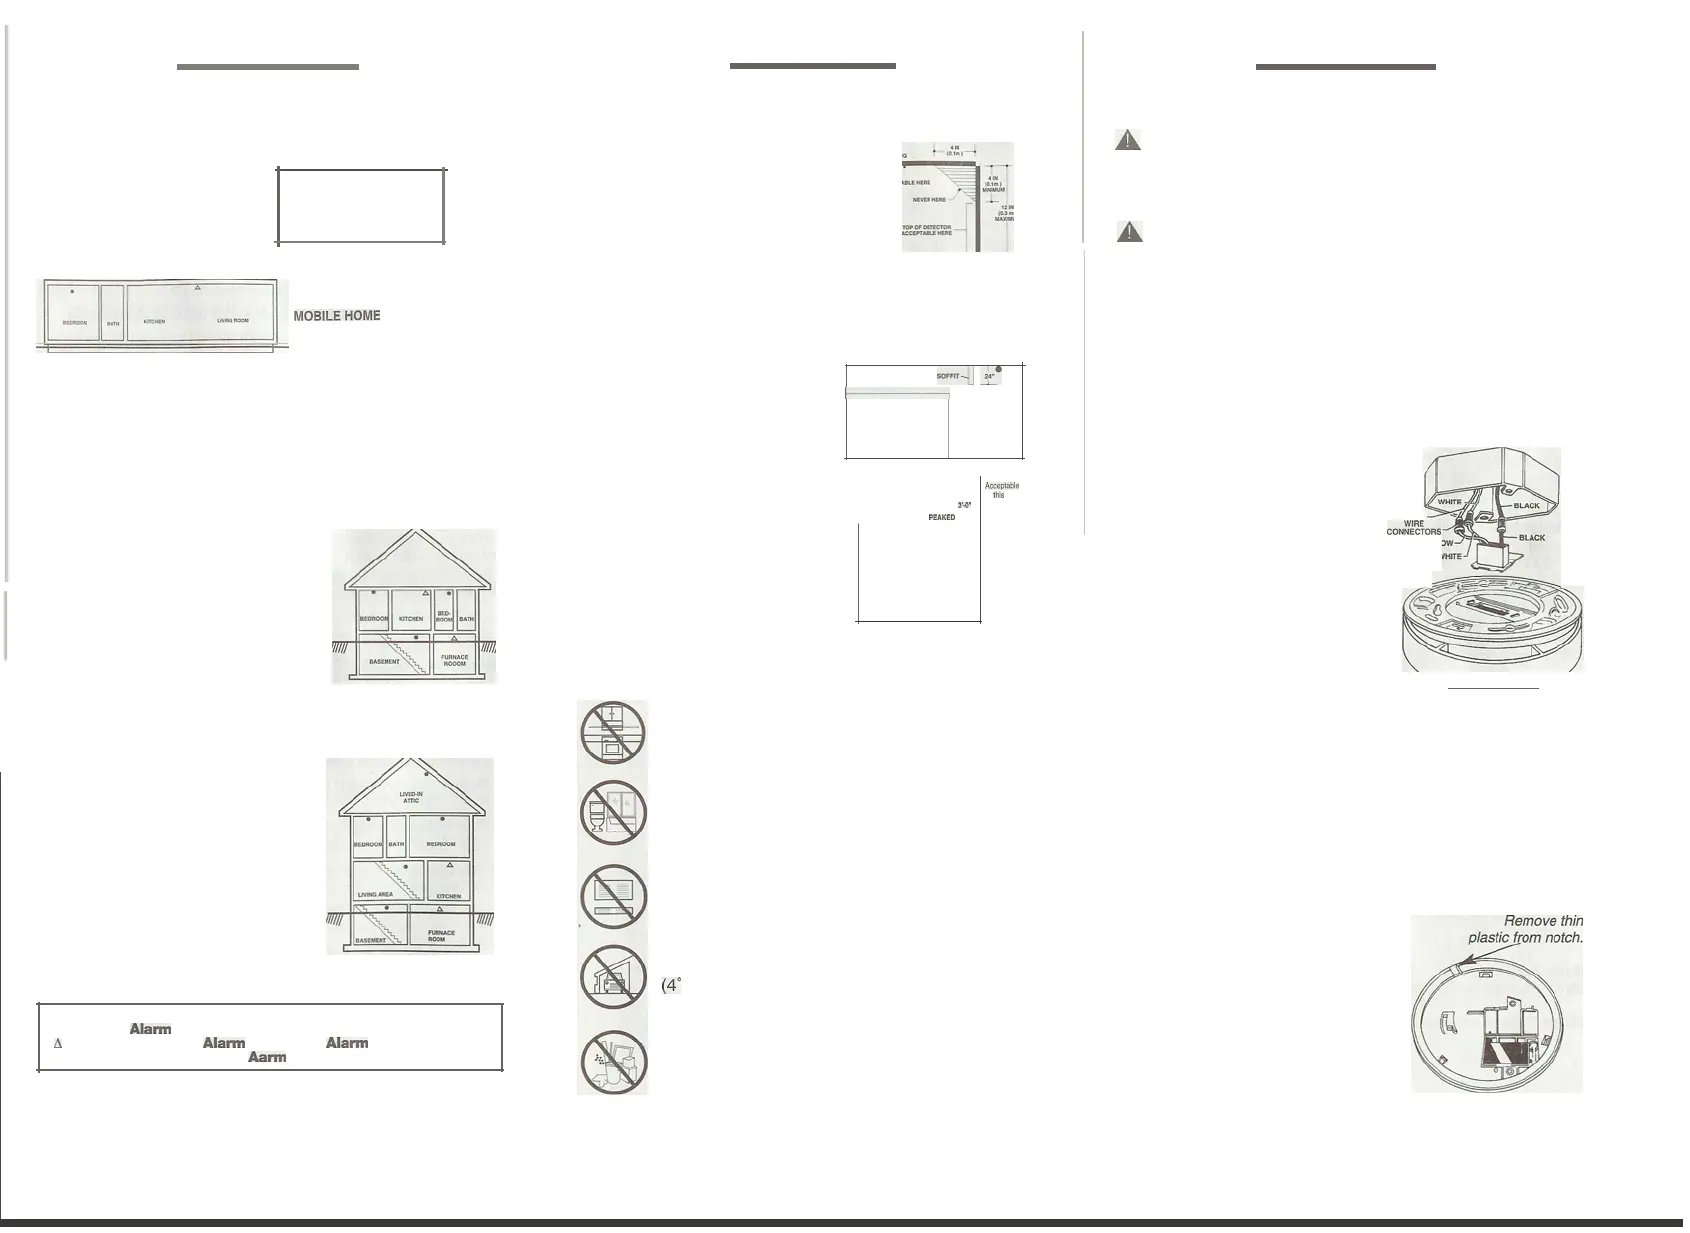
8. Lift open battery pocket door.
9.
Connect new 9-volt battery to battery connector inside battery
pocket. BE
SURE
BATTERY
IS
SECURELY
CONN
ECTED.
Smoke alarm may beep briefly when battery
is
installed.
10. Close battery pocket door, snap-
ping it into place. (For tamper-
resist, use long-nosed pliers to
remove thin plastic from notch on
smoke alarm edge.)
11
. Attach connector plug to pins on
back of smoke alarm. Plug will only
fit one way and will snap into place.
12. Gently tug connector to be sure it is
attached securely.
A
cce
pt
able
in
t
hi
s
ar
ea
3'.(1
"
PEAKED
CEILING
•
somr
-tJ
~
.
1-
------,
In
rooms where tempe
ra
tures may fall below 40°F
W
C)
or rise above 100°F (38
°C)
.
In
extremely dusty, dirty, or insect-infested areas.
Loose particles interfere with smoke alarm operation.
Near air returns or heating and cooling supply vents.
The air could blow smoke away from the detector,
interrupting its alarm.
In
areas with high humidity, like bathrooms or areas
near dishwashers or washing machines. Install at least
10 feet (3 meters) away from these areas,
if
possible.
IMPORTANT
SMOKE
ALARM
PLACEMENT
AND
EXCEPTION
INFORMATION:
• Install a smoke alarm as close to
the center of the ceiling as possi-
ble. If this is not practical, mount
no closer than 4 inches from a
wall or corner. Also, if local codes
allow, install smoke alarms on
walls, between 4 and 12 inches
from ceiling/wall intersections.
• Install a minimum
of
two smoke alarms in every home, no mat-
ter how small the home. New construction codes require a mini-
mum
of
two interconnected smoke alarms
in
newly built homes.
• Install a smoke alarm in each room
that
is
divided by a partial wall
(either coming down from the
ceiling at least 24 inches,
or
coming up from the floor).
• Install smoke alarms on peaked,
cathedral,
or
gabled ceilings 3 feet
from the highest point (measured
horizontally).
• Install a smoke alarm in lived-in
attics or attics which house electri-
cal equipment like furnaces, air con-
ditioners,
or
heaters.
DO
NOT
install
smoke
alarm:
Near appliances or areas where normal combustion
regularly occu
rs
(kitchens, near furnaces, hot water
heaters). Use specialized smoke alarms with unwanted
alarm control for these areas.
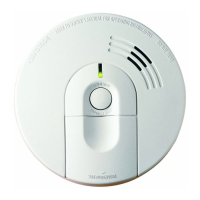
TWO STORY
SINGLE STORY
Typical
Mob
i
le
H
ome
NOTE: For mobile homes built before 1978, install smoke alarms on
an
inside wall between 4 and 12 inches from the ceiling. (Older
mobile homes have little or no insulation
in
the ceiling.) This
is
especially important
if
the ceiling
is
unusually hot or cold.
• Install a smoke alarm inside each bedroom and
in
the hallway
outside each separate sleeping area.
Typical
Single
Story
Home
• Install a smoke alarm on the ceiling
or wa
ll
inside each bedroom and in
the hallway outside each separate
sleeping area. If a bedroom area
hallway is more than 30 feet long,
install a smoke alarm at each end.
If
there
is a
basement:
• Install a smoke alarm on the
basement ceiling at the bottom of
the stairwell.
Typical
Two-Story
or
Split
Level
Home
• Install a smoke alarm on the ceil-
ing
or
wall inside each bedroom
and
in
the hallway outside each
separate sleeping area. If a bed-
room area hallway
is
more than 30
feet long, install a smoke alarm at
each end.
• Install a smoke alarm at the top of
a first-to-second floor stairwell.
If
there
is a
basement:
• Install a smoke alarm on the
basement ceiling at the bottom
of the stairwell.
EFFICIENCY APARTMENT
Key
•
Smoke
Alann
(Ionization)
/!,.
Ionization
Smoke
Alann
with
False
Alann
Control™
or
Photoelectric
Smoke
Aann
~IQ~
QI
·~"~
~
I I
MO","'OM'
FOR
BEST
PROTECTION
.
WE
RECOMMENO
THAT
VOU
INSTALL
A
SMOKE
AL
A
RM
IN
EVERV
ROOM
In additi
on,
we recommend that
all
smoke alarms be interconnected.
Typi
cal
Efficiency
Home (A
partment)
• Install a smoke alarm on the
ceiling or wall closest to the
sleeping area.
4 5
6
 Loading...