Page 2
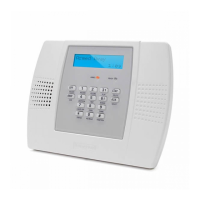
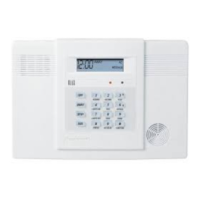
Steps to Installing ReadyGuard
1.
Separate the front assembly from the back plate and mount the back plate.
DO NOT disconnect the ribbon cable from the terminal strip board. Disconnect the cable only from the front
assembly board.
2.
Make wiring connections as follows:
Connect the incoming phone line to either the 8-position jack or terminals 2 (TIP) and 3 (RING).
Connect the handset phone lines to either the RJ11 jack or terminals 4 (TIP) and 5 (RING).
NOTE:
For full line seize operation, see the installation instructions.
If used, connect a piezo sounder to terminals 10 (+) and 11 (–).
If used, connect a bell to terminals 11 (–) and 12 (+).
If using Powerline Carrier Devices, connect com/data/sync/ lines from the PL513 Powerline Interface
Module to terminals 9, 13, and 14 respectively.
Install Powerline Carrier Devices according to their instructions.
Connect wires from the 1332 (1332CN) AC Transformer to terminals 15 and 16.
3.
After all wiring connections are made, carefully reconnect the ribbon cable to the front assembly
PC board connector (properly aligning the red wire), then snap the front assembly to the back plate so it
is held by the locking tabs.
Plug the transformer into a 24-hour, 110VAC unswitched outlet.
Slide out the battery drawer and install either a single 9V alkaline battery or six 1.5V “AA” alkaline
batteries. Use only nonrechargeable, alkaline batteries.
After installing the battery(ies), slide the battery drawer into the back plate only after AC power has
been applied.
4.
Set a programming default:
Enter Programming mode: Installer Code + 8 0 0.
Press *97, then press a number 1-5 to select a default table from the tables listed on page 1.
5.
Program the variable data fields:
Press *24 (RF House ID), then enter the desired 2-digit RF House ID for wireless keypads.
Press *40 (PABX Code, if used), then enter up to 6 digits. If fewer than 6 digits are used, press [*] to
end the field and advance to the next field.
Press *41 (Primary Phone Number), then enter the primary phone number, up to 20 digits. If fewer than
20 digits are used, press [*] to end the field and advance to the next field.
Press *42 (Secondary Phone Number) if used, then enter the secondary phone number, up to 24 digits.
If fewer than 24 digits are used, press [*] to end the field and advance to the next field.
Press *43 (Primary Account Number), then enter the primary account number. If only 3 digits are used,
press [*] to end the field and advance to the next field.
Press *44 (Secondary Account Number) if used, then enter the secondary account number. If only 3
digits are used, press [*] to end the field and advance to the next field.
Press *88 (Pager Characters) if using Default Table 2 or 4, then enter up to 16 digits which may be
required by your pager service (e.g. account number, PIN, etc.). If fewer than 16 digits are used, press
[*] to end the field and advance to the next field.
Press *94 (Download Phone Number), then enter the downloading computer phone number, up to 20
digits. If fewer than 20 digits are used, press [*] to end the field.
6.
Enroll transmitter serial numbers by pressing *83 while in Programming mode, then follow the prompts:
%
Enter the 2-digit zone number of the first transmitter whose serial number you are entering,
then press [*]. The system displays the “C” prompt.
'
Enter the 7-digit serial number (printed on the transmitter). If you enter an incorrect digit,
press the [#] key to back up to that digit and reenter the correct digit. When all 7 digits are
entered, press the [*] key. Review the displayed serial number. If correct, press [*] again to
save it. The next zone number to be enrolled will display at the “C” prompt for 30 seconds. If
this is the desired zone number, enter its serial number as described above. If not, either
wait 30 seconds or press the [#] key to display the “b” prompt.
b
The system automatically displays the next zone number for which a serial number may be
enrolled. Press [1] to return to the “C” prompt described above to enroll this zone.
If the zone number displayed is not desired, press [0] to return to the “A” prompt, where you
can then enter a different zone number.
After all serial numbers have been enrolled, return to the “A” prompt, then enter [00] to exit enrollment
mode (blinking “83”). Press [*] + [99] to exit Program mode.
 Loading...