Do you have a question about the FISCHER FERITSCOPE FMP30 and is the answer not in the manual?
Details on registered trademarks and disclaimers regarding manual accuracy and completeness.
Explanation of symbols and conventions used throughout the operator's manual.
Specifies the intended application of the FERITSCOPE® FMP30 for measuring ferrite content.
Provides general information about the instrument's display values and potential variations.
Outlines the necessary training and knowledge for operating personnel.
Instructions and warnings for connecting the instrument to a power outlet using the AC adapter.
Details on EMC, low voltage, temperature, and humidity limits for operation and storage.
Guidelines for safe and correct handling of the probe to prevent damage and ensure accurate measurements.
Proper procedures for handling, storing, and transporting calibration standards to maintain accuracy.
Information regarding instrument repair and who is authorized to perform service operations.
Conditions under which the manufacturer's warranty is void.
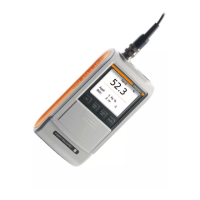
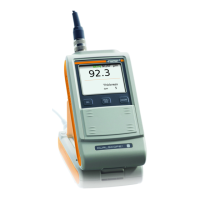
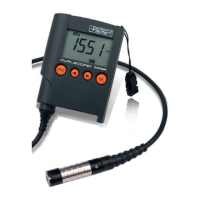
Details on the elements and functions of the instrument's LCD display.
Explanation of the functions assigned to each key on the instrument's control panel.
Overview of accessories available for the FERITSCOPE® FMP30 instrument.
Specifications and technical details of the FERITSCOPE® FMP30 instrument.
Information on standard shipment contents and available optional accessories.
Information on how to supply electrical power to the instrument via AC adapter or batteries.
Step-by-step guide for installing or replacing the instrument's batteries.
Procedure for connecting and disconnecting measurement probes to the instrument.
Instructions for powering the instrument on and off, including measurement method display.
Guidelines and precautions for cleaning the instrument and accessories safely.
Proper techniques for handling the probe during measurements to ensure accuracy and longevity.
Procedure for registering a new probe with the instrument for proper identification and use.
Instructions for creating and configuring a new measurement application.
How to select an existing application for measurement.
Procedure for deleting an application and its associated data.
Displaying a list of all configured measurement applications.
How to assign custom designations to applications for easier identification.
Configuring settings specific to the current measurement application.
Setting upper and lower limits for measurements to quickly check conformity.
Enabling and configuring outlier rejection to improve measurement reliability.
Information on linking applications to share normalization and calibration data.
Important information to observe before performing calibration procedures.
Step-by-step guide for performing the normalization process.
Detailed procedure for performing a corrective calibration.
Instructions for performing a master calibration to optimize measurement accuracy.
How to determine the normalized countrate of a calibration standard during master calibration.
Steps to prepare the instrument and measurement area before taking readings.
Basic procedure for placing the probe and acquiring a measurement.
How to configure and perform measurements using a fixed block size.
Overview of standard and matrix measuring modes and their preparation requirements.
Detailed explanation of the matrix measuring mode and its configuration.
Factors influencing measurements and how to correct for them.
How to evaluate the results of the current measurement block.
How to evaluate all readings stored within the open application.
Instructions for connecting the instrument to a PC via USB.
Steps for installing the necessary USB drivers on the PC.
Overview of methods for transferring measurement data to a computer.
Procedure for transferring data in real-time while measurements are being made.
List of commands that can be sent from a PC to control the instrument remotely.
An overview of the available functions within the service menu.
Settings related to the instrument's system configuration.
Instructions for selecting the instrument's display language.
Procedure for resetting the instrument to its factory default settings.
Settings related to USB data transfer and connectivity.
Configuring the data output mode for USB transfer.
Settings to configure the instrument's operating mode.
Enabling and configuring the matrix measuring mode.
Settings related to measurement acquisition and behavior.
Selecting the primary measuring mode: Standard, Area, or Automatic.
Troubleshooting guide for common instrument malfunctions and their solutions.
Explanation of error and warning messages displayed on the instrument's LCD.
Definitions of common terms and symbols used in ferrite content measurement.
List of recommended literature for further reading on statistics and measurement.
| Application | Coating thickness measurement |
|---|---|
| Probe Compatibility | Fischer probes |
| Measuring Principle | Magnetic induction |
| Substrate Material | Ferrous and non-ferrous metals |
| Resolution | 0.1 μm |
| Display | LCD |
| Interface | USB |
| Power Supply | Batteries |
| Battery Life | Approx. 8 hours of continuous operation |
| Operating Temperature | 0°C to 50°C |
| Storage Temperature | -10 - 60 °C |
| Standards | ISO 2178 |