Written by www.procontechnology.com.au Phone: (03) 98306288
TXT Controller Tips – version 1.6
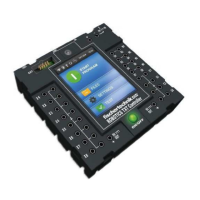
1. The most important requirement of the new fischertechnik TXT controller (part no. 522429 or
153513) is the power supply! Always ensure that you have a charged battery or, preferably,
use a mains adapter especially during important operations such as firmware upgrades. A
supply voltage of 8~10 Volts is required. Important: ensure that a minimum of 8V is
maintained even when outputs are turned on!
2. Should the ROBOPro software suggest that a TXT firmware update is required, always use
the USB cable connection before proceeding with the upgrade. The TXT controller will turn
off after downloading the firmware! Switch it on again to re-boot the controller.
3. After turning the WiFi or Bluetooth on for the first time, always switch the TXT controller off
and on again to ensure that any wireless operation is initialized. Also it is a good idea to key
the "Pairing Code" and the "Network security key" into a TXT or DOC file on your computer
to facilitate cutting and pasting when initializing the WiFi or Bluetooth connection. Please
note, should your WiFi connection say "limited connectivity", simply switch the TXT controller
off and on again. If the WiFi connection is working correctly, the status will show "Activity"
that is both sending and receiving data! *this problem has been corrected in latest firmware!
The latest firmware allows WLAN Client Mode operation. In other words your TXT Controller
can now connect automatically through your WiFi Modem/Router. Simply follow the
instructions in the separate documentation provided by fischertechnik. Don’t forget to turn-on
the WLAN switch (green light) BEFORE going to the WLAN Mode screen!
4. When using Bluetooth on the computer, plug in your Bluetooth device or switch it on and
ensure that the Bluetooth icon is visible in the notification area. Right click on the icon and
then select "Join a Personal Area Network". If it's the first time connecting the TXT to the
computer, you will need to "pair" the device. Click "Add…" and select the "TXT xxxx" device,
click "Next" and enter the "Pairing Code". Finally, once the device appears as an "access
point" in the "Personal Area Network" window, click "connect". Please note that you should
now be able to check the "Network and Sharing Center" and find that there is a "Bluetooth
Network Connection" and the "Status" of this connection can be checked.
5. The backup battery compartment (pictured below) is underneath the TXT. Remove the
Phillips-head screw using a small screwdriver (e.g. part no. 36443), press the latch and
remove the cover. The 3V lithium coin battery CR2032 is used to backup the Real Time
Clock (RTC), maintaining the date and time when the TXT is disconnected from an external