Instruction Manual
D200137X012
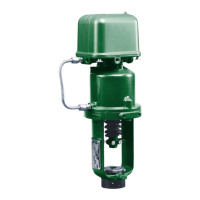
3570 Positioners
September 2015
14
3. Two bellows posts are provided. The posts are screwed into storage holes in the positioner base immediately above
the CYLINDER and INSTRUMENT connections. Unscrew these posts.
Note
An optional restrictor (see the top view in figure 5) can be found in place of one of the bellows mounting screws (number 1). If so,
note the location of the restrictor and replace it in the same location during reassembly. The restrictor has a hex head; the
mounting screws do not.
4. Remove the four mounting screws (numbers 1 and 2) and lift out the bellows assembly.
5. Screw the bellows posts (number 3) into the holes where the screws (number 1) originally were.
6. Invert the bellows and replace the screws (numbers 1 and 2).
7. Refer to the adjustment procedures to check operation of the positioner.
8. Make a notation on the action label (key 43, figure 10) that the action of the positioner has been changed.
9. Replace the cover (key 39) on the positioner.
Changing to Direct Action
1. Bypass the control valve and shut off the input signal line and the supply pressure line to the positioner.
2. Remove the positioner cover by loosening the four thumb screws on the underside of the base.
Note
An optional restrictor (see the top view in figure 5) can be found in place of one of the bellows mounting screws (number 1). If so,
note the location of the restrictor and replace it in the same location during reassembly. The restrictor has a hex head; the
mounting screws do not.
3. Remove the four mounting screws (numbers 1 and 2), bellows, and bellows posts (number 3).
4. Invert the bellows and reinstall it in the positioner. Secure the bellows with the four screws (numbers 1 and 2).
Screw the bellows posts into the storage holes provided in the base immediately above the cylinder and instrument
connections.
5. Refer to the adjustment procedures to check the operation of the positioner. If the input signal range has not been
changed, adjustment of the range spring might not be necessary.
6. Make a notation on the positioner action label (key 43, figure 10) that the action of the positioner has been
changed.
7. Replace the cover (key 39) on the positioner.