If the side t-top cross bar will not allow you to attach the stand offs to the console
position the t-top in the boat so that you can use the stand offs coming off either the
front or rear legs.
Align Uprights to Mark the Drill Locations on Bases: Loosen the bolts at the top of each
upright so you can align the uprights where they will be installed. Tap the top of the legs with a
rubber mallet so both legs are vertical with a level. Double check that the T-Top is in its final
position for installation and the legs are both vertical. Do not worry about the canopy frame
being centered as it will be removed for final installation. Keep the bases from moving until
after you have marked and drilled the holes. Use a marker or pencil to mark the four drill
locations in each base. Use the marks to make sure the bases do not move until after all
the holes are drilled.
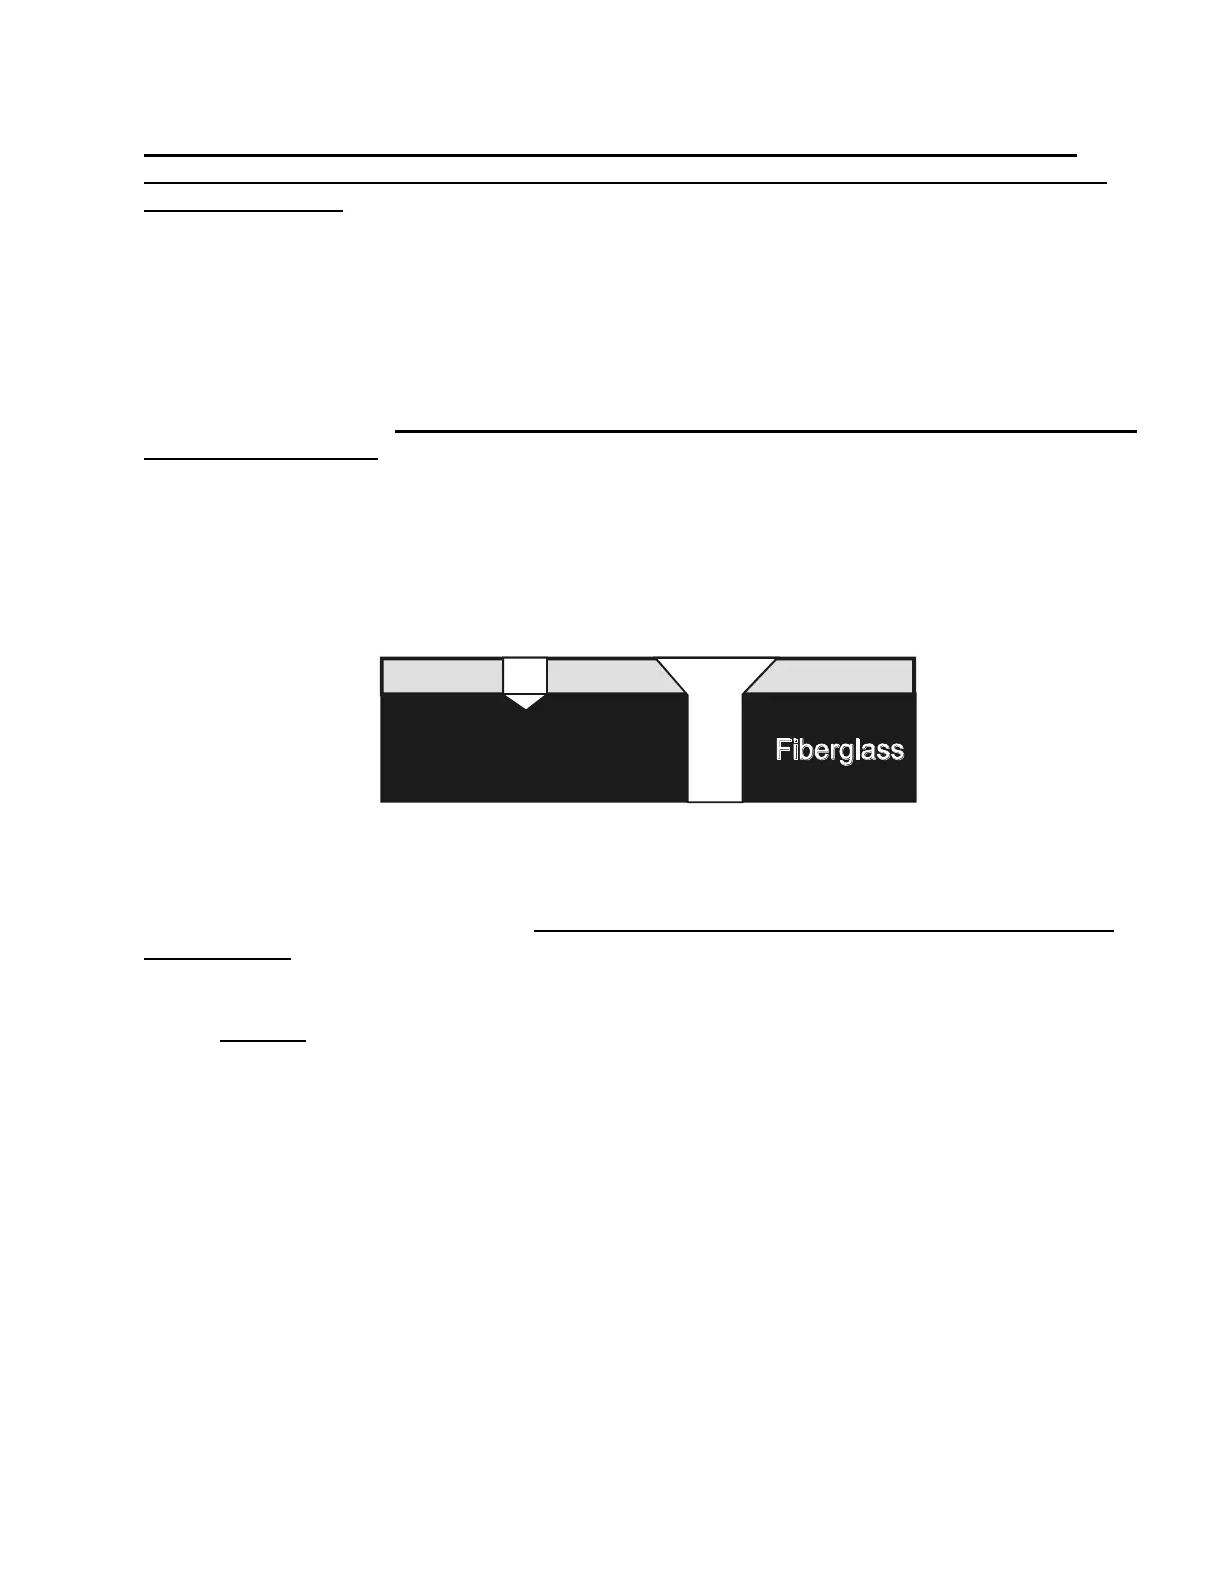
Drill Base Screw Locations: Understand the following procedures before drilling to ensure a
clean hole through the deck. Boats have a very hard gelcoat surface with fiberglass under the
gelcoat as shown. There may be wood, fresh water tanks, fuel tanks or wiring under the
fiberglass so remember to drill only 1.5” deep for the bases. Mark this point on the drill bit with
a piece of tape.
The gelcoat is a very thin layer approximately 1/16
th
” thick and the fiberglass below it is
normally about 3/8” thick. The floor near the center console may also have wood or composite
sheet material below the fiberglass. You should ALWAYS run the drill in reverse at first
while drilling. Only through the first 1/8” of gelcoat. Then kick into forward to finish though
fiberglass deck. This keeps the fiberglass from splintering or cracking while drilling. Finish the
hole by putting a slight angle (chamfer) on the edge of the gelcoat turning a large or chamfer
drill bit by hand (drill optional ) IN REVERSE!!! as shown on the right side in the above
diagram to further protect the boat.
During the drilling is a great time to have someone with the vacuum or shop vac to remove the
fiberglass as you are drilling. To drill the holes follow the above procedure with the 3/16”
drill bit. Make sure the bases do not move during drilling.
After drilling all the base holes, move the T-Top forward or aft about 6” so you have access to
the holes. Use a large or chamfer bit to chamfer the hole as shown in the below image. IN
REVERSE with lite pressure!!!! Optionally, you can use a small piece of sand paper to radius
the edge of the chamfer also to remove the slight edge. Removing this edge will prevent
stress cracking around the holes.
 Loading...