21
INSTRUCTIONS FOR USE
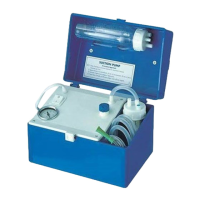
Before each use, the accessories must be carefully inspected, making sure that there is no dust, encrustation, lumps or liquid
inside the connection pipe, the vessel and its cap. They must also be cleaned strictly in accordance with the instructions given
in the section 'HYGIENIC PREPARATION'. Personal use of the accessories, collection vessels and connecting tubes is recom-
mended to avoid the risk of infection.
Instructions for aspiration operation on the patient:
1.
C
onnect the accessories, referring to the “CONNECTION DIAGRAM”.
ATTENTION: the lter is hydrophobic and in addition to being antibacterial/antiviral, it also acts as a secondary protection and
stops uids that the primary protection device in the lid of the collection vessel accidentally fails to stop.
Follow the instructions below for the correct assembly of the lter:
2.
P
lug the power cord (17) into a mains socket corresponding to the voltage of the appliance, at the end of the use of the appliance
pull the plug out of the socket, it must be positioned so that it is not dicult to disconnect from the mains.
3.
S
tart up the appliance by actuating the switch (2), the appliance is intended for continuous use. Always use the appliance on a
horizontal plane; this will allow the liquid ingress protection device in the aspiration pump to function properly.
4. For more comfortable suction, set the desired vacuum value (bar) via the vacuum regulator (4). Turning the knob clockwise gives
a higher vacuum value and turning it anticlockwise a lower vacuum value; these values can be read on the “vacuum gauge” (3). In
order to speed up the suction and simplify the HYGIENIC PREPARATION operations, it is recommended to introduce about 400 ml
of water into the vessel (8/9).
5.
P
lace your nger on the hole of the manual aspirated ow control (15) and, in pulsed mode, start aspiration on the patient through
the cannula (NOT INCLUDED WITH THE DEVICE).
6.
W
hen the application is nished, switch o the appliance.
7. Disconnect the connecting pipes and if necessary close the “PATIENT” and “VACUUM” outlets with plugs 14a -14b. During aspiration,
place caps 14a and 14b on xing anchors 14d and 14c.
8.
Disc
onnect the plug and empty and clean the vessel and connecting pipes.
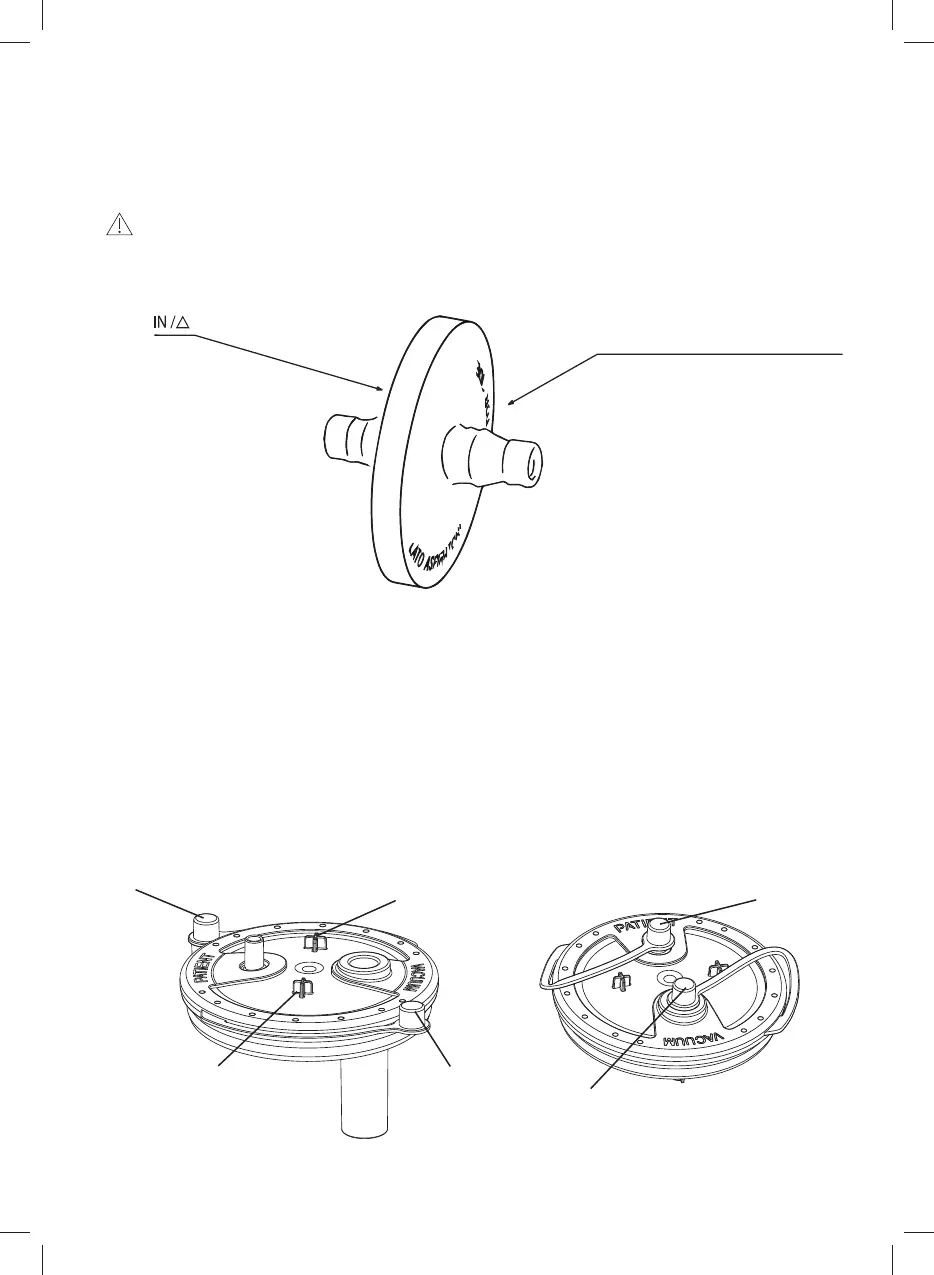
Side to be connected to the socket
VACUUM of the collection vessel
Side to be connected to the socket
AIR INLET of the aspirator
Writing:
Lato aspiratore - Aspirator side
14b
14a
14c
14d
14b
14a