Directions For Use:
AC Power Supply Operations:
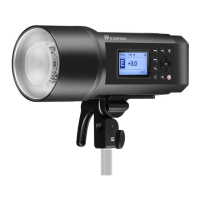
1. Turn on the Light, Turn on the power by pressing the power switch(2) to"”––”"position, the charge indicator(6) will turn red when the
flash has been fully charged.
2. Test Flash, Press the test button (11) to make sure the flash is working.
3. Slave Sensor, Press the sensor button (10),then you can use the built-in slave sensor to trigger the light.
4. Synch Cord, Link the flash to your camera with a synch cord to trigger the light.
5. Audio Signal, Set the switch (5) to “I” position will activate an audio signal to remind you when the power has been fully recharged.
6. Modeling Lamp, To turn the lamp off, set the switch(4) to “0”;when set to “=”,the modeling lamp is on at full power; when set to”-“,the
modeling lamp varies in brightness as you turn the power setting controller(12).press the switch(5) to “DIM” position, the modeling
lamp will turn itself off when the flash is fired and then will turn on automatically when the flash is fully charged.
7. Adjust Output Power for Flash, Use the power setting controller(12) for the desired exposure. the power level can be set continuously
from 1/16 to full power.
8. Reflector Loading and Unloading, The reflector has 3 pins around the perimeter of it’s base. Line these pins up with the corresponding
notches in the strobe heads front collar. Then rotating the reflector clockwise until it locks into position. to remove the reflector, push
the locking bolt on the top of the strobe and rotate the reflector counterclockwise, then pull it way from the strobe.
9. Replace flash tube For safety purpose, please switch off the power for at least 10 minutes before changing the flash tube.
Do not touch the anode and cathode of the flash-tube.
10. Malfunction Alert When there is malfunction in your flash, the beeper will buzz to give you an alert. now please cut off the power
immediately and turn it on again. If the same situation repeats, send the strobe back to the store from which you buy it for technical
service.
DC Power Supply Operations:
1. Please first check if the battery pack switch is set to “off” position, then plug the cord into battery pack and connect it to the flash, then
tighten it.
2. Set the battery pack switch to “BATT” position, press down the power switch(2) to”=” ,when the charge indicator (6)is on indicating
your flash has been fully charged. Press test button to make sure your flash is working.
3. When use with the battery pack, the functions of Modeling lamp are not available.
4. For safety purpose, please don’t charge the flash through the AC power supply or battery pack at the same time, no mixing charge!
5. The battery pack will get hot during the use, please don’t continuously fire your flash rapidly over 6 times.
In The Box
• Studio Strobe Body
• Power Cord
• Sync Cord
• Flashtube
• Modeling Light
• Standard 8” Reflector
• Built in Umbrella Holder
• Protective Cap
• Owner’s Manual
• 2 Year Warranty
Optional Accessories:
All reflectors that fit, Protective cover, Flashtubes and modeling lamps, Beauty
dishes, Grids for reflectors, Barn doors, Snoots, Spare sync cord and power
cord, Ifra red trigger, Battery pack to power light new version, Spare battery,
Flashpoint accessories, New soft boxes, Speed rings list, Flashpoint dedicated
soft box with ring, Egg crate, Stands, Boom stand, umbrellas
 Loading...