From
Plumbing
Fixtures
KNIFE
VALVE\
TERMINATION
FITTING
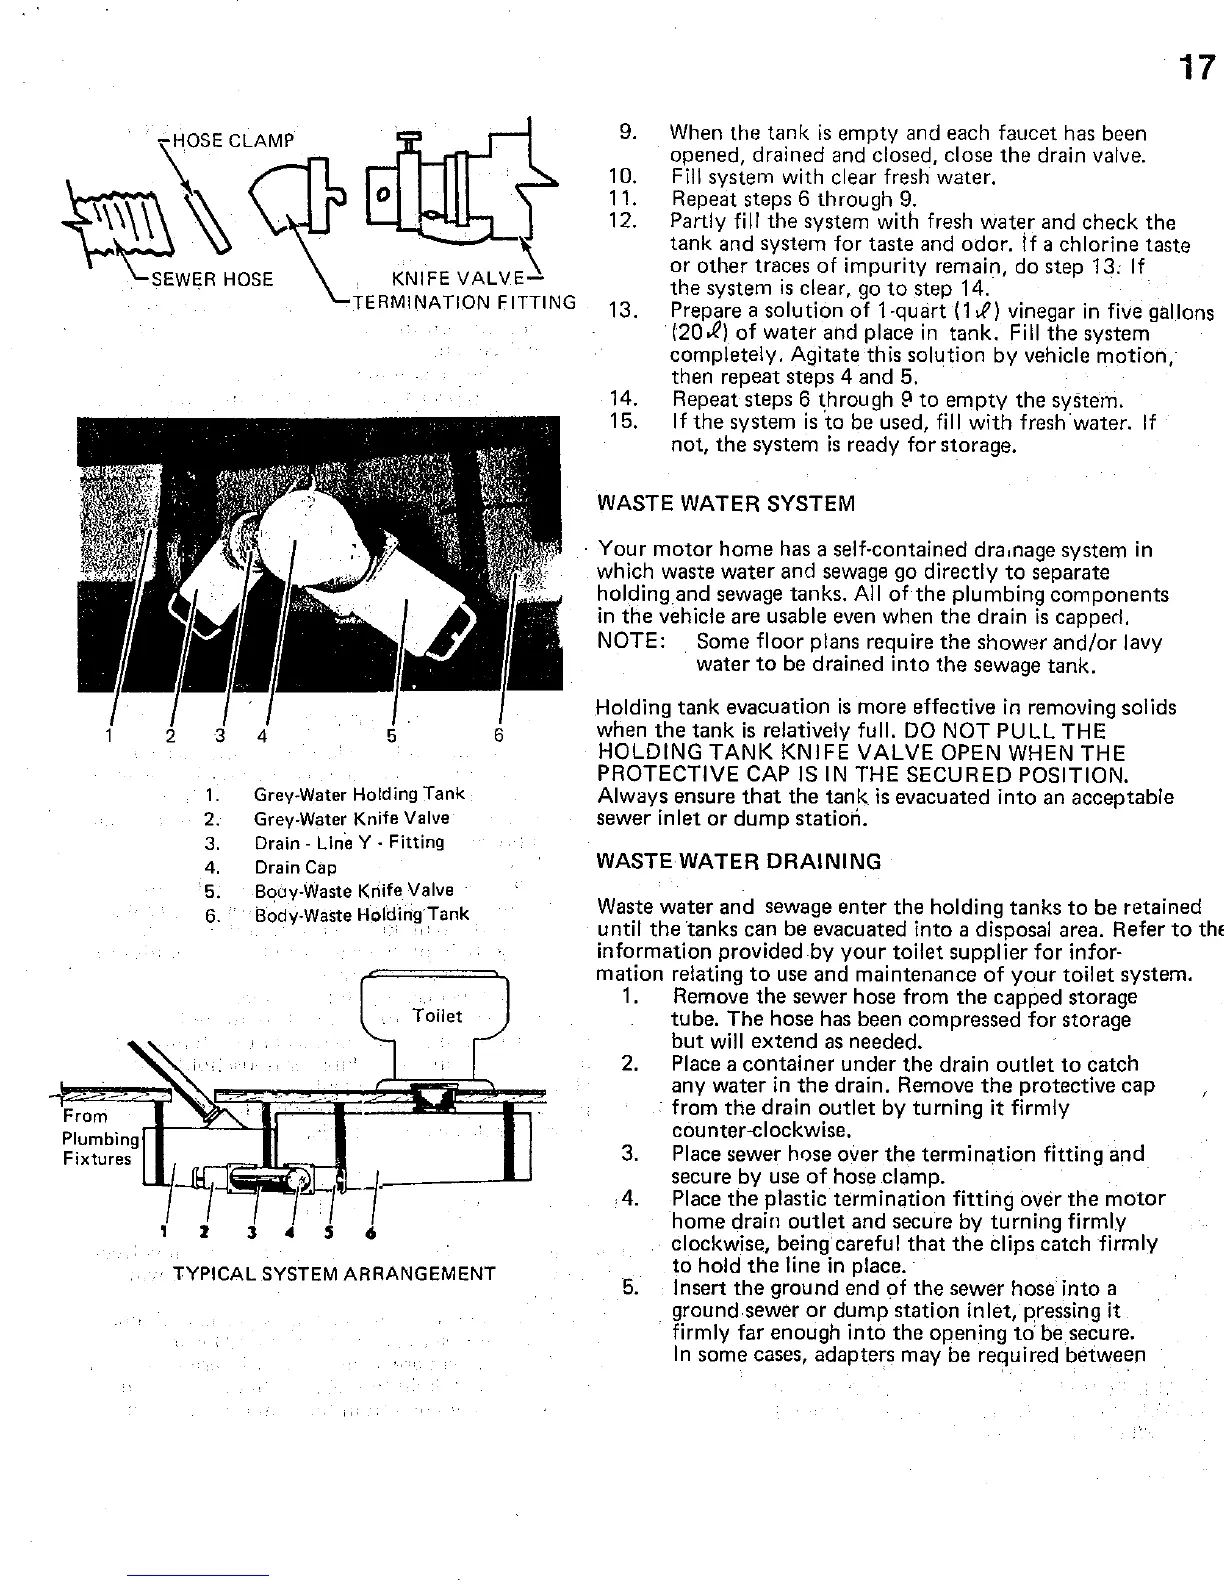
1.
Grey-Water Holding Tank
2. Grey-Water Knife
Valve
3. Drain - Line Y -
Fitting
4. Drain
Cap
5. Bqay-Waste Knife Valve
6. Body-Waste Holding·Tank
.,
Toilet
1 7
J 4 5 6
TYPICAL
SYSTEM
ARRANGEMENT
17
9. When the
tank
is
empty
and each faucet has been
opened, drained and closed, close
the
drain valve.
10. Fill system with clear fresh water.
11. Repeat steps 6 through 9.
12.
Partly fill
the
system with fresh
water
and
check
the
tank
and system for taste and
odor.
if a chlorine taste
or
other
traces
of
impurity remain, do step 13,
If
the
system
is
clear,
go
to
step 14.
13.
Prepare a solution
of
1-quart (1.1') vinegar
in
five gallons
(20.R)
of
water ahd place
in
tank.
Fill
the
system
completely. Agitate this solution
by
vehicle
motion,
then repeat steps 4 and 5.
14.
Repeat
steps 6 through
(l
to
empty
the
system.
15.
If
the
system
is
to
be used,
fill
with
freshwater.
If
not,
the
system
is
ready for storage.
WASTE WATER SYSTEM
. Your
motor
home
has a self-contained dra,nage system
in
which waste
water
and sewage go directly
to
separate
holdingand
sewage tanks.
All
ofthe
plumbing
components
in
the
vehicle are usable even when
the
drain
is
capperl.
NOTE: Some floor plans require
the
shower
and/or
lavy
water
to
be drained
into
the
sewage
tank.
Holding
tank
evacuation
is
more effective in removing solids
when
the
tank
is
relatively full.
DO
NOT PULL THE
HOLDING TANK KNIFE VALVE OPEN WHEN THE
PROTECTIVE CAP
IS
IN
THE SECURED POSITION.
Always ensure
that
the
tank
is
evacuated
into
an acceptable
sewer inlet
or
dump
statiori.
WASTEWATER DRAINING
Waste
water
and
sewage
enter
the
holding
tanks
to
be retained
until
the
tanks
can be evacuated into a disposal area. Refer
to
the
information provided
by
your
toilet supplier for infor-
mation
relating
to
use and maintenance
of
your
toilet
system.
1.
Remove
the
sewer hose from
the
capped
storage
tube.
The
hose has been compressed for storage
but
will
extend
as
needed.
2.
Place a
container
under
the
drain
outlet
to
catch
any
water
in
the
drain. Remove
the
protective
cap
from
the
drain
outlet
by
turning
it
firmly
counter-clockwise.
3.
Place sewer hose oiler
the
termination
fitting
and
secure by use
of
hose clamp.
·4. Place
the
plastic termination fitting over
the
motor
home
drain
outlet
and secure by
turning
firmly
clockwise, being careful
that
the
clips catch firmly
to
hold
the
line
in
place.
5.
Insert
the
ground end
of
the
sewer hose
into
a
ground.sewer
or
dump
station inlet, pressing it
firmly far enough into
the
opening
to
be secure.
In
some cases, adapters may be required between
 Loading...