3
8
Wooden
Ceiling
Joists
7
6
B
4
G
1
8
3
G
D
B
G
3
7
8
7
2
6
G
x2
D
5x5
B
x4
G
3x3
B1
x6
B3
x6
I
M8
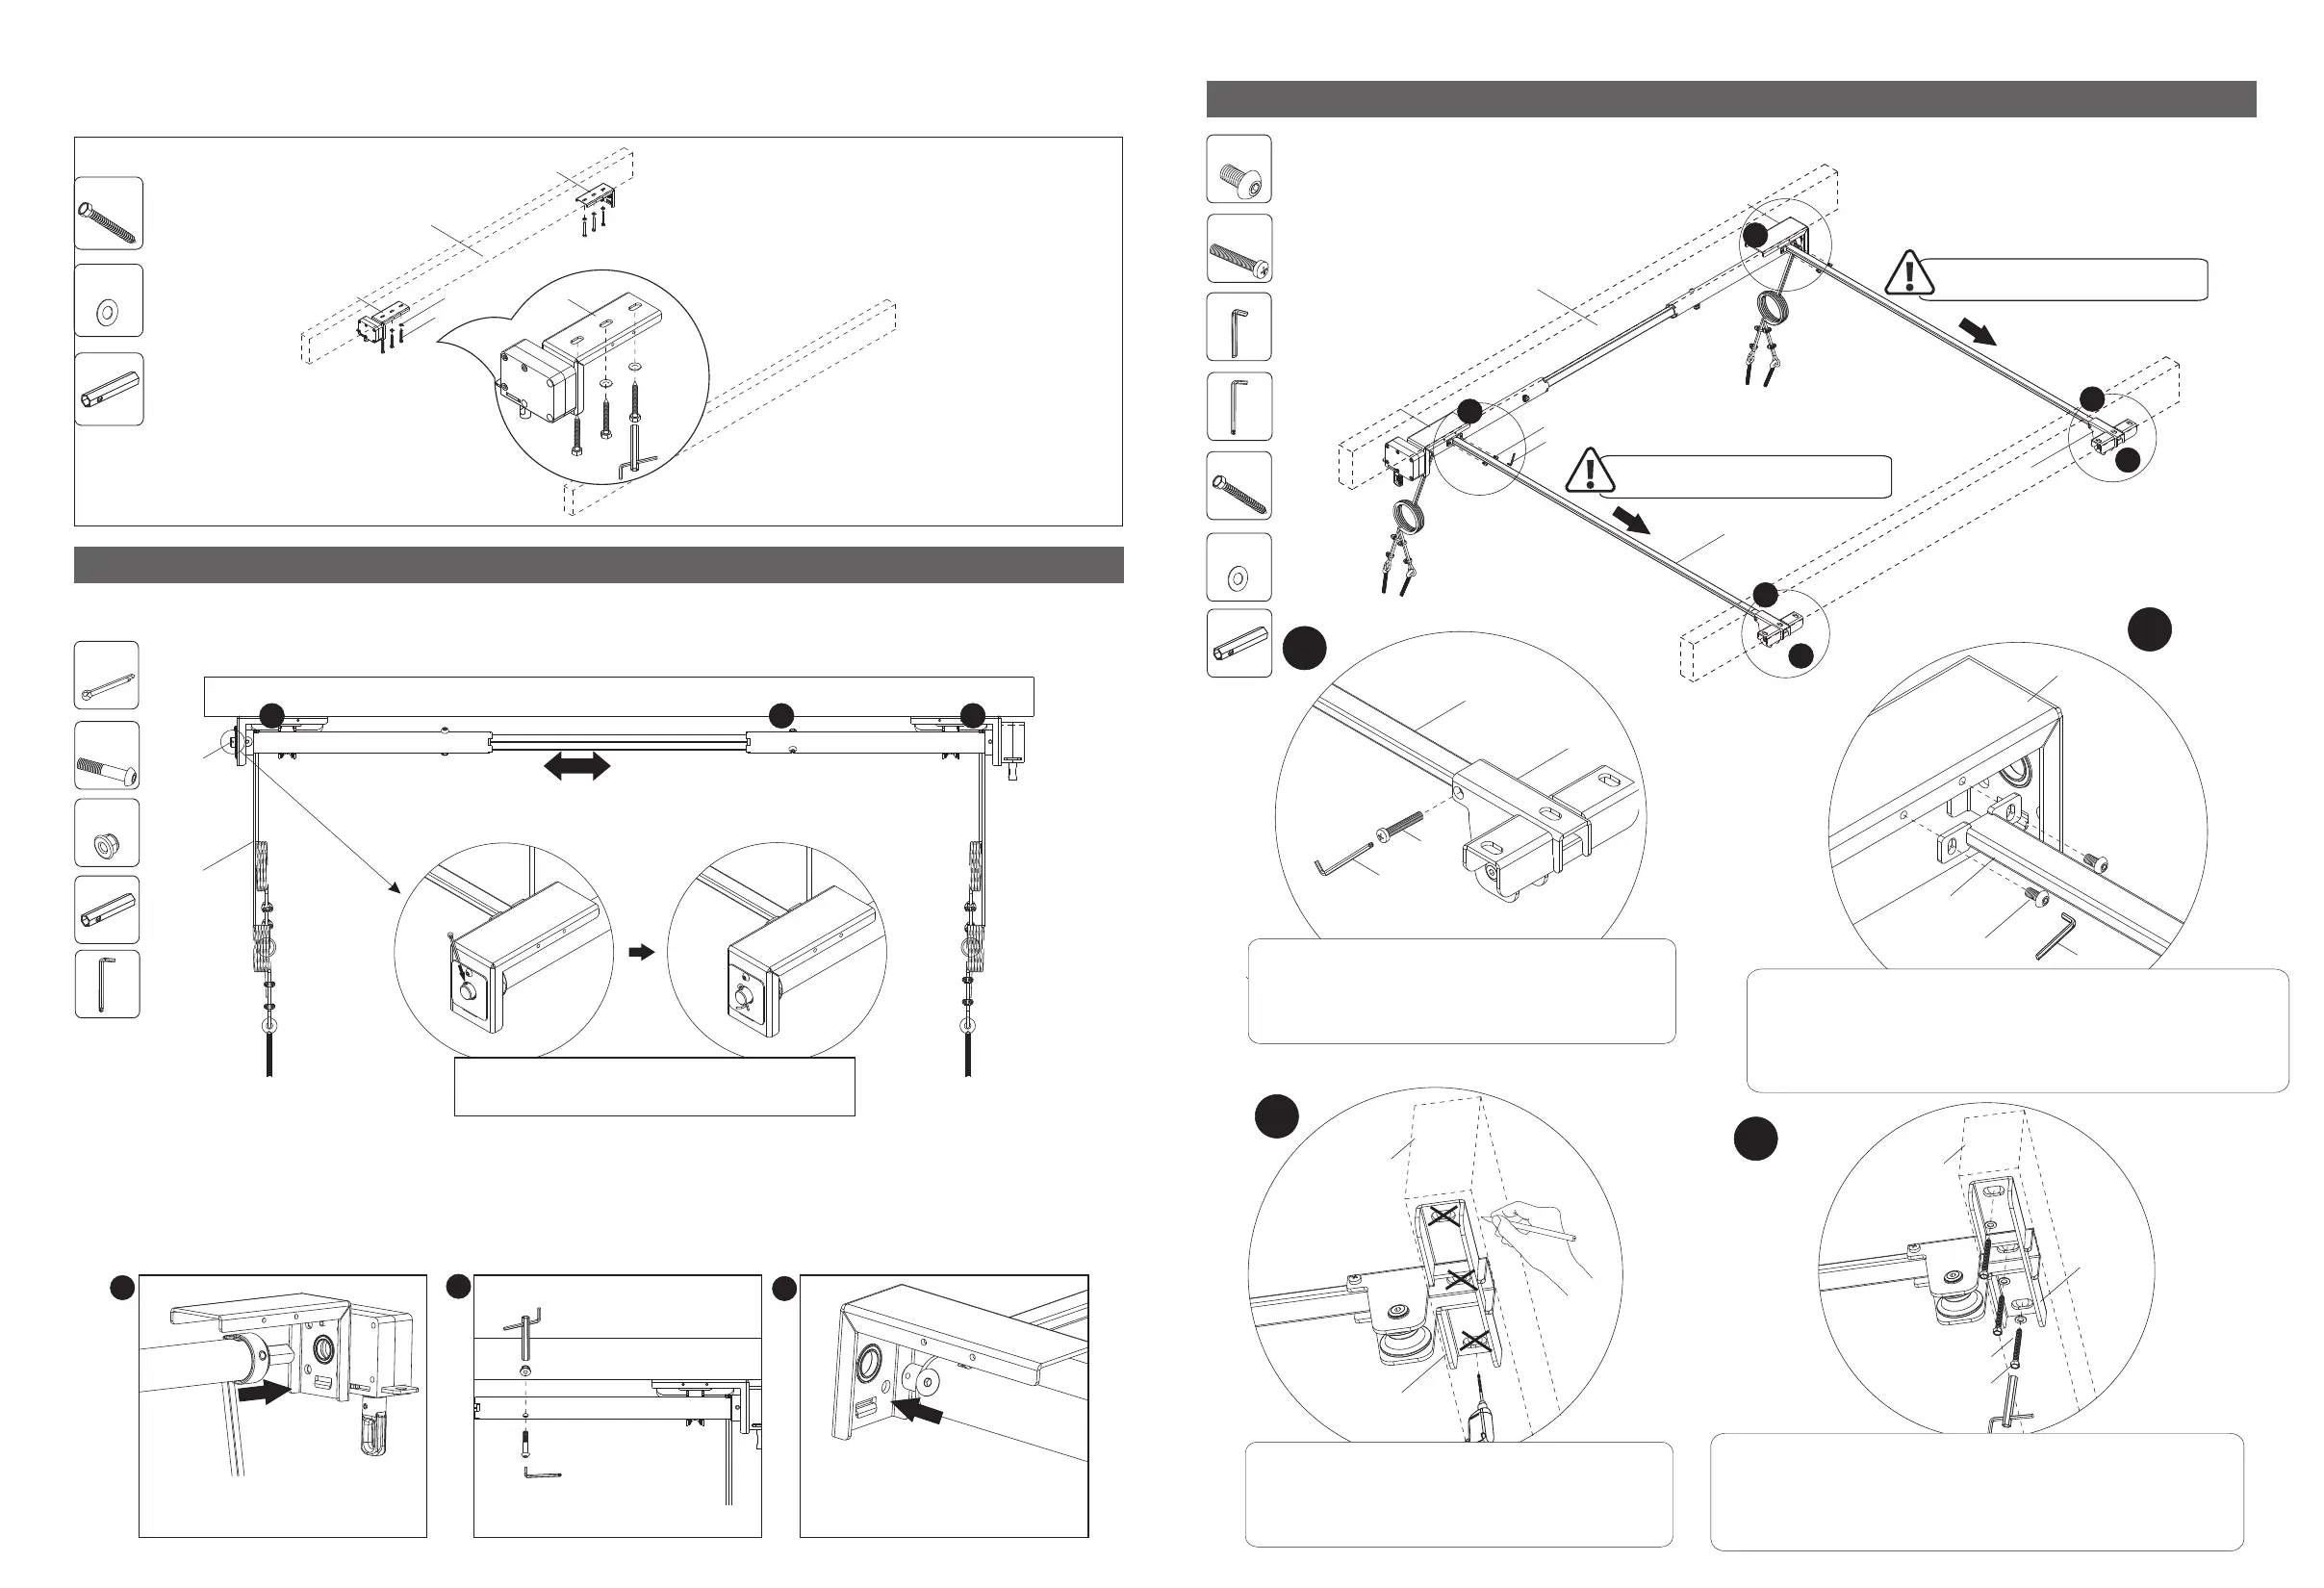
3. Install the axle supports (4) and (6) using tapping screws (B1) and flat washers (B3).
Tighten with socket wrench (I).
05 06
B1
x6
B3
x6
I
M8
B1
B3
4
6
B1
B3
4
I
F
x2
F
I
M8
x2
x2
G
5x5
x1
C
1
2
5
Stretch
6
3
Step 4: Install Axle
Insert cotter pin (C) and bend one end
of it to prevent the axle from falling off.
Insert one side of the axle (5) into the gear box first and fix it with screws (F) and nuts (F). Tighten
with socket wrench (I); Stretch the axle to the other side and insert into the axle support (6). Then
fix the other side with screw (F) and nut (F), and tighten it with M8 socket wrench (I).
1
2
3
Insert the gearbox side first.
Pay attention to the direction
when inserting.
F
F
I
G
Tighten
Insert on the other side
Step 5: Install Connecting Rods and Fixed Plates
The direction of the connecting
rod is installed as shown.
The direction of the connecting
rod is installed as shown.
1. Connect the connecting rod (7) to
the fixed plate (8) with screws (D), and
tighten it with a 5x5 wrench (G).
2. Connect the other end of the connecting rod (7)
to the axle support (6), and then tighten it with a
3x3 wrench (G); Repeat for the other connecting
rod assembly.
3. Mark the holes on the fixed plate (8)
on the ceiling joist with a pencil, and
drill holes.
Wooden Ceiling Joists
2
2
1
1
4
8
B1
B3
I
4. Install the fixed plate (8) to the wooden joist
using tapping screws (B1) and flat washers (B3).
Tighten with socket wrench (I); Repeat the above
step for installing the other fixed plate.
Wooden
Ceiling
Joists
 Loading...