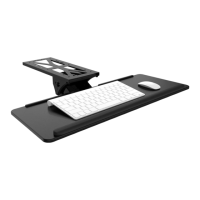
STEP 2: Install holder
05 06
1
2
Install the plastic cap to the panel opening.
3
Install and tighten screws C.
Install the holder from the panel opening.
C
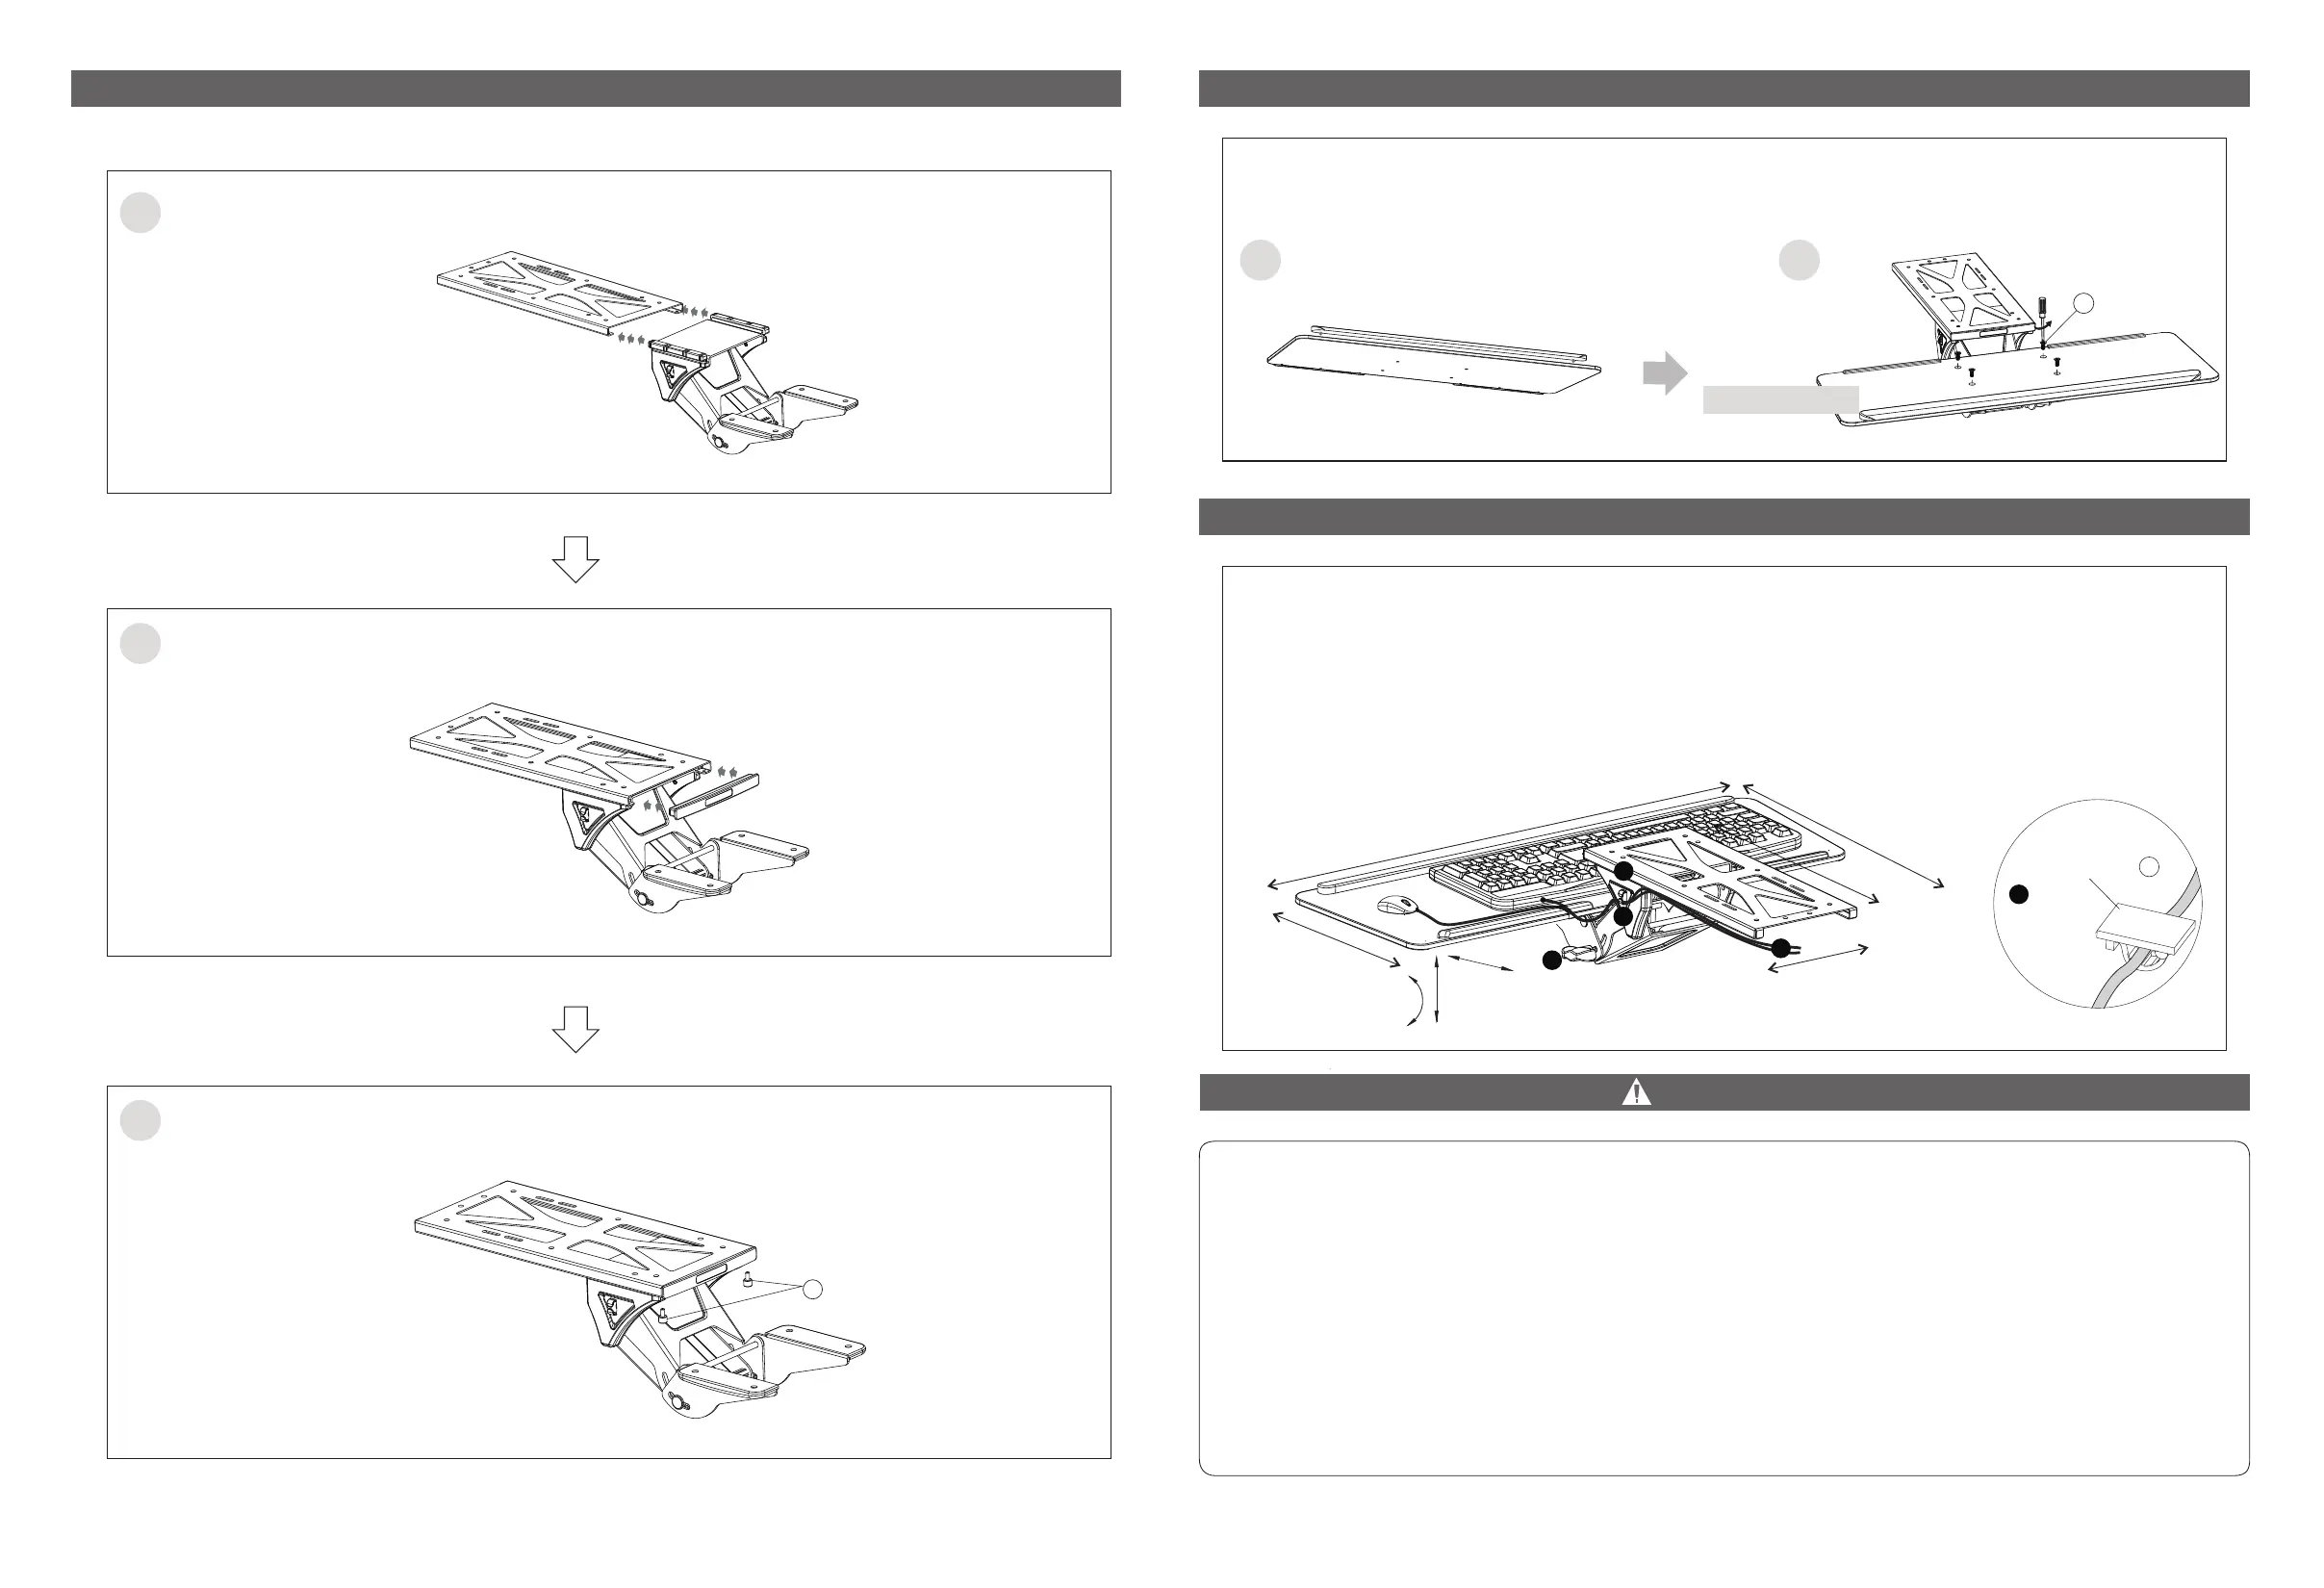
STEP 3: Install keyboard tray
STEP 4:
CAUTION
This product contains small items that could be a choking hazard if swallowed. Keep these items away from
children.
● Make Sure these instructions are read and completely understood before first use. If you are unsure of any
part of this installation, please contact a professional installer for assistance.
● Please check joint parts every two months and check the screws loosened or not.
● Do not exceed the max loading capacity (2.2 Ibs)1 kg when using, or it may cause product failure or
personal injury.
Note: This product is intended for indoor use only. Use of this product outdoors could lead to product failure
or personal injury.
1. Choose to install the long pad or not according to actual needs.
2. Install the keyboard tray and tighten with screws D.
Long Pad
D
1 2
Keyboard Tray
1. The keyboard tray is movable and can move in or out.
2. Loosen the knob to adjust the height. Tilt the tray angle to set as your preference, and then
tighten the knob.
3a. Tidy cables: Buckle mouse cable and key bus to the cable clips on the two side.
3b. Tidy cables: Fix the mouse cable and key bus to the table board with cable clip E.
3b
E
+
2
0
°
-16
°
2
1
3a
3b
Cable Clip
5
.8
7'
' (
1
49 m
m
)
2
6
.1
4
'' (
664 m
m)
9
.6
5'
' (2
45 m
m)
13
.
7
8'
' - 2
2.6
4'' (350 - 575 m
m
)
13
.
27
'' (
337 mm
)
8
.
8
9
'
' (
22
5 m
m
)
4
.5
3
'' (
1
1
5 m
m
)