431-TS00-02-QS Rev 110 June 2012
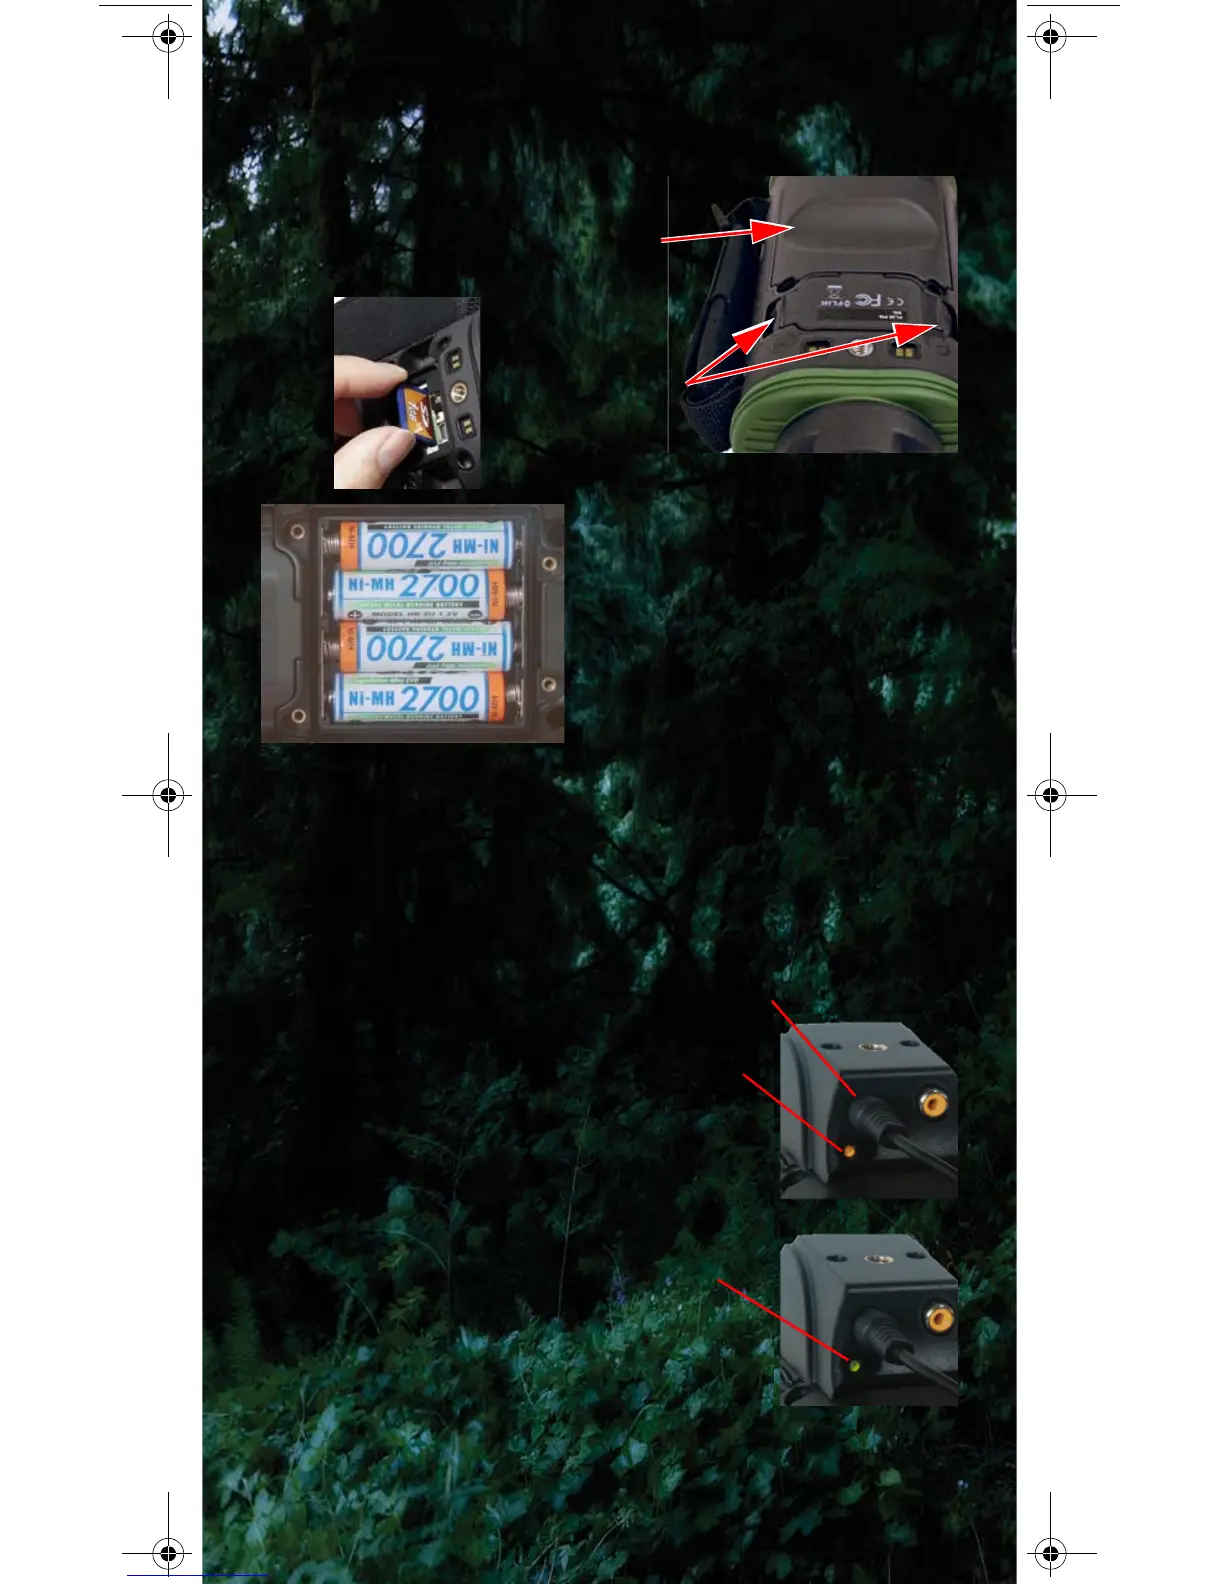
Installing the Batteries and SD Card
The batteries must be installed and charged before using your
camera. Install your SD card.
1. Remove the small SD card
cover.
No tools are required.
2. Install the SD card.
3. Loosen the four captive screws
securing the battery cover.
4. Pry off the battery cover by
grasping the front edge where the
SD card cover was removed.
5. Install the batteries as shown.
6. Snap the SD card cover back
into place and re-install the battery
cover—it only fits one way.
Charging the Camera
The batteries in the camera must be charged prior to their first
use.
1. Connect the Hot Shoe to your
camera.
2. Ensure that the plug is fully
seated in the Hot Shoe.
When charging correctly, the
charging indicator will be lit
yellow and will blink green for one
second within about 35 seconds.
The charging indicator will
continue to blink at decreasing
intervals until the batteries are
fully charged.
When fully charged, the charging
indicator will be lit solid green.
The initial charge time is
approximately 4 hours.
www.flir.com
Grasp SD card
Battery
cover
cover edges
and pull
Plug from power adapter
Charging
indicator
Solid
green
431-TS00-00-QS Scout Quick Start Guide.fm Page 2 Saturday, June 2, 2012 4:12 PM

 Loading...