A
DJUSTMENTS
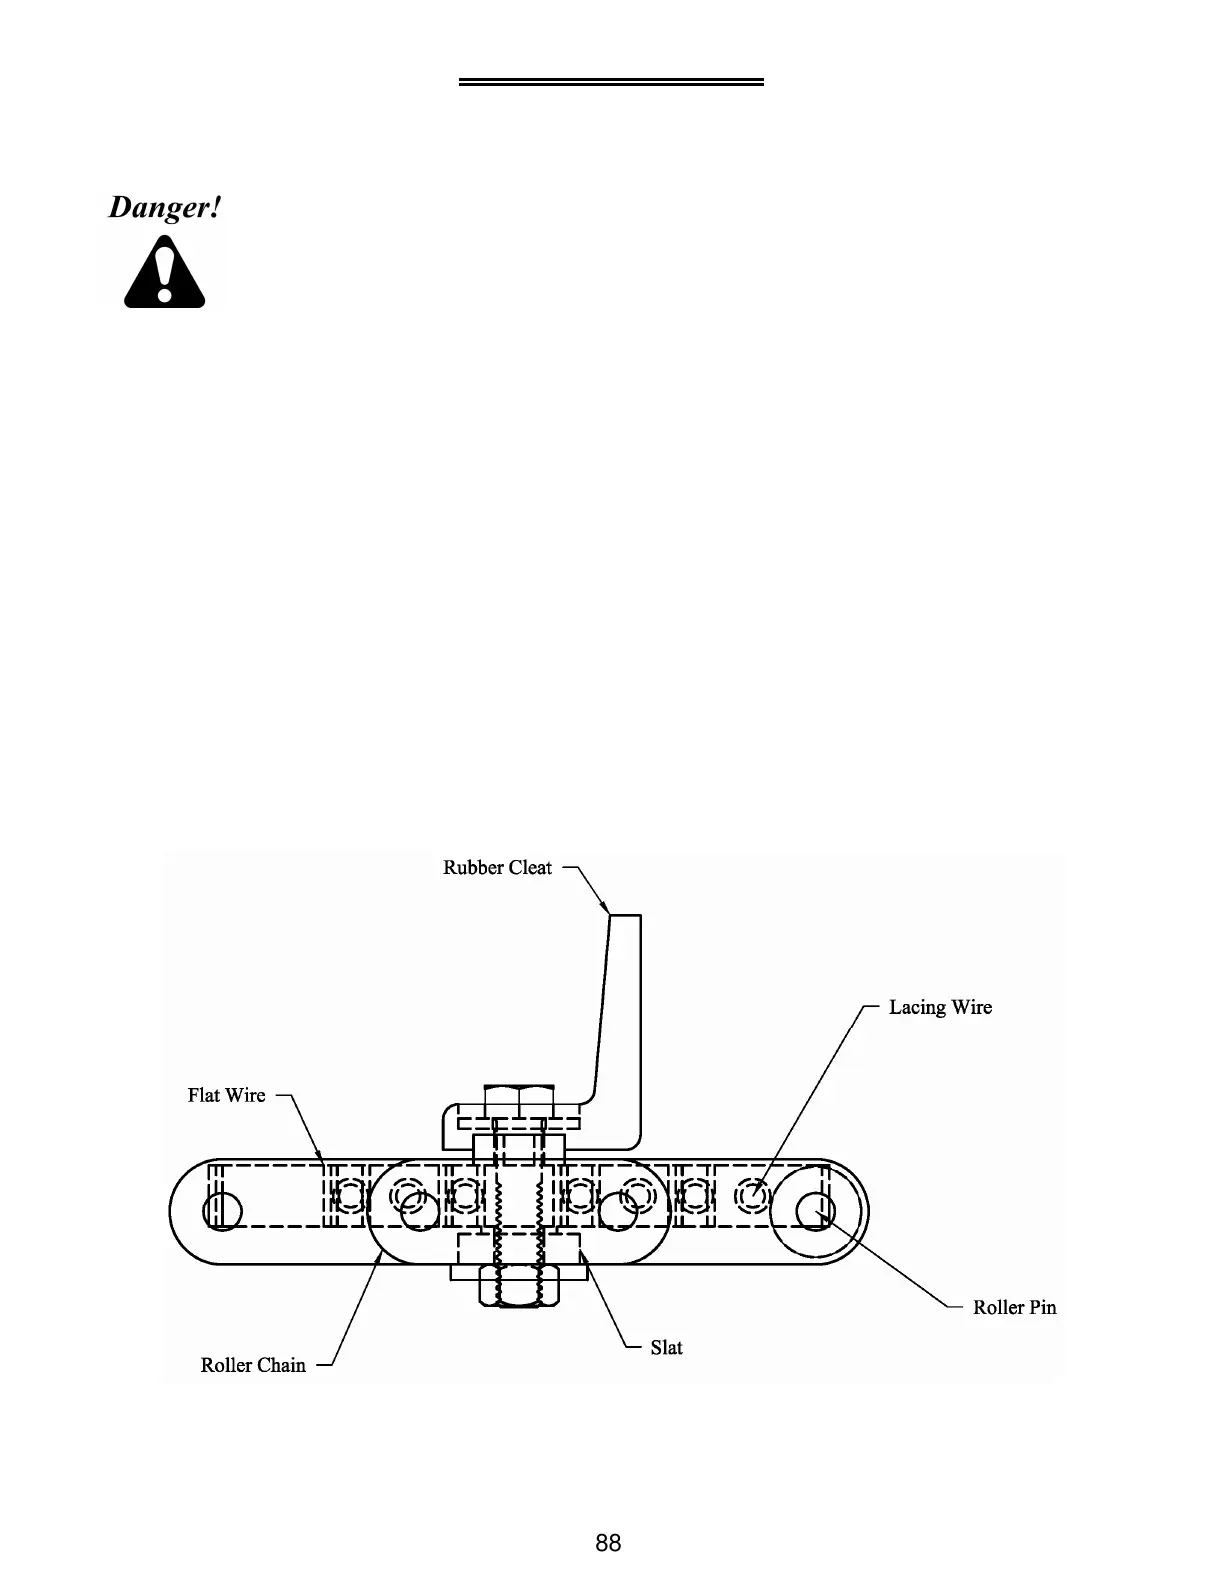
Elevator Dirt Chain
—————
Be sure machine is stable and blocked up securely before working underneath. Failure to
heed these warnings may result in severe personal injury or death
1. To adjust the elevator chain: Loosen the idler on the drive chain and tighten take-up bolts equally on both sides
of conveyor. When desired tension is achieved, lock the jam nuts on the take-up bolts and re-adjust the idler on
drive chain as needed. It may become necessary to add links to the drive chain, as the elevator chain reaches its
maximum amount of take-up.
2. As the elevator chain wears it may become necessary to remove links from the chain to maintain proper tension.
Proper tension is important in order to maintain good chain and sprocket life. Do not over tighten! Shorten the
chain using the following procedure:
A. Loosen take-up bolts to minimum position on each side of conveyor and remove drive chain.
B. Remove the cover plates on inspection holes on elevator sides. Locate the connector links on the
roller chain and manually turn it so the connector links appear in the holes. Remove cotter pins
from the connector links and disconnect before cutting the lacing wire in the woven wire chain.
“Tie off” the bottom of elevator chain to prevent it from sliding down the elevator. Now, cut the
lacing wire and separate the ends.
C. In order to maintain the proper sequence of links on the roller chain, it is necessary to remove two
links from it. One of the two must have a “slat” (cross bar) welded to it. Remove elevator cleat from
the “slat.” Grind off the heads of the roller chain pins and use a punch to remove. (See illustration
below)