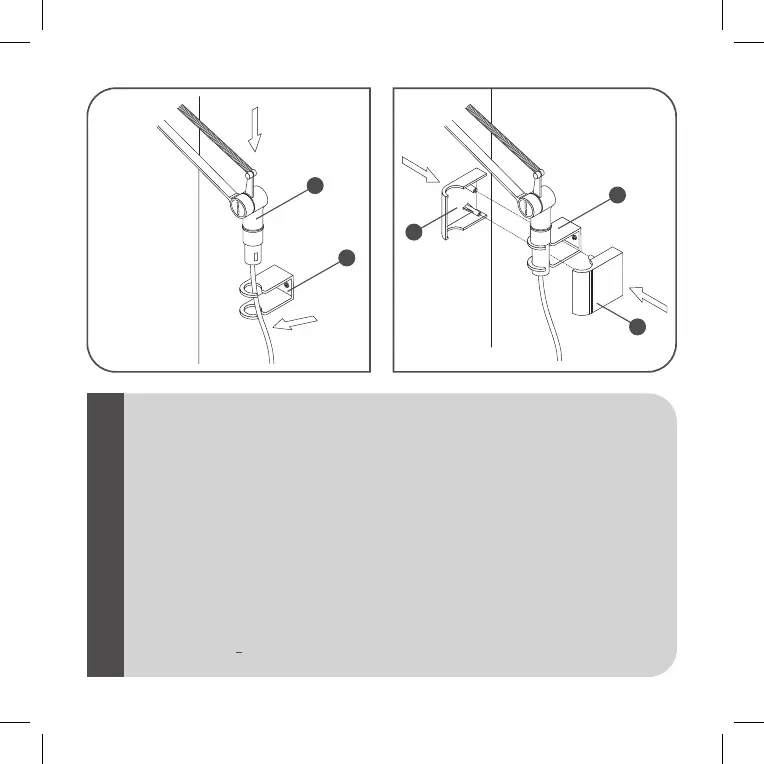
Fig.3 Fig.4
<IT>
<GB>
<DE>
<FR>
<ES>
<PT>
Fig.3ATTACCOPARETE- Inserire il corpo (C) nell’attacco a muro (B). Fig.4 ATTACCOPARETE-Agganciare le
coperture (D) sull’attacco a muro (B) come indicato in figura.
Fig.3WALLBRACKET- Insert the body (C) in the wall bracket (B). Fig.4 WALLBRACKET- Hook the covers (D)
onto the wall bracket (B) as indicated in the figure.
Abb.3WANDBEFESTIGUNG- Den Korper (C) in die Wandbefestigung (B) einsetzen. Abb.4 WANDBEFESTIGUNG-
Die Abdeckungen (D) wie in der Abbildung gezeigt in die Wandbefestigung (B) einhngen.
Fig.3RACCORDMURAL- Insérer le corps (C) dans le raccord mural (B). Fig.4 RACCORDMURAL- Monter les
éléments de couverture (D) sur le raccord mural (B) comme indiqué sur la figure.
Imag.3ENGANCHEPARED- Introducir el cuerpo (C) en el enganche de pared (B). Imag.4 ENGANCHEPARED-
Sujetar las tapas (D) en el enganche de pared (B) de la manera indicado en la figura.
Fig.3LIGAÇAOAPAREDE- Colocar o corpo (C) no suporte da parede (B). Fig.4 LIGAÇAOAPAREDE- Colocar as
coberturas (D) na ligaçao a parede (B) como indicado na figura.
C
B
B
D
D