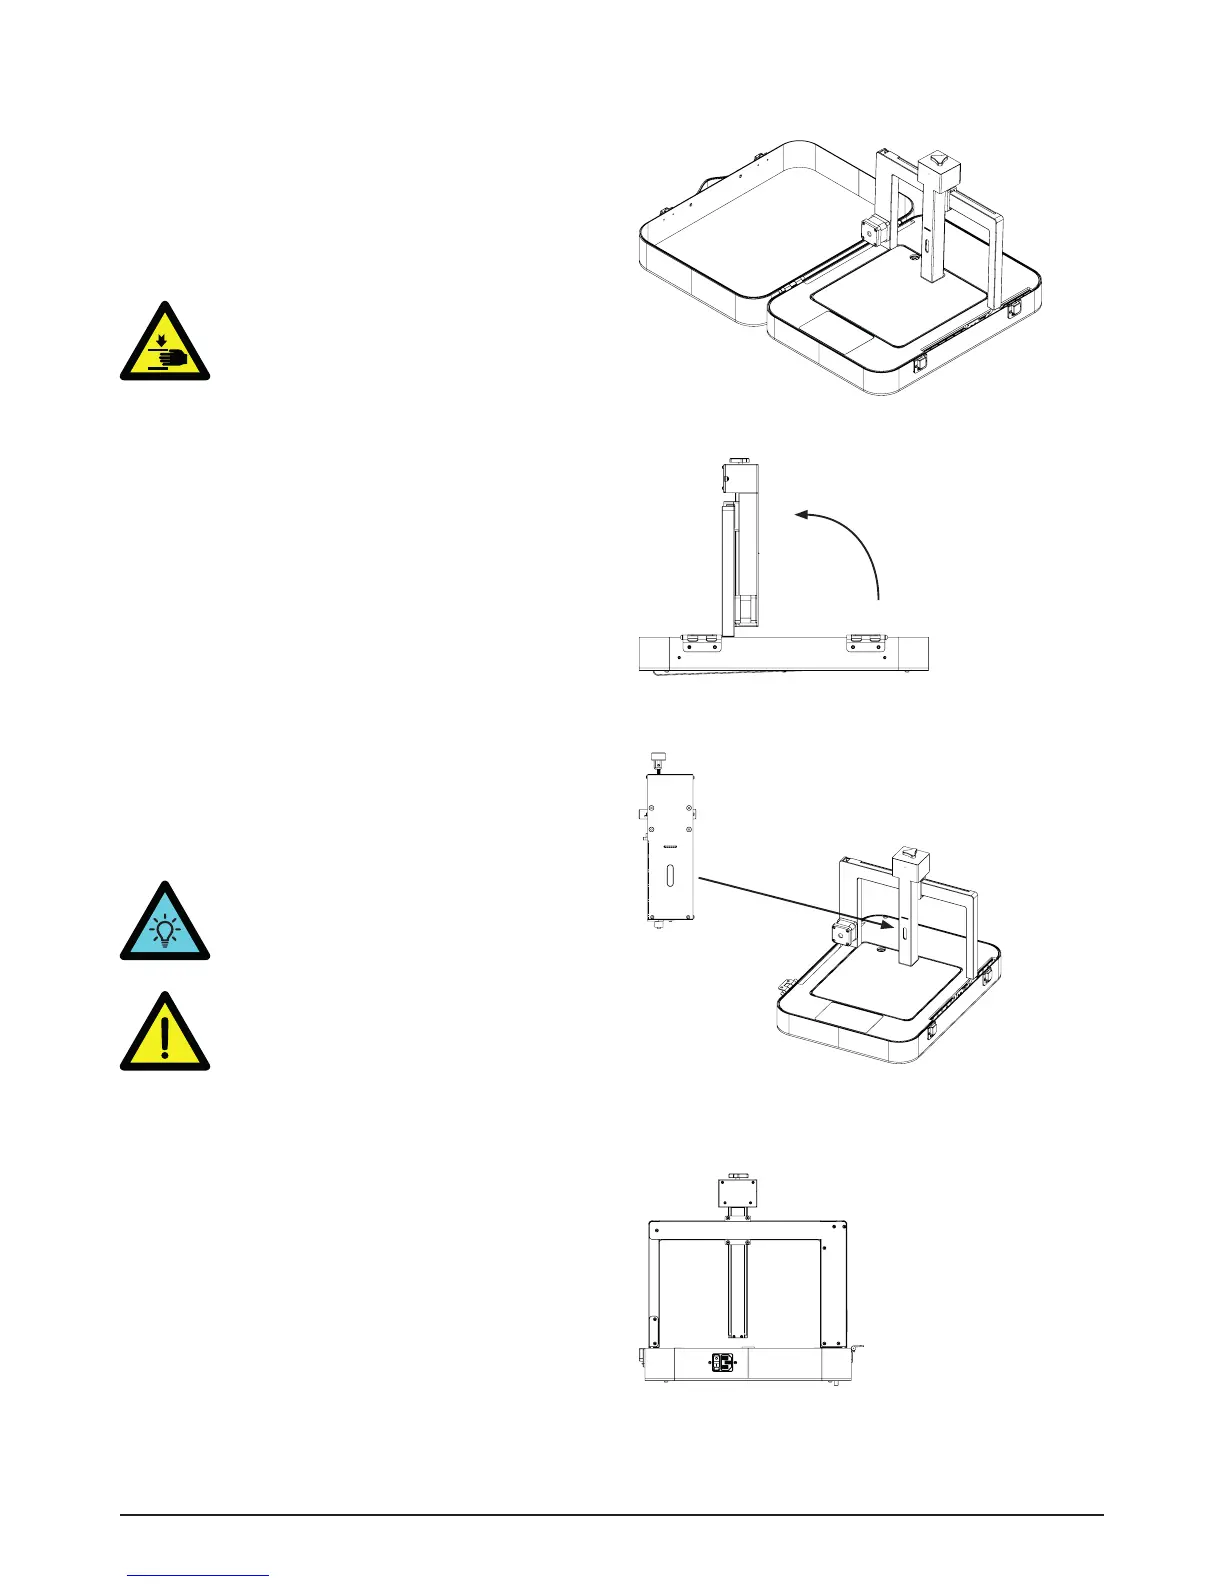
2
• Open the lid [2] and remove it from the
case hinges [10][picture 1].
• Lift the grey frame [3] to the angle of 90° until
you hear the clicking of the frame hinges[12]
[picture 2].
WARNING! Don’t put your fingers
between the frame and the hinge.
• Connect the printhead to the vertical Z axis [7]
of the frame. The magnet in the backplate of
the printhead will align and stabilize the print-
head to the frame.
• Connect the power cable to the power input
port at the backside of the printer, as well as
to an electrical outlet. Turn on the printer by
switching on the power-button [11].
• The LED on the printhead will turn on and
the display will show which pastehead is
connected.
Prepare1
TIP. If the vertical Z axis is too low to
place the printhead, twist the white
knob [13] on top of the axis to adjust its
position.
Picture 2 - Printer in open state.
Picture 3 - Frame to 90°
Picture 4 - Connect printhead to printer
Picture 5 - Backside of printer
90°.
WARNING! Don’t connect or remove the
printhead when the power is on. Always
turn off the printer first.
 Loading...